Demersus Devlog #17 - IRL Asset Pipeline, Cutscene Revolver, More Assets News, Final Milestones and more
Going over the entire IRL pipeline in great detail, how we created the revolver for the first cutscene, asset list plus other asset news and final milestones.
- reading time
- 23 minutes
- published
- last updated
- authors
- Eryk Darnowski
- series
- Demersus Devlogs
- categories
- Game Development
- tags
- #Ztgk #Unity
Making of the Revolver
This assets is probably the one we have spent the most time on as it’s one of the ‘core’ ones for the game. We’ve been working on it so obsessively in fact, we keep getting reminded of it, every time we see a hand gun remotely similar to it.
It was quite an adventure but we’re really proud of the work we’ve done to bring it to life and, here is how all of that happened.
Getting a Reference
The first thing we started with was getting a reference. Luckily my dad owns a (fake) bang gun so I borrowed it and started out with taking some pictures as a material lookup:
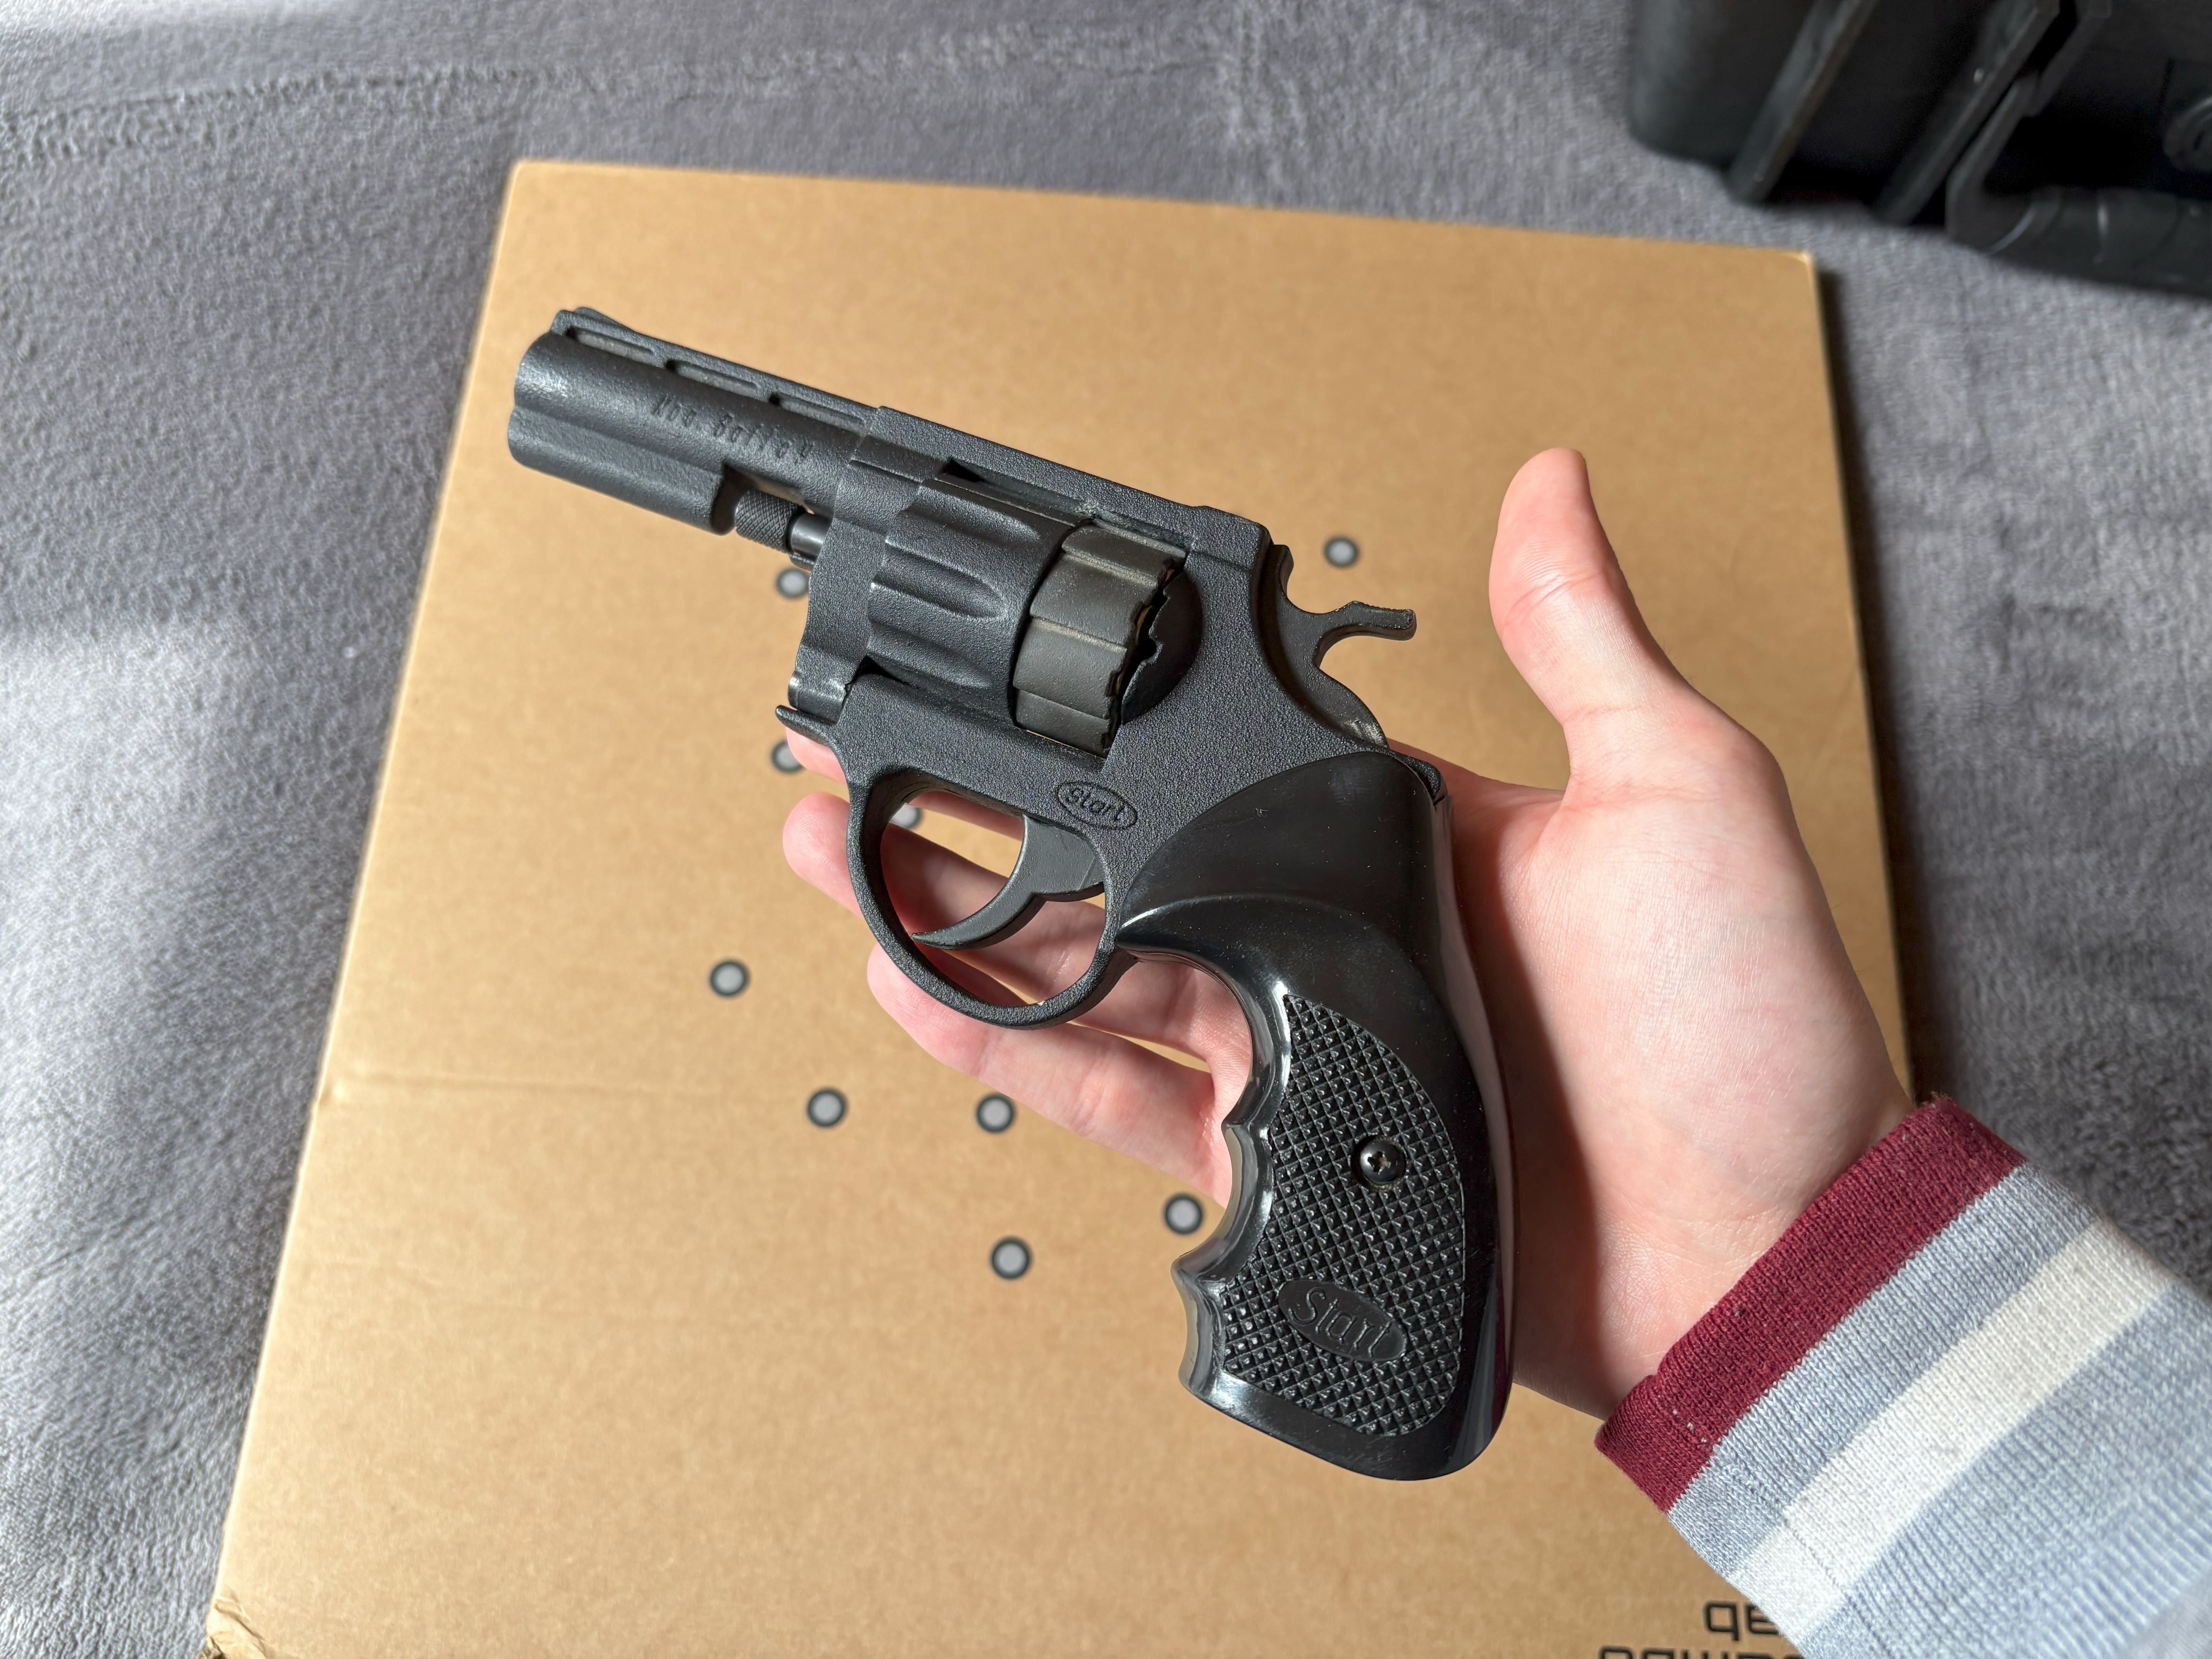
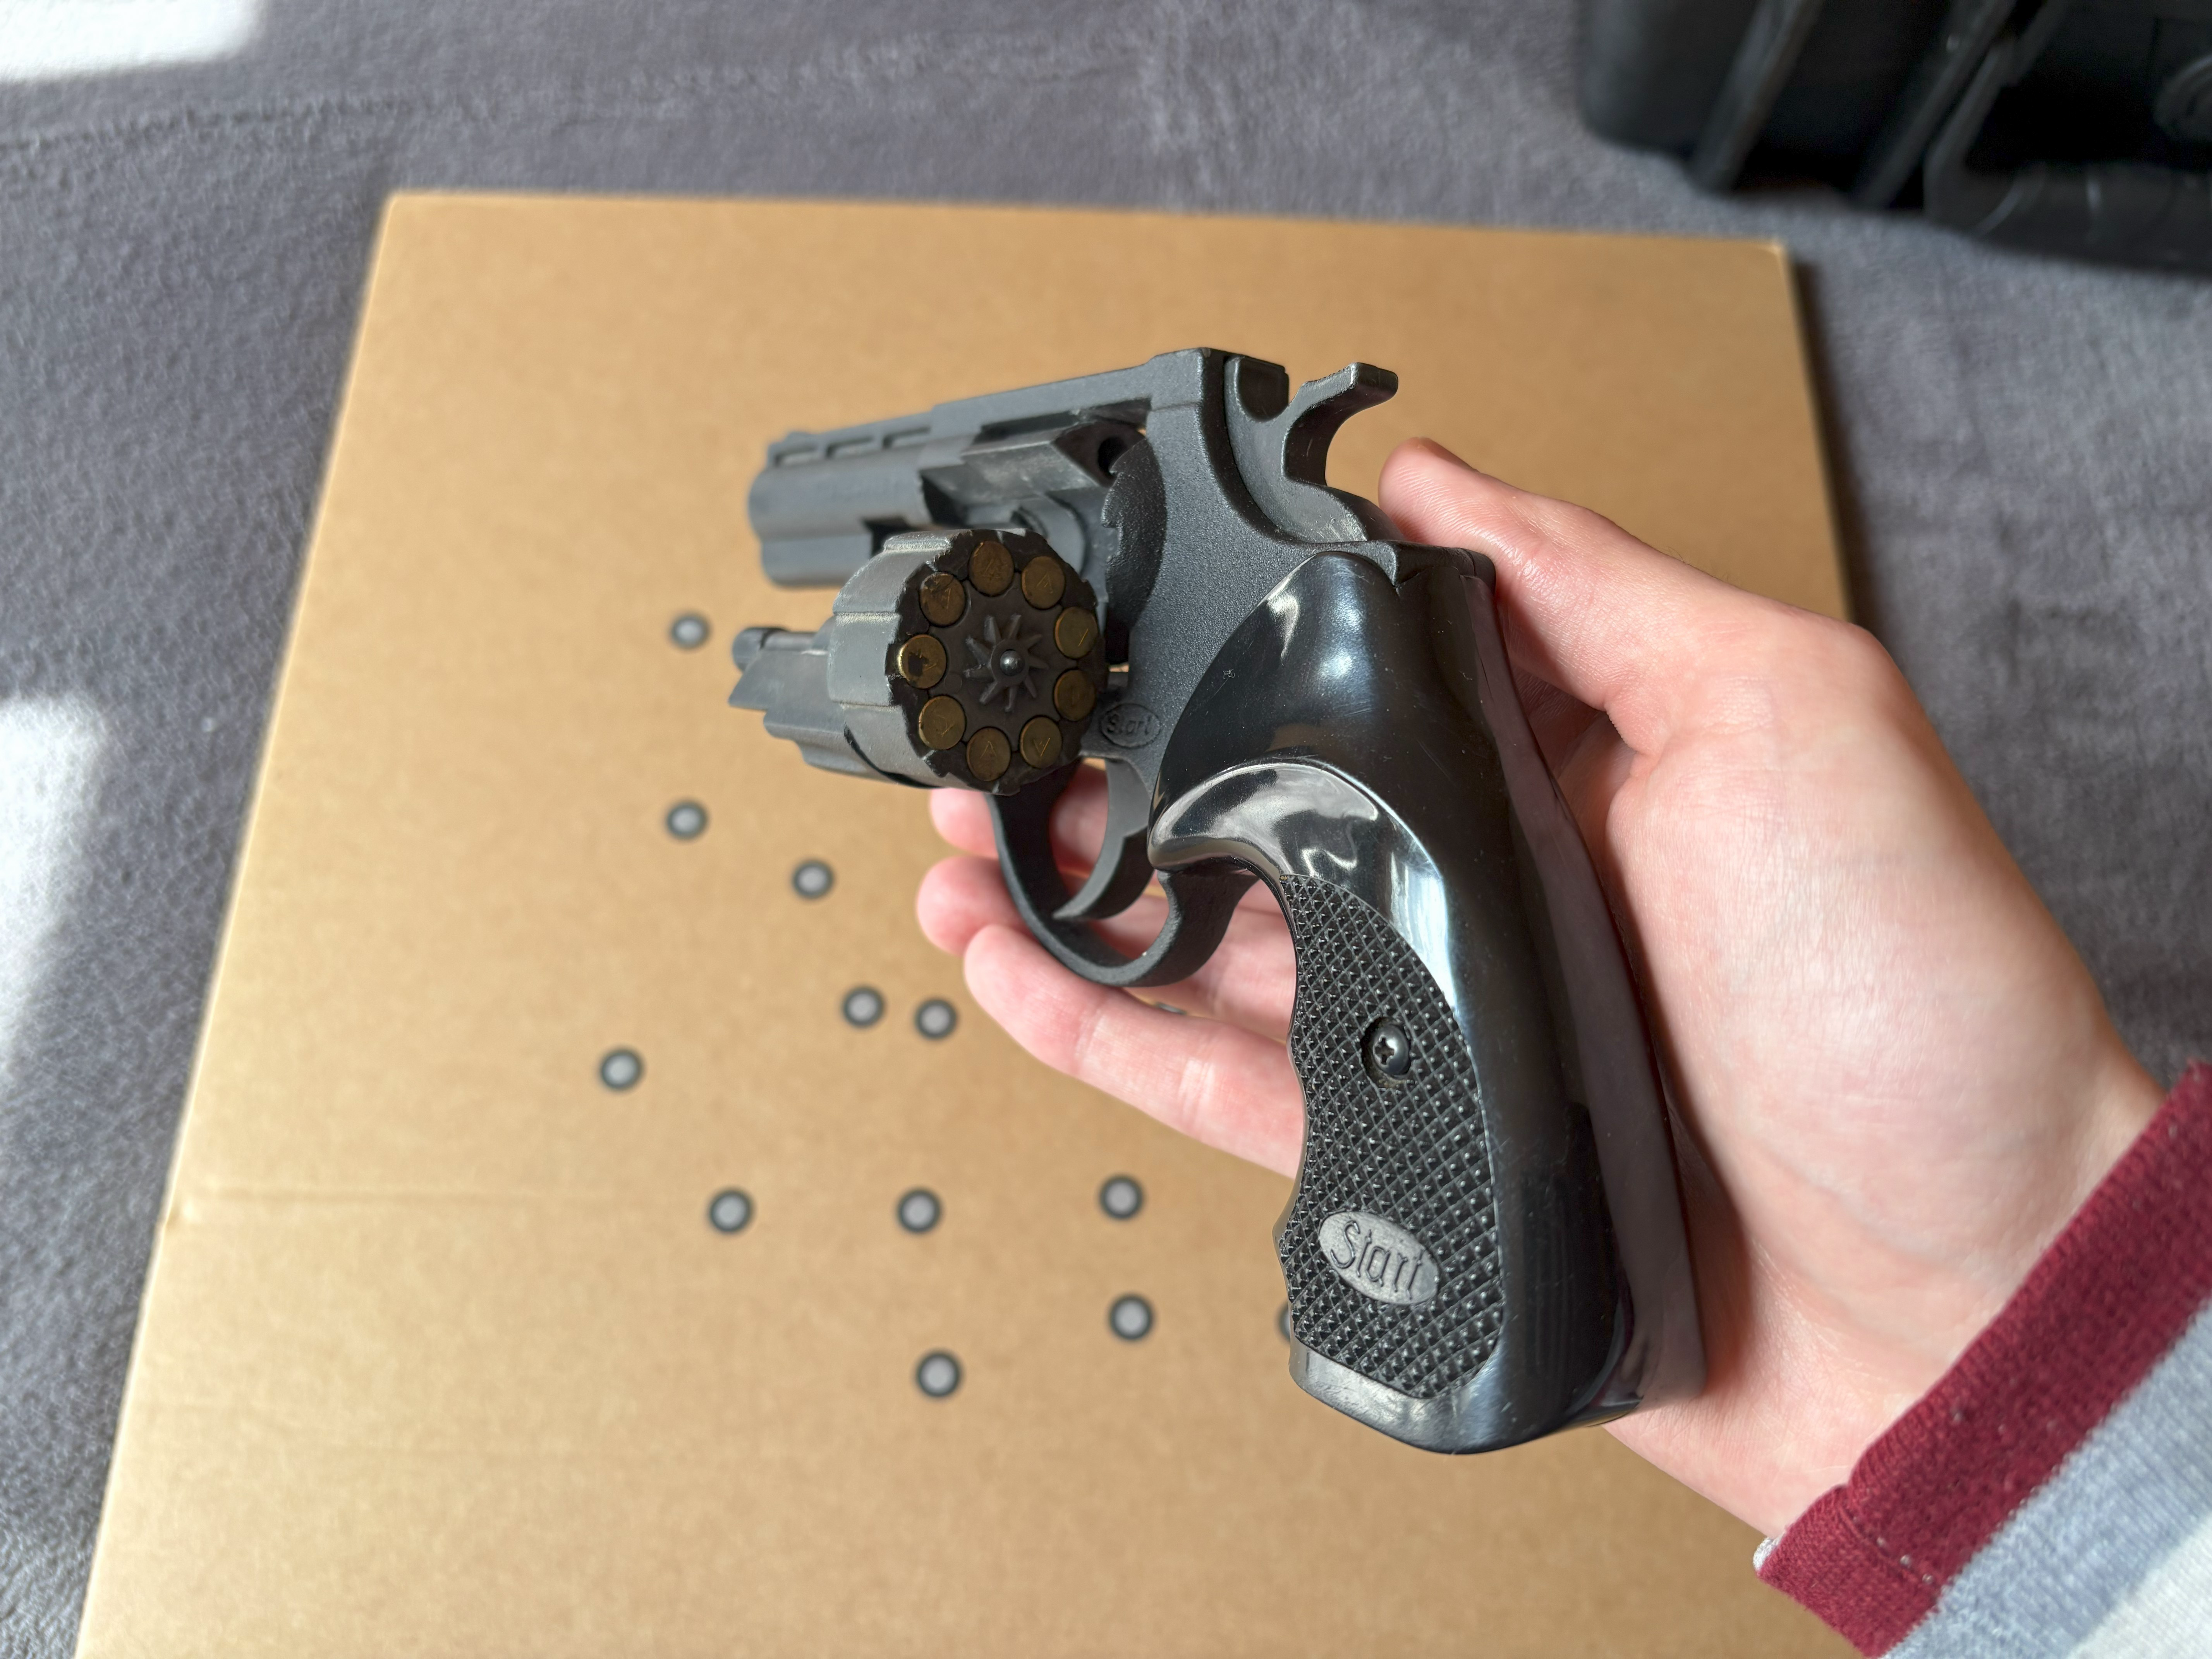
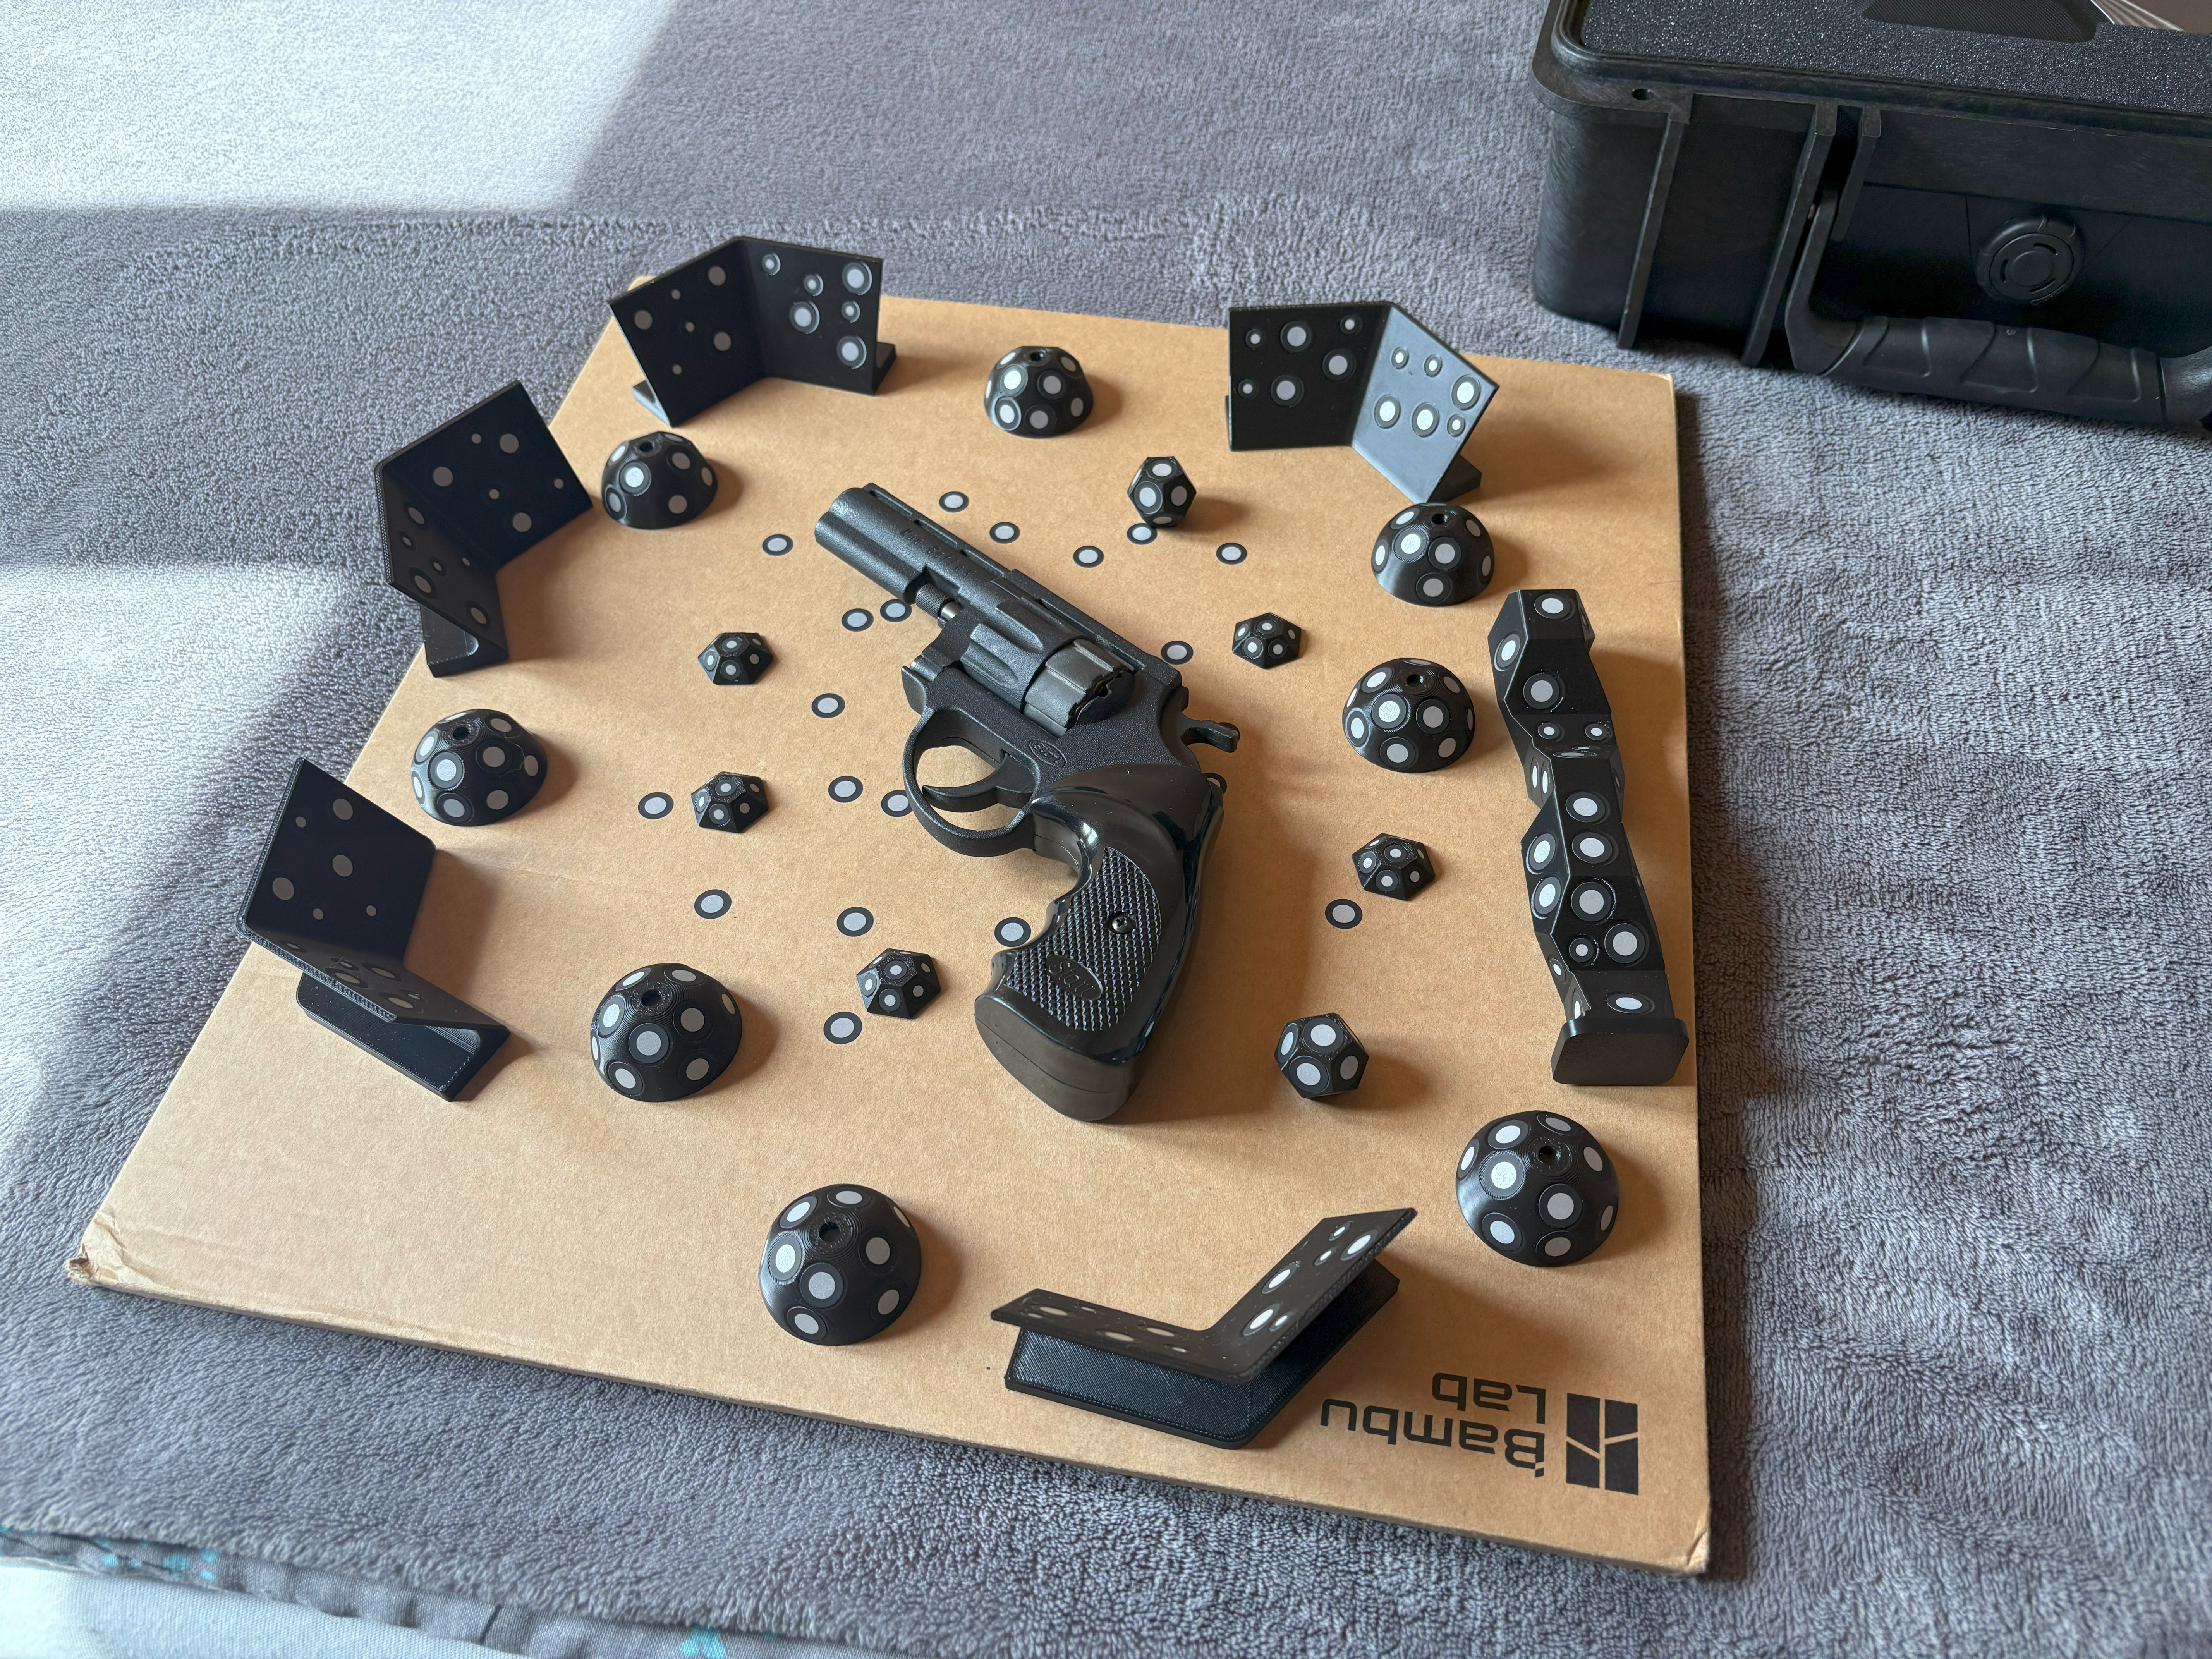
After that came the 3D scanning, so I took out my Creality CR-Scan Raptor and setup the markers:
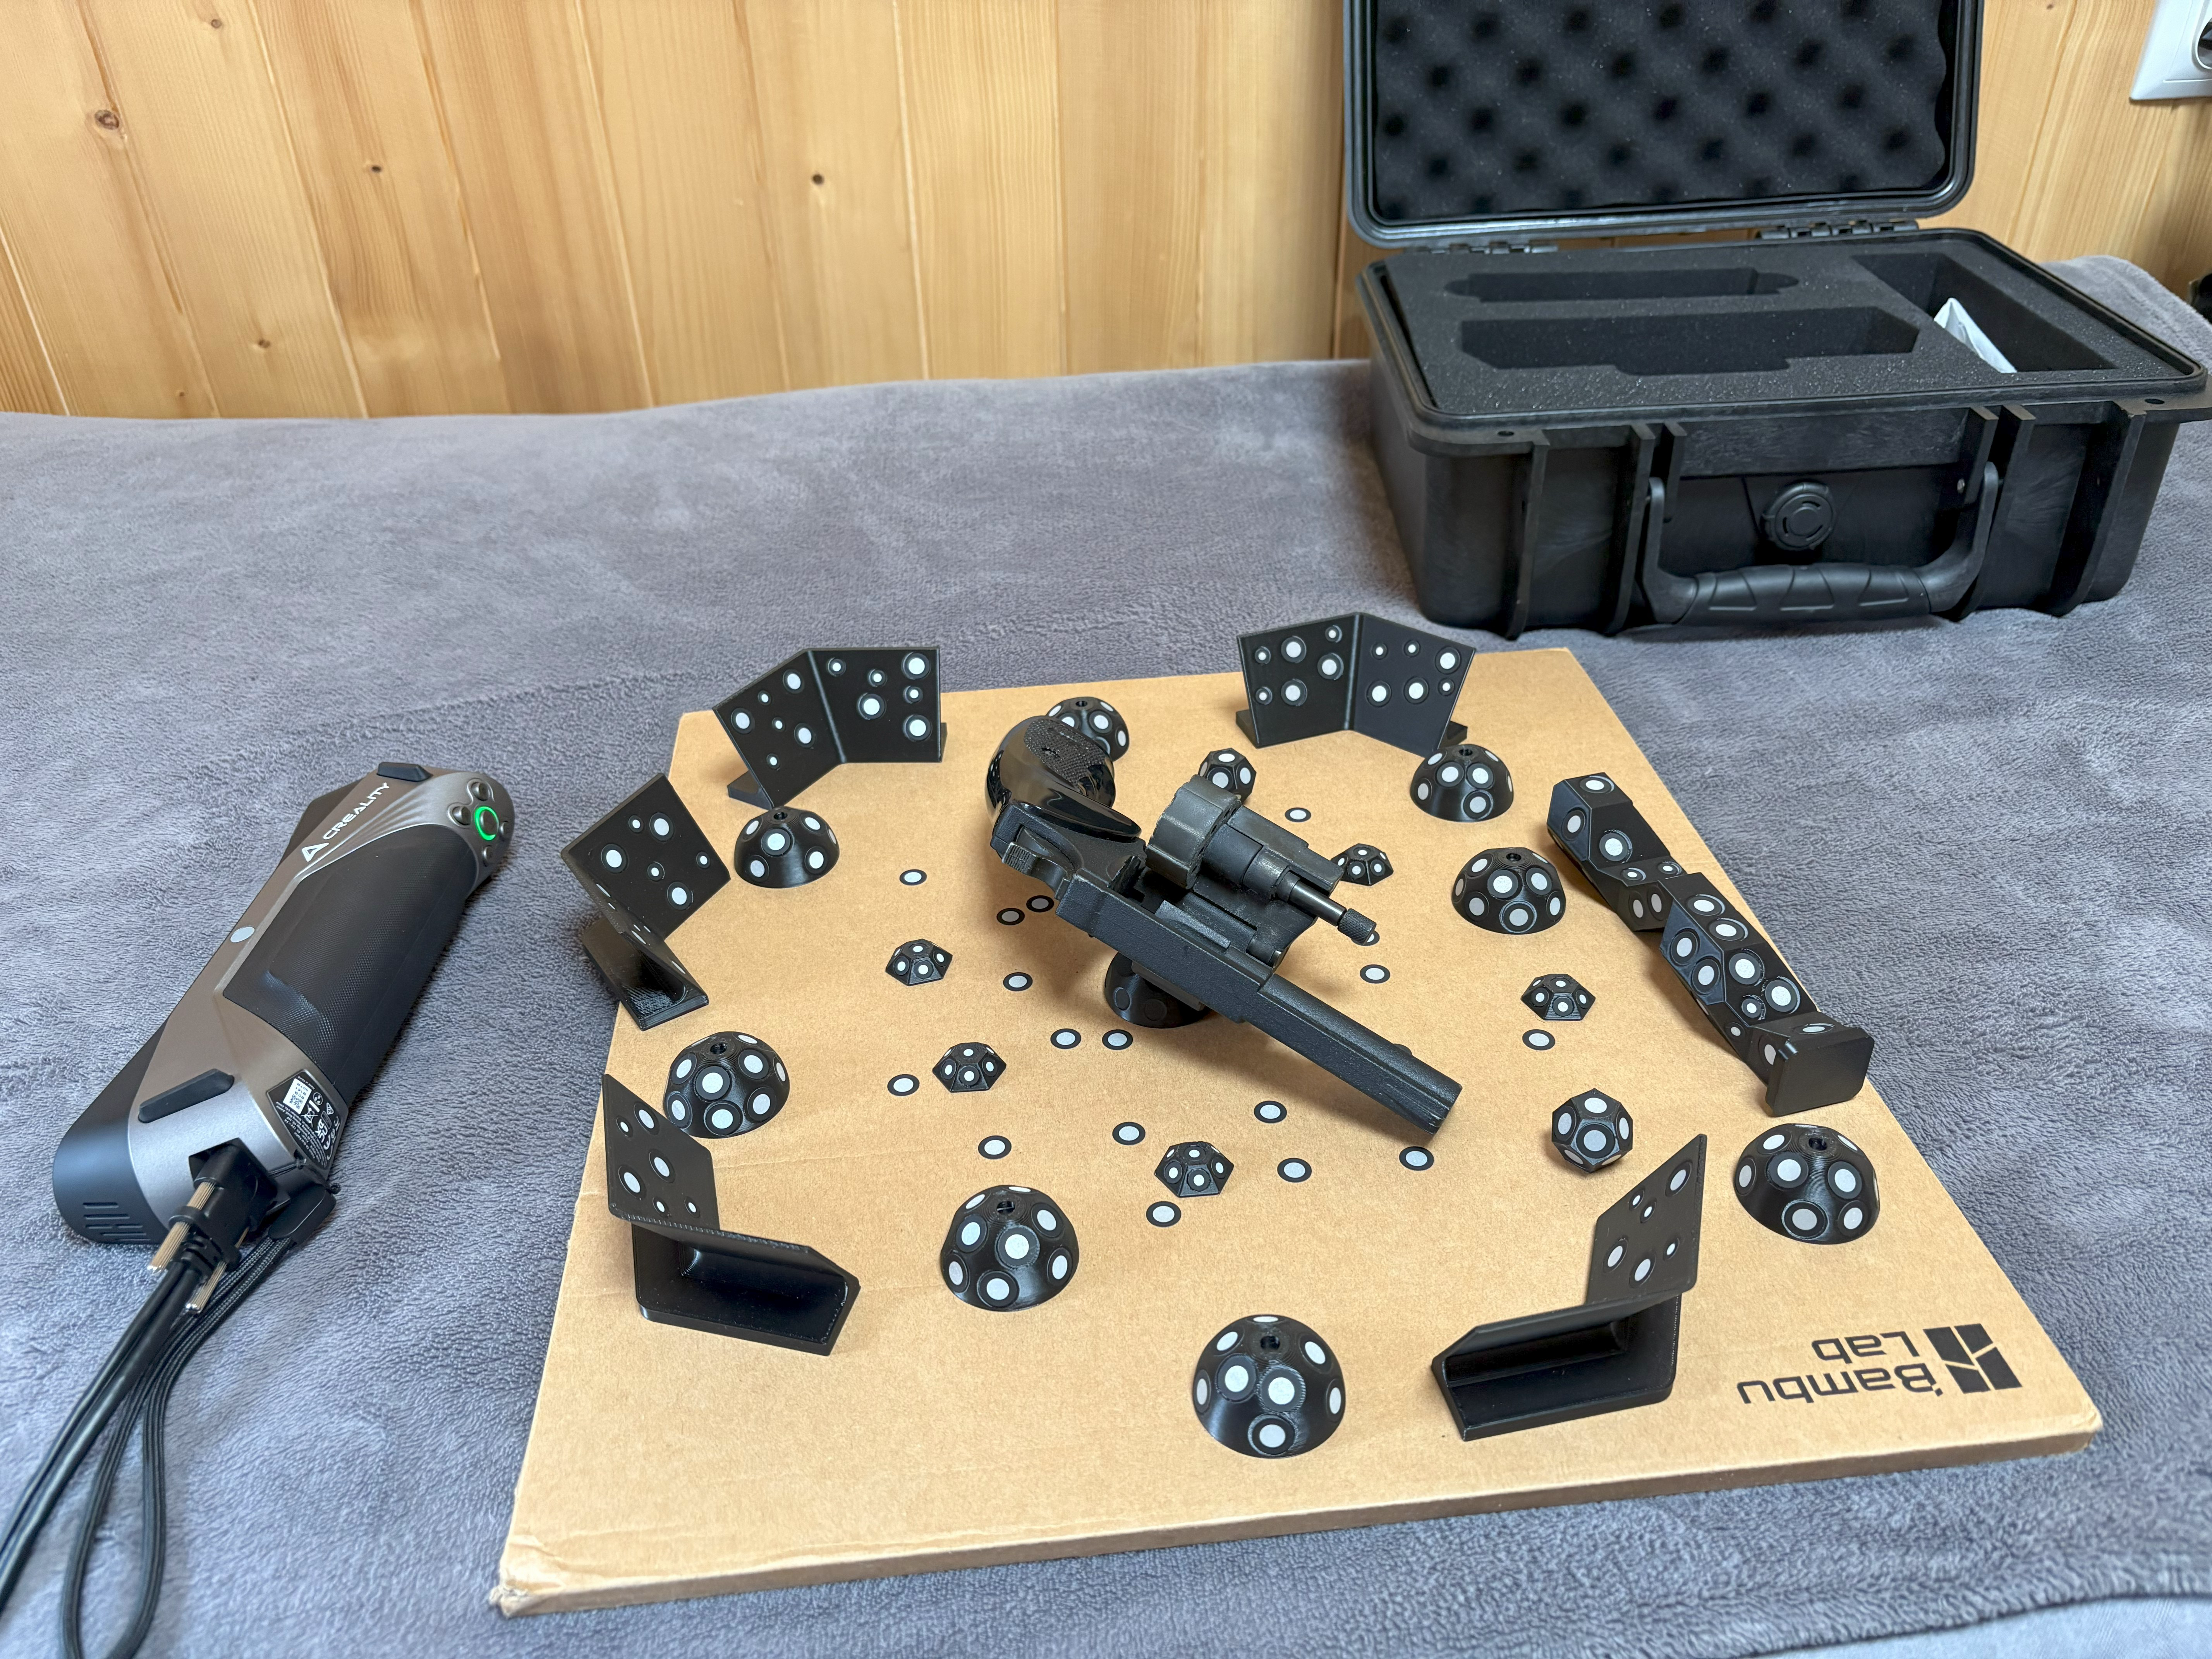
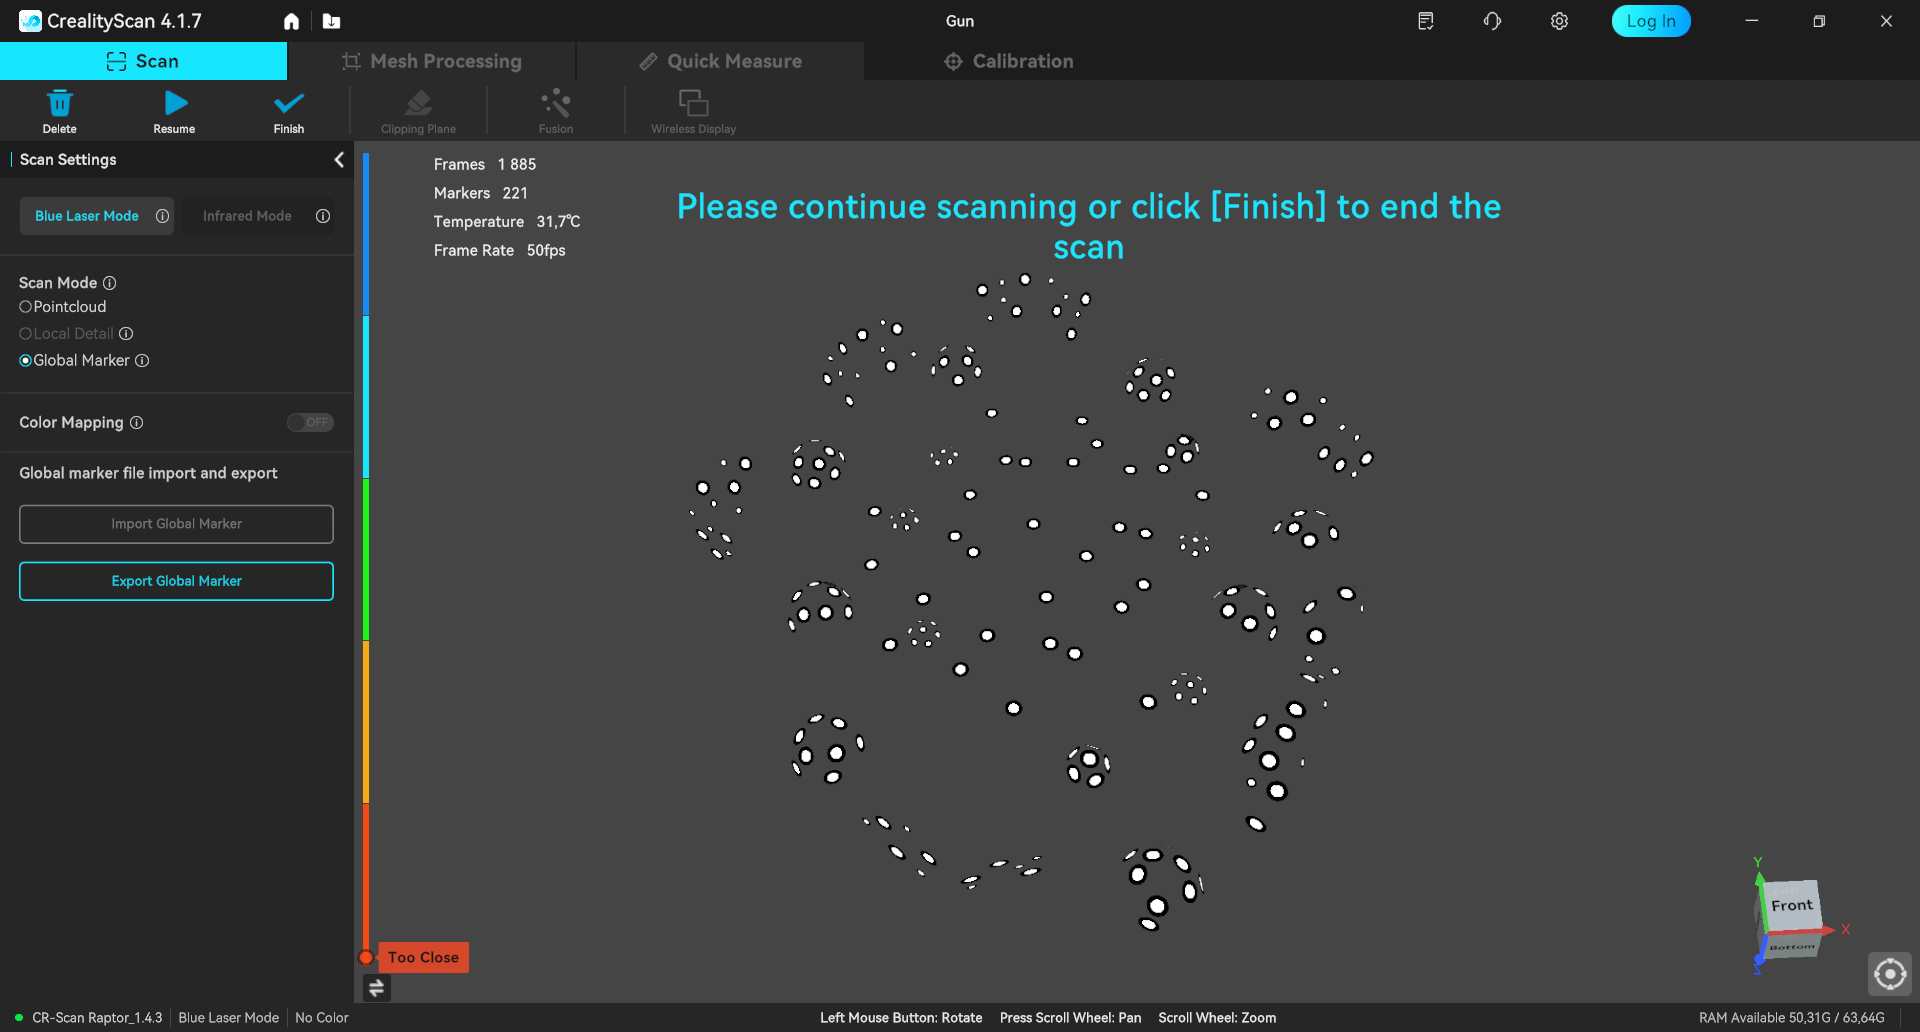
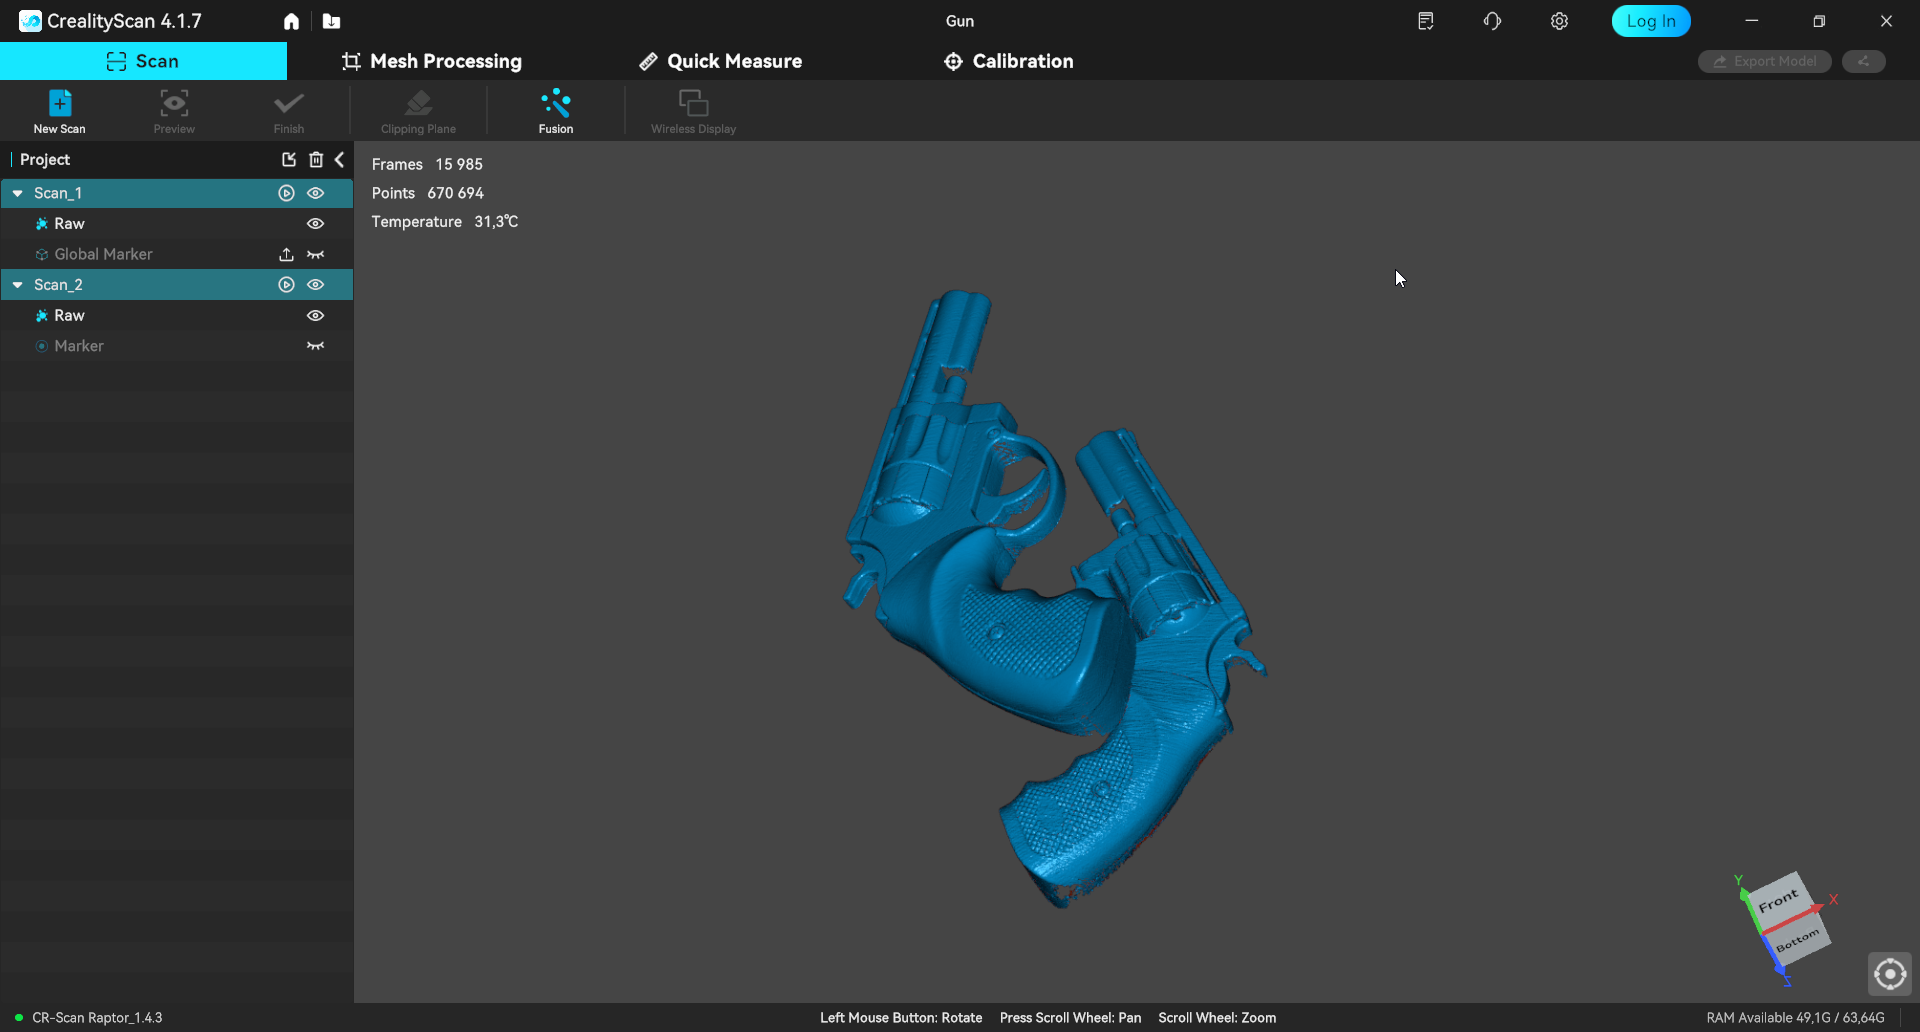
Next, came the initial 3D scans of both the closed and open revolver. I started out by getting a scan of the markers and then moved on to doing about 3 scans (with an additional one for more details inside of the gun) per each of the 2 cases. After that I did the post processing pipeline in Creality Scan (removing unnecessary data, mesh smoothing, scan alignment, simplifying, hole filling, etc.):
Closed:
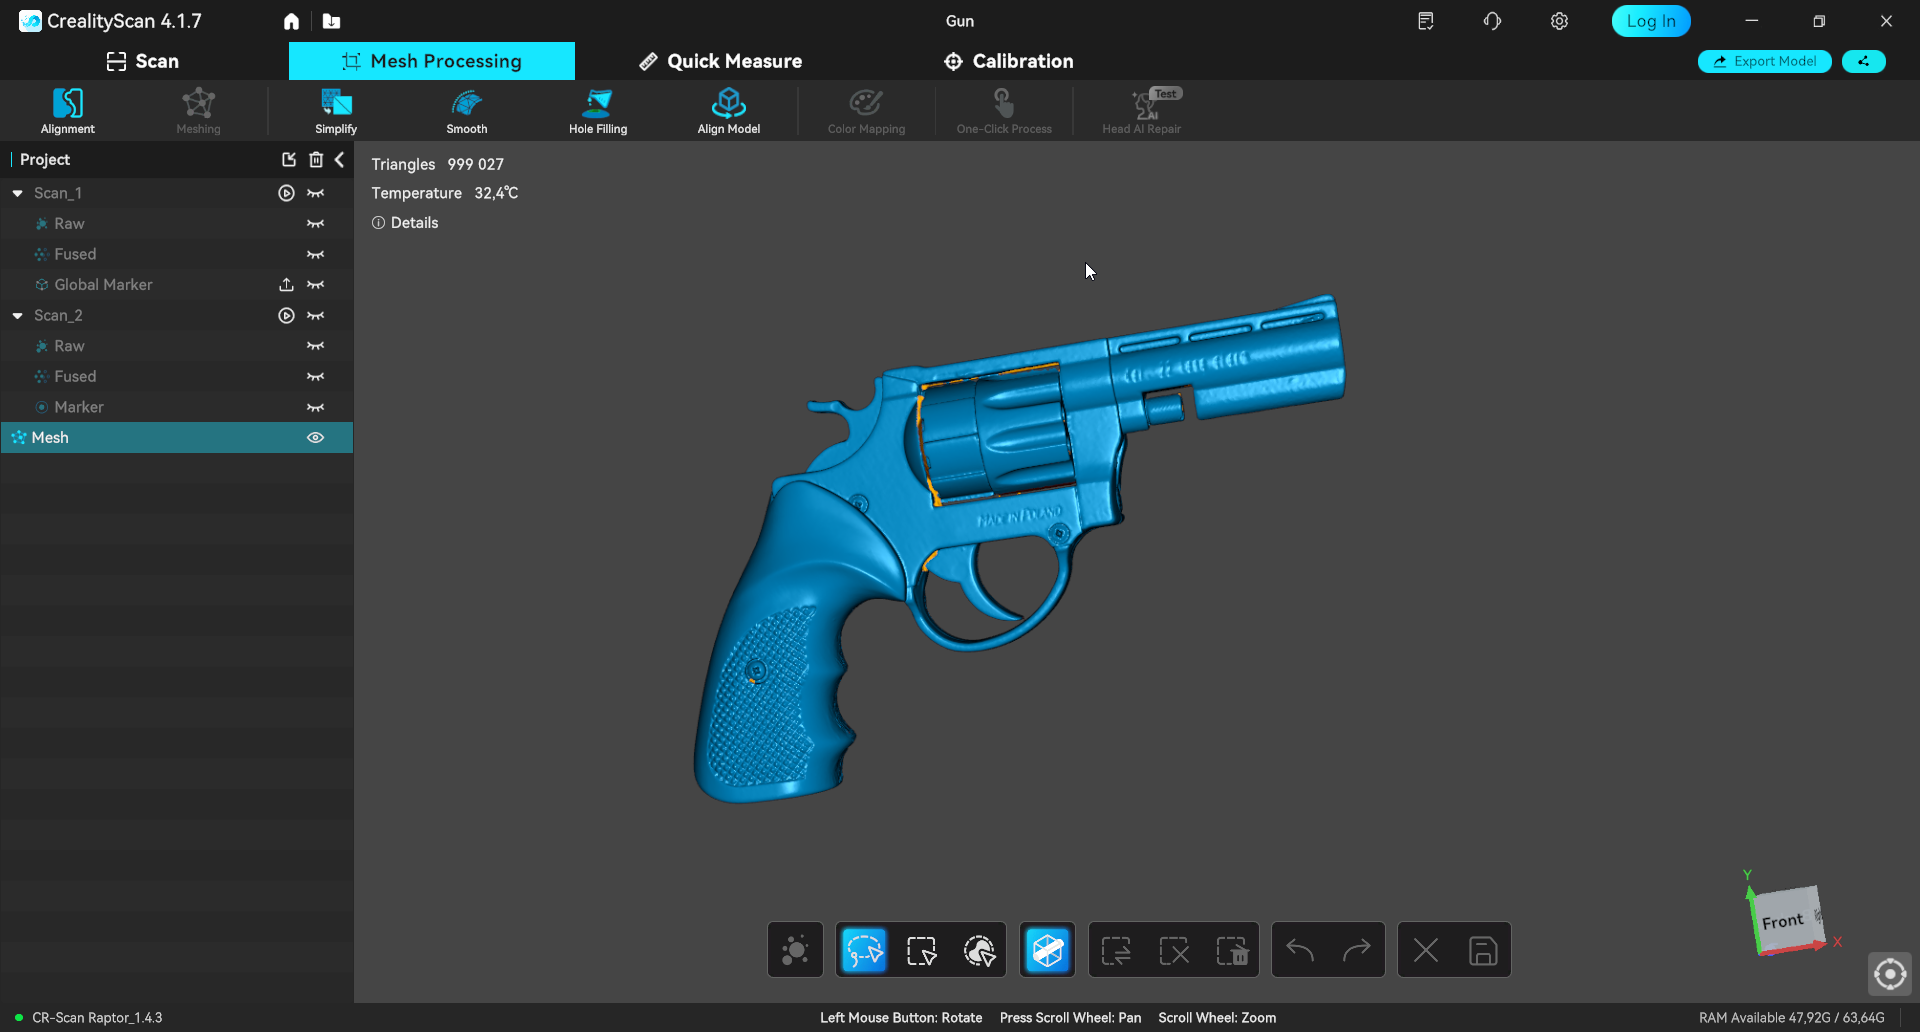
Open:
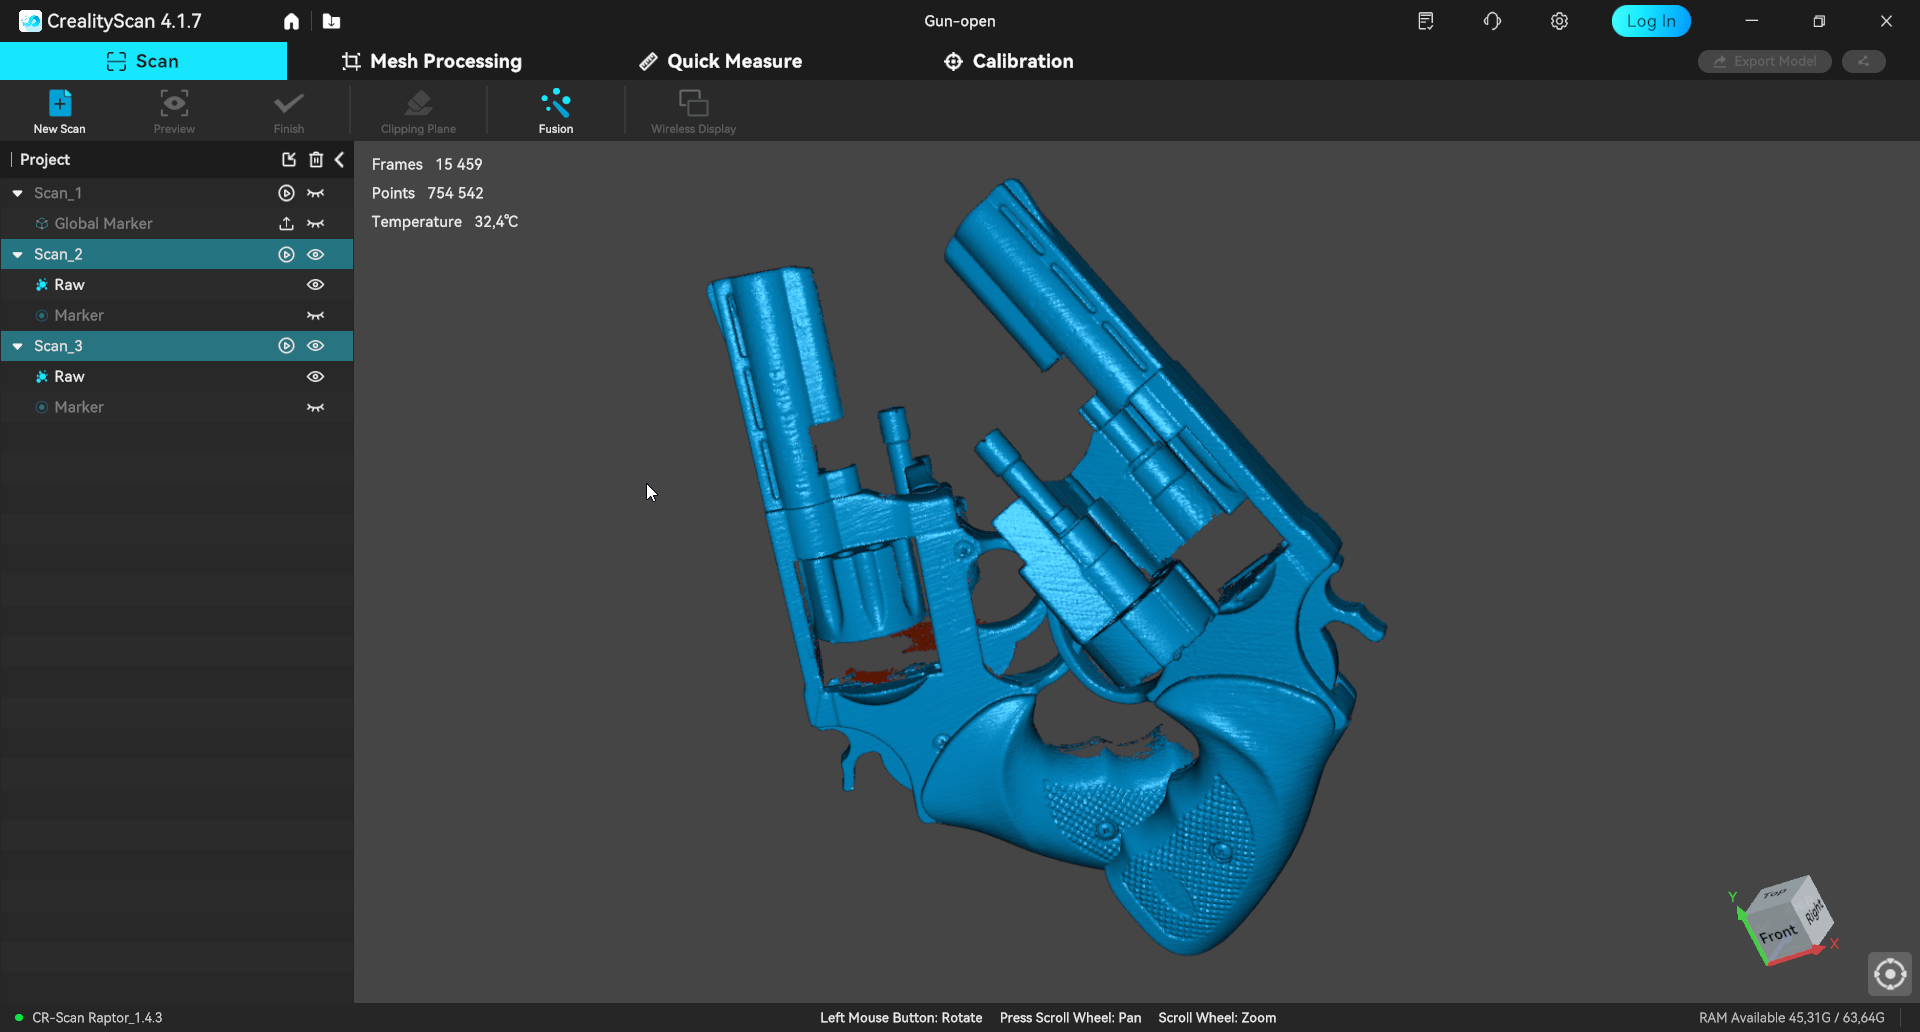
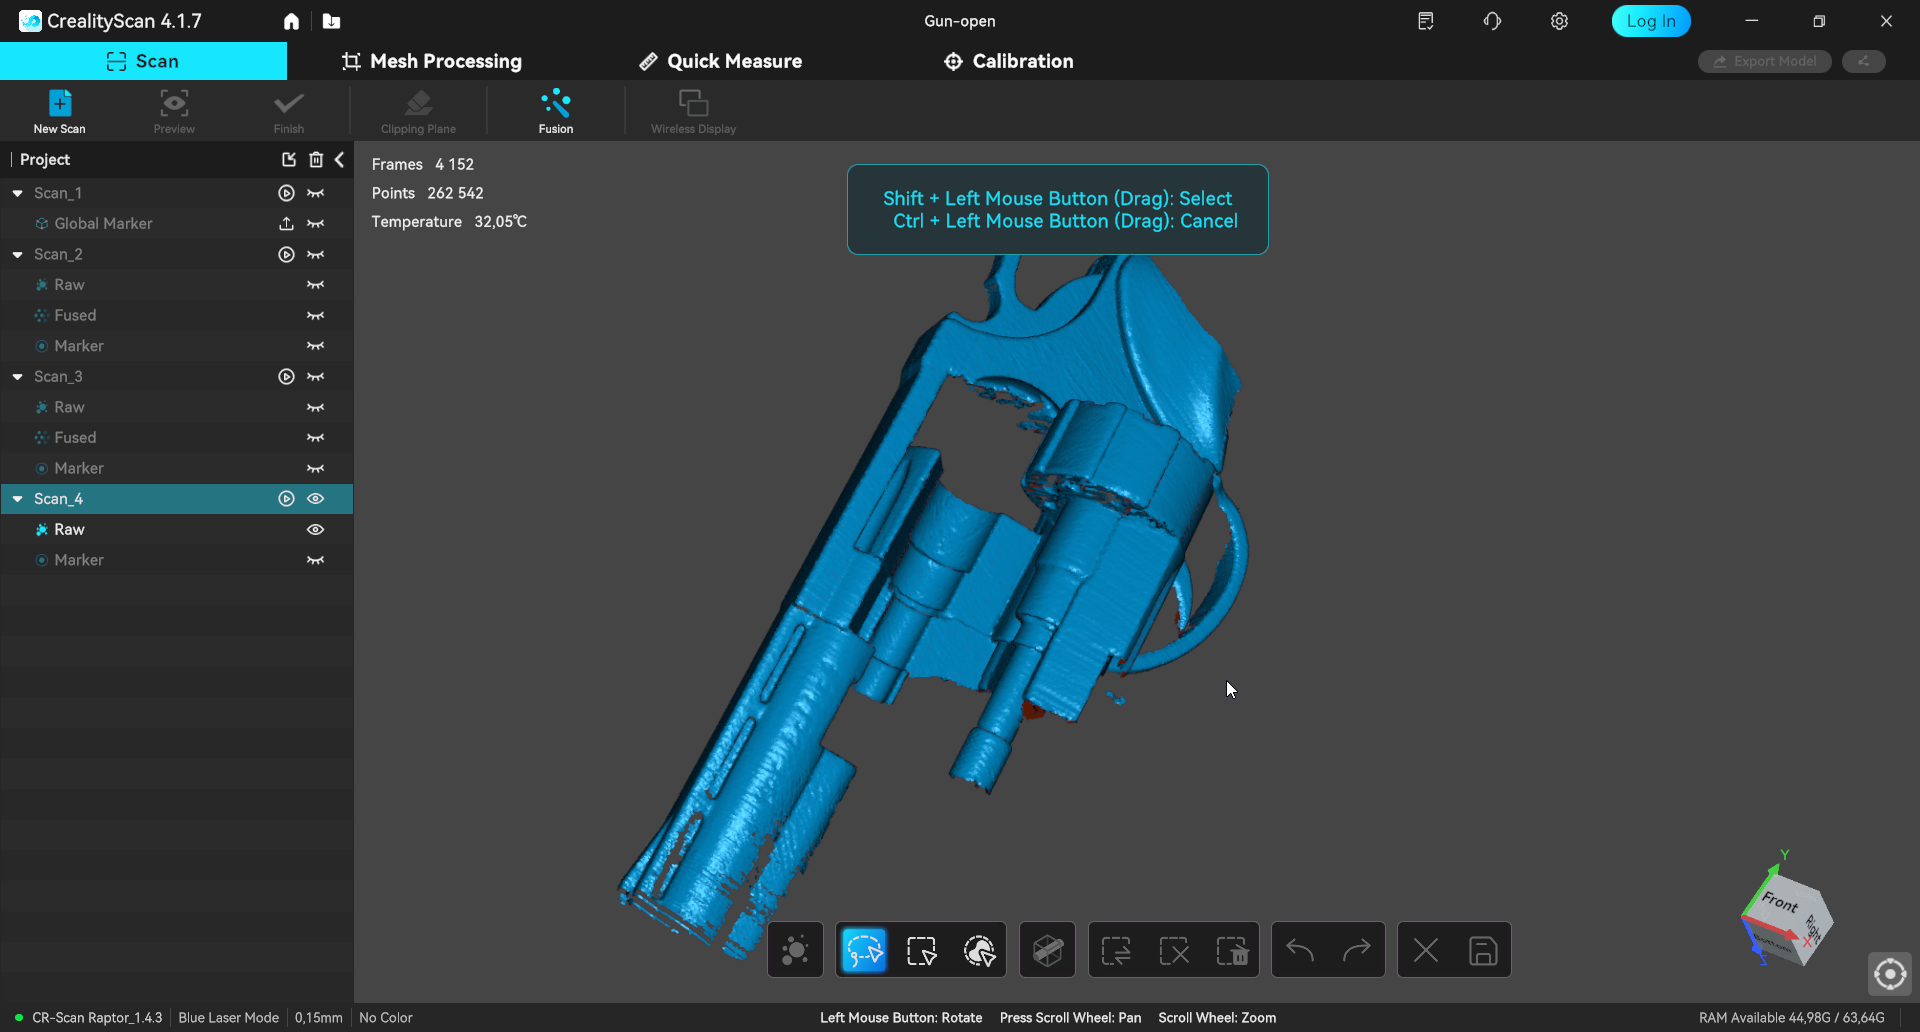
After that, it was time for importing into Blender and aligning them to be as straight as best as possible:
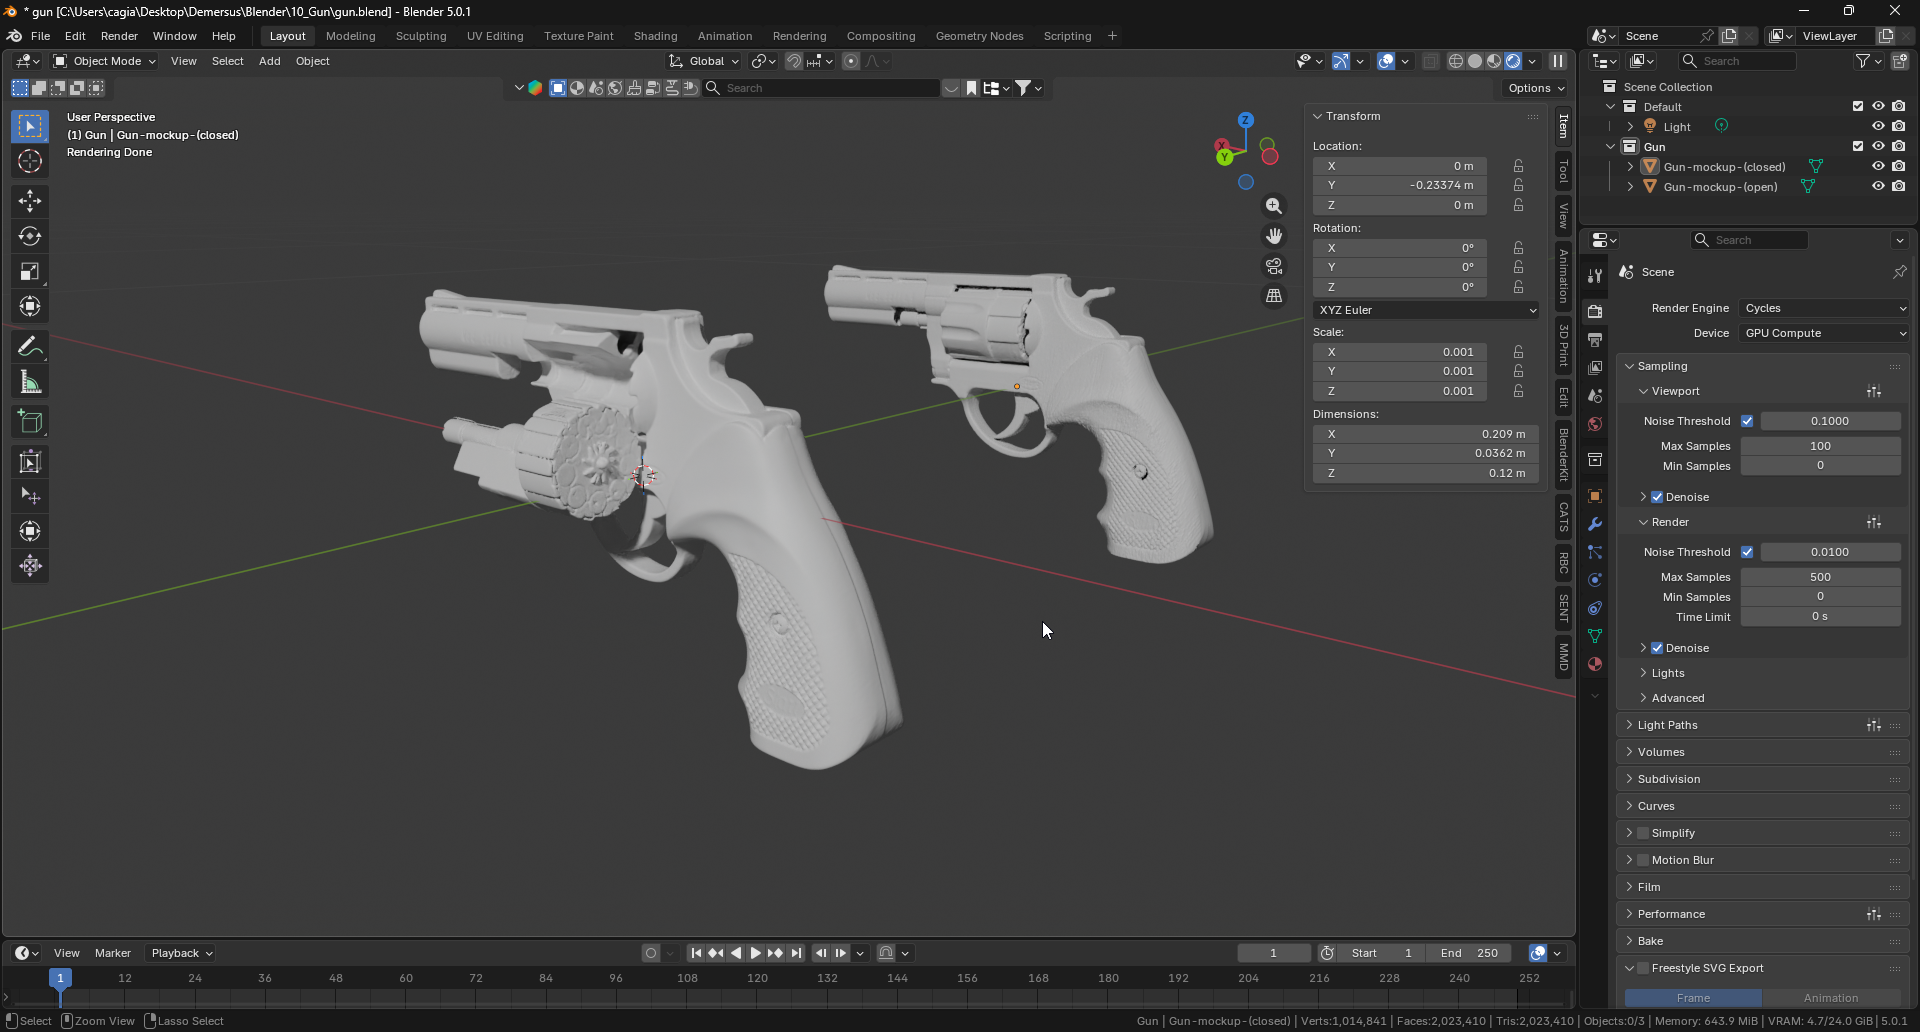
Retopology
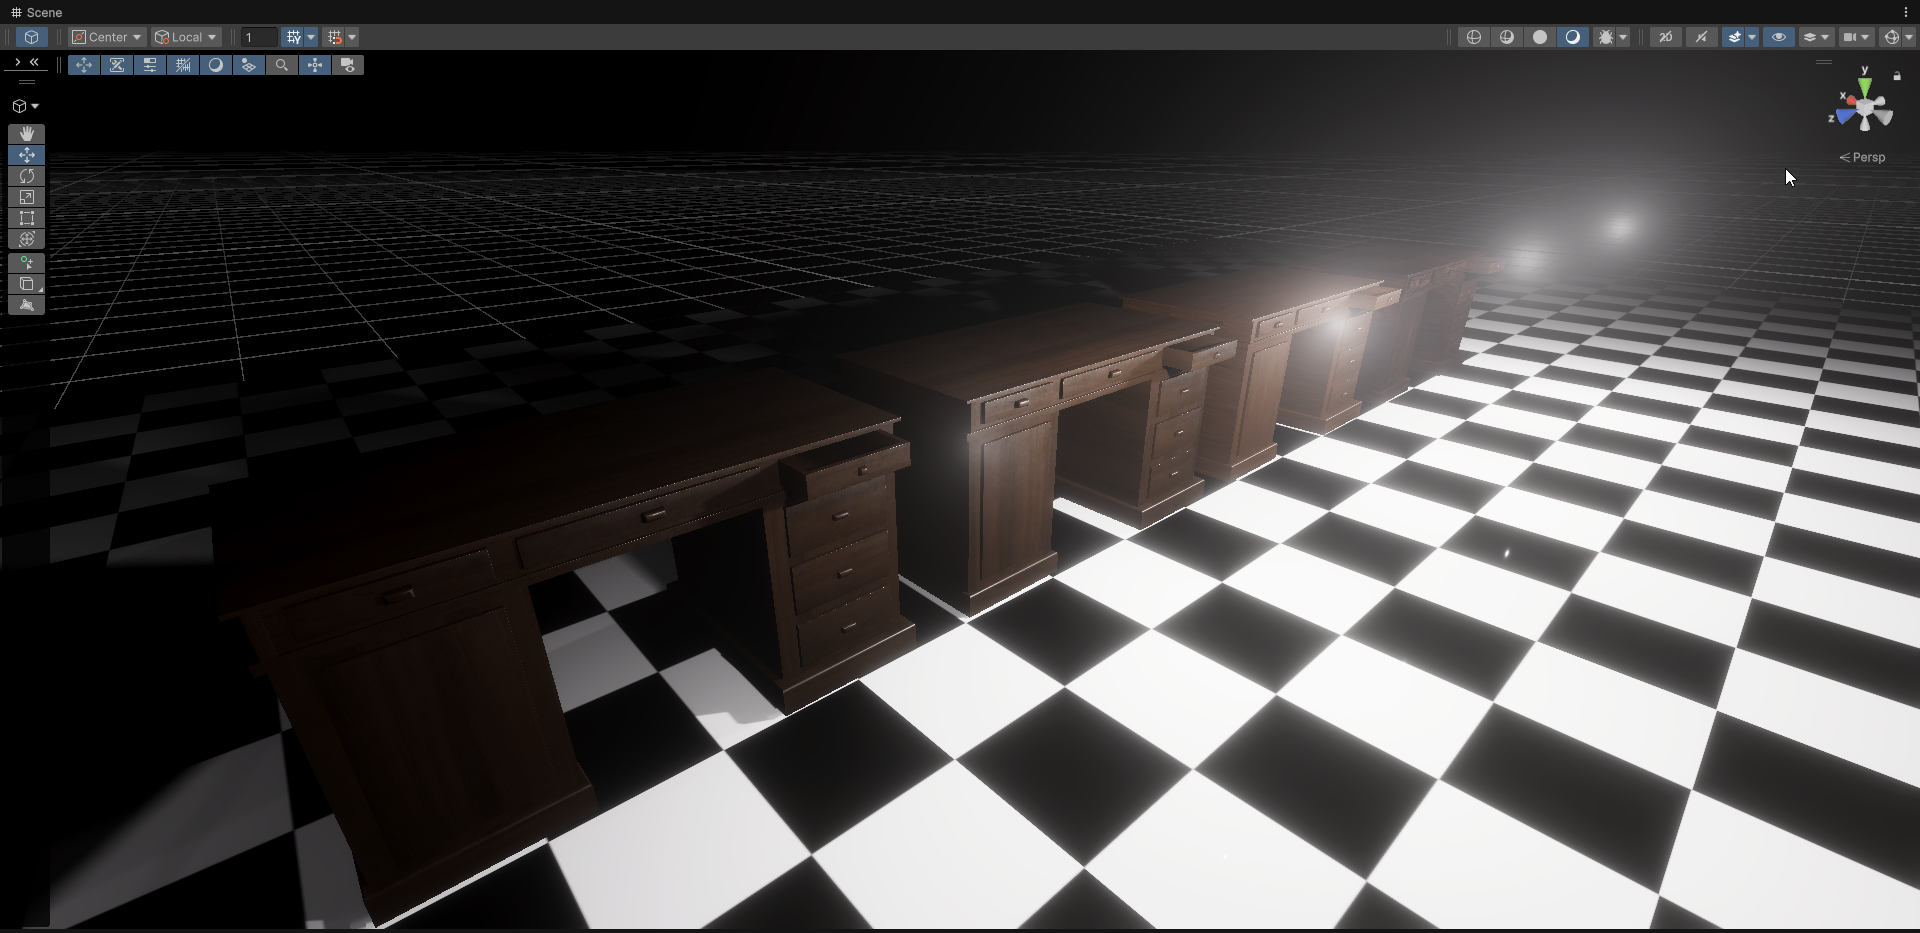
With the really high poly, really high detail reference models based on point clouds from the 3D scans in Blender, my bud was able to work on doing retopology to bring the poly count down to less than 3K:
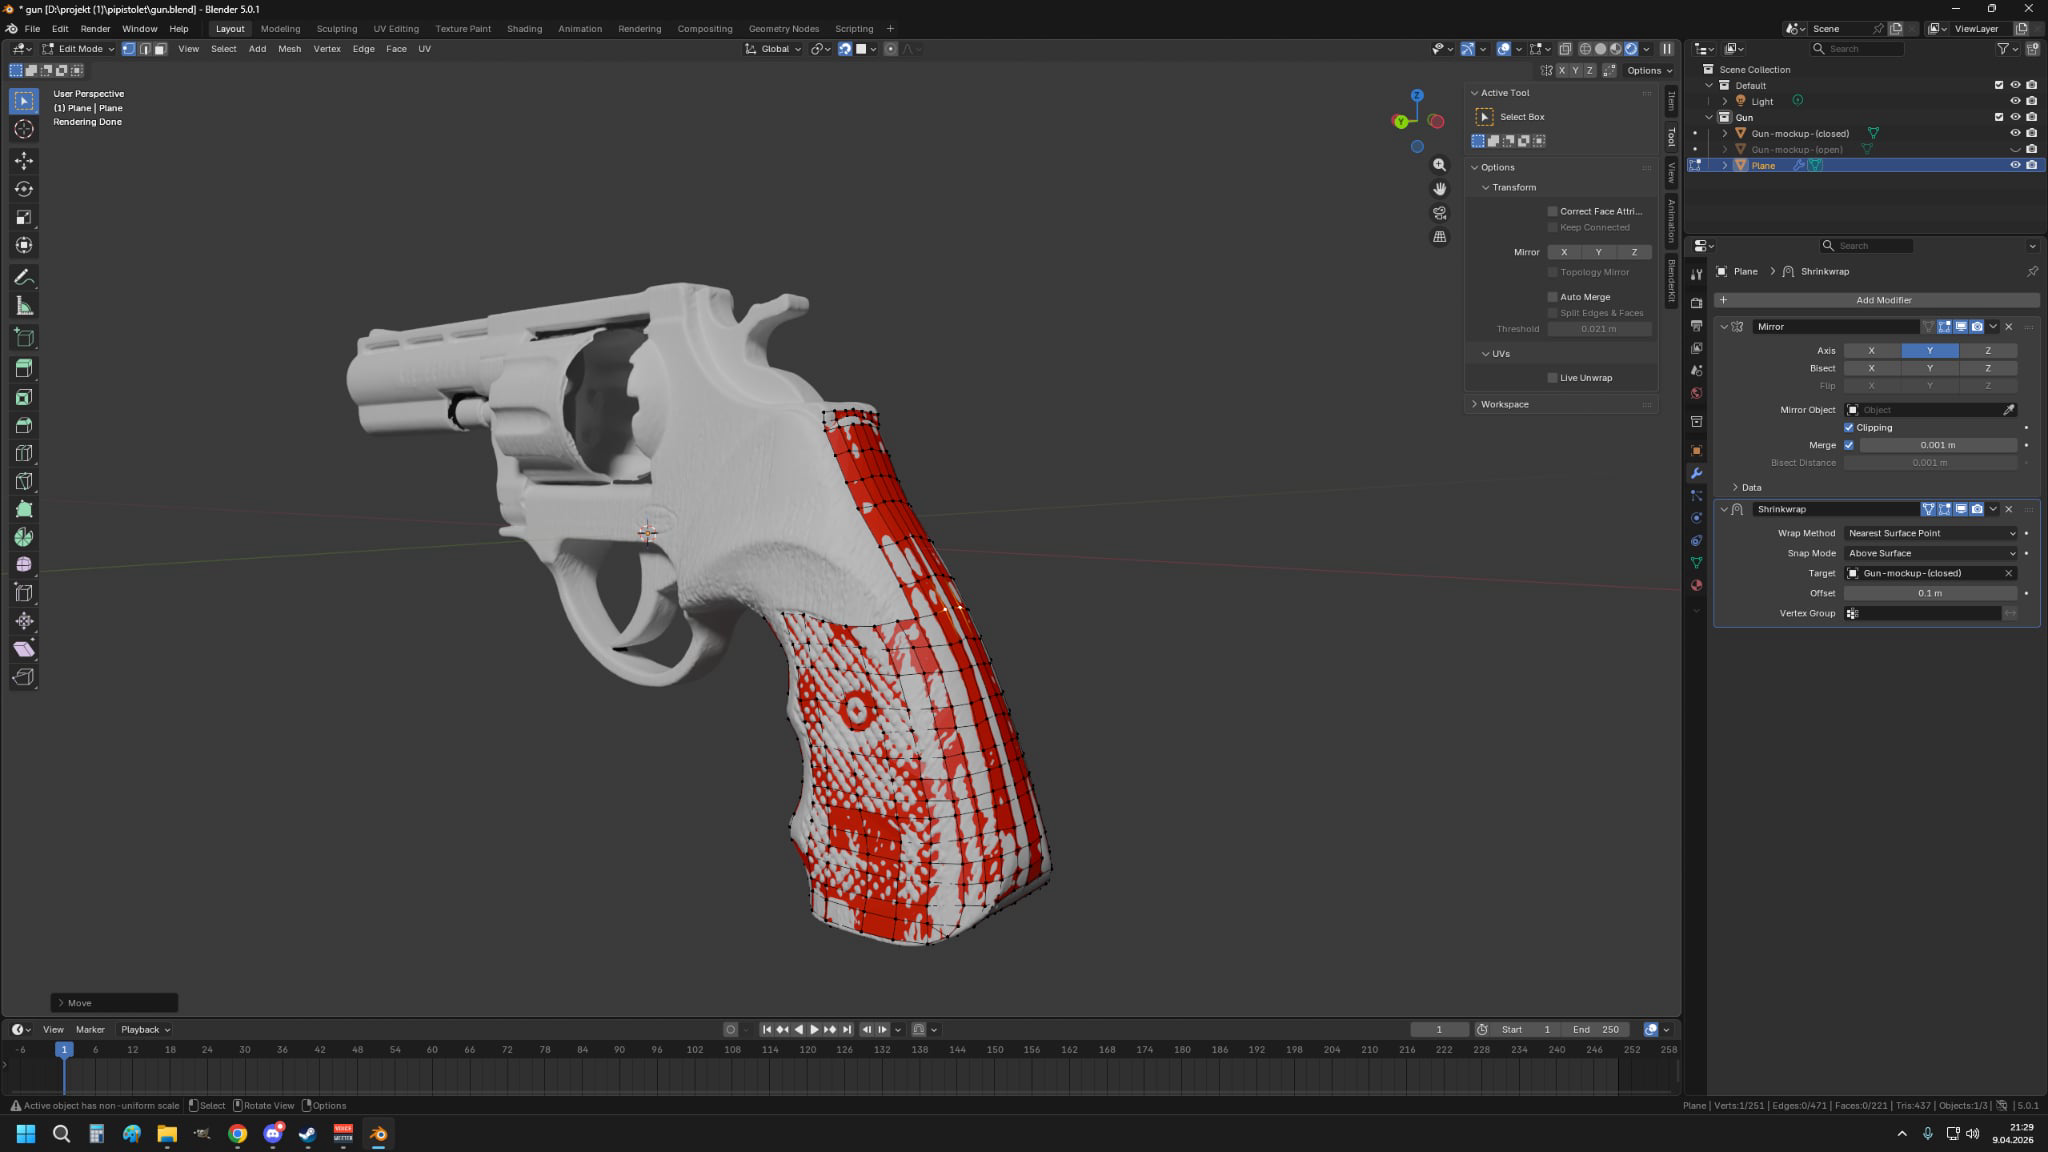
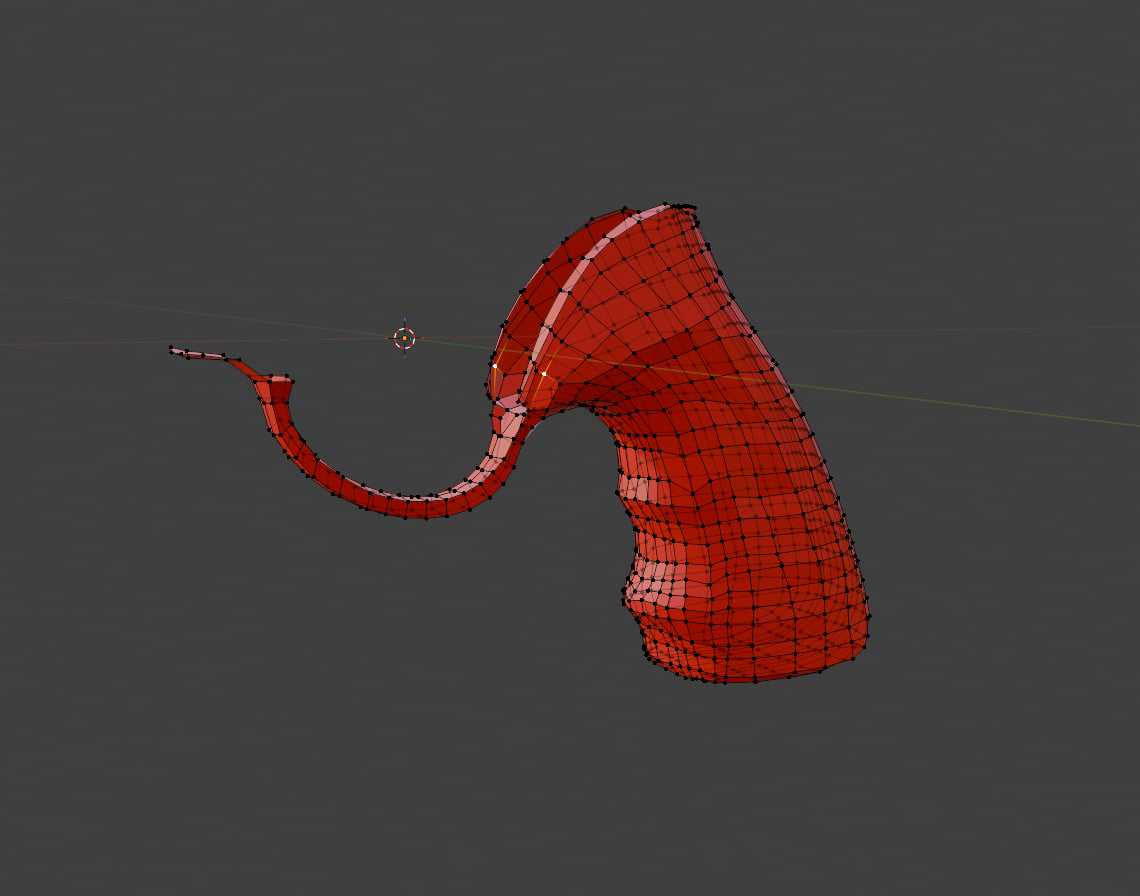
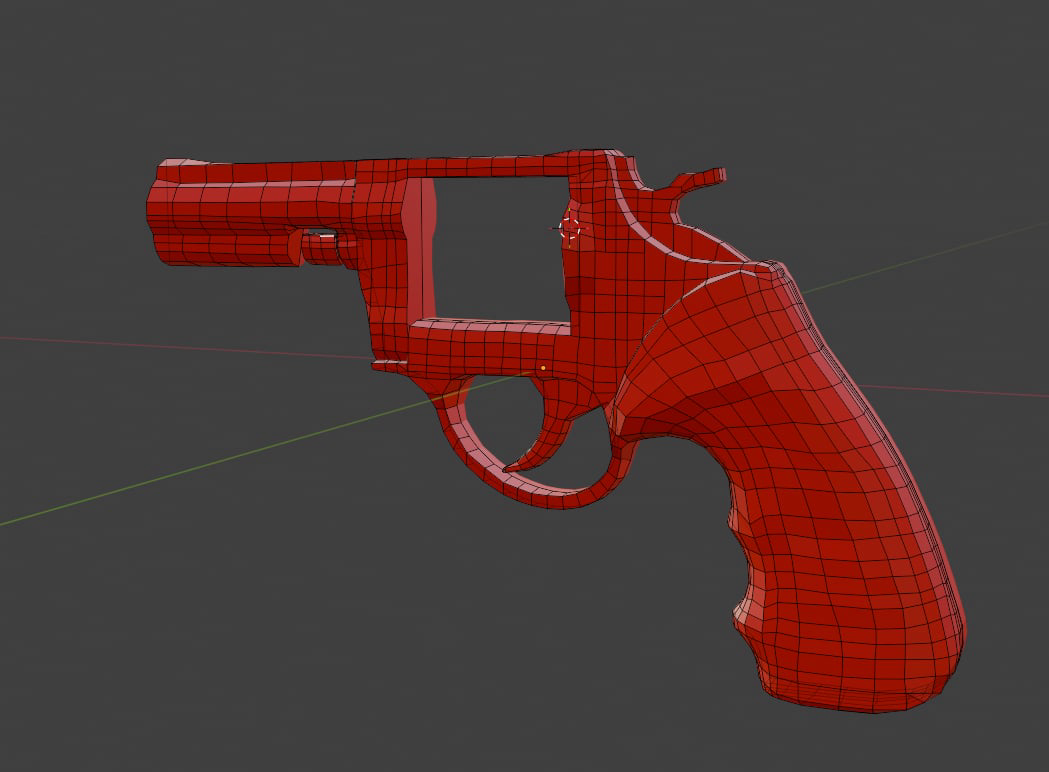
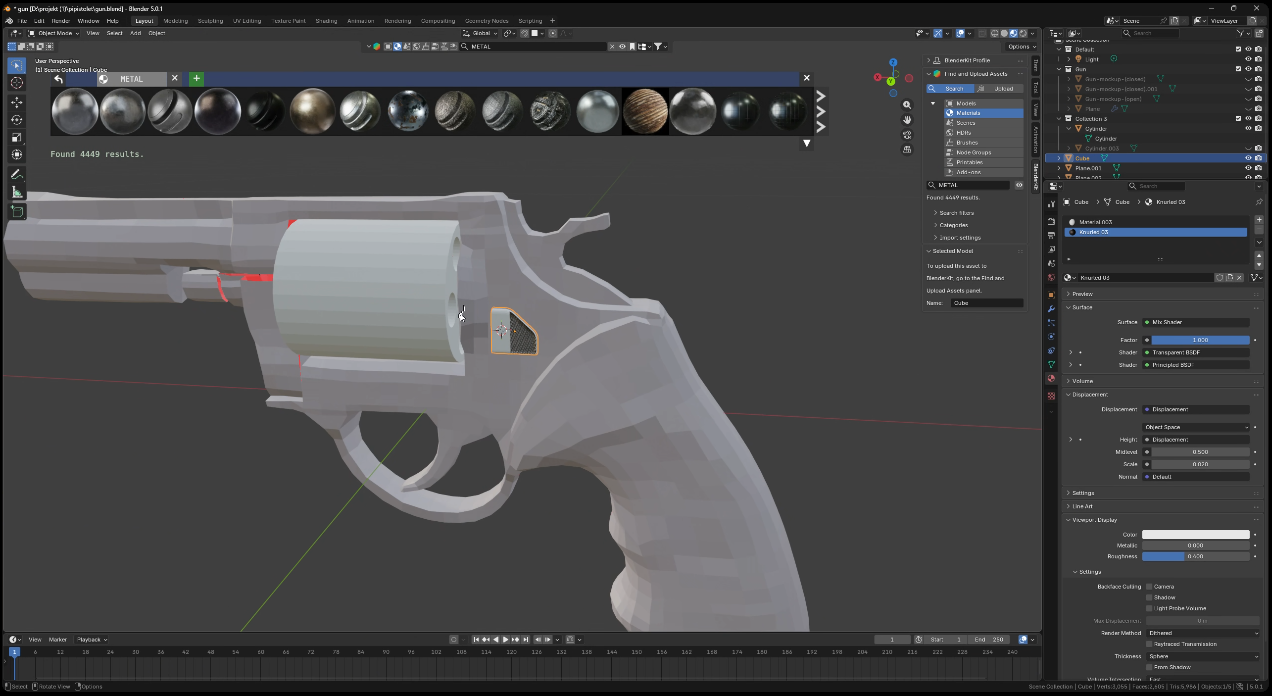
After doing that, he did some work on making the gun look more realistic by changing the cylinder and adding a switch:
Baking In Details And Materials
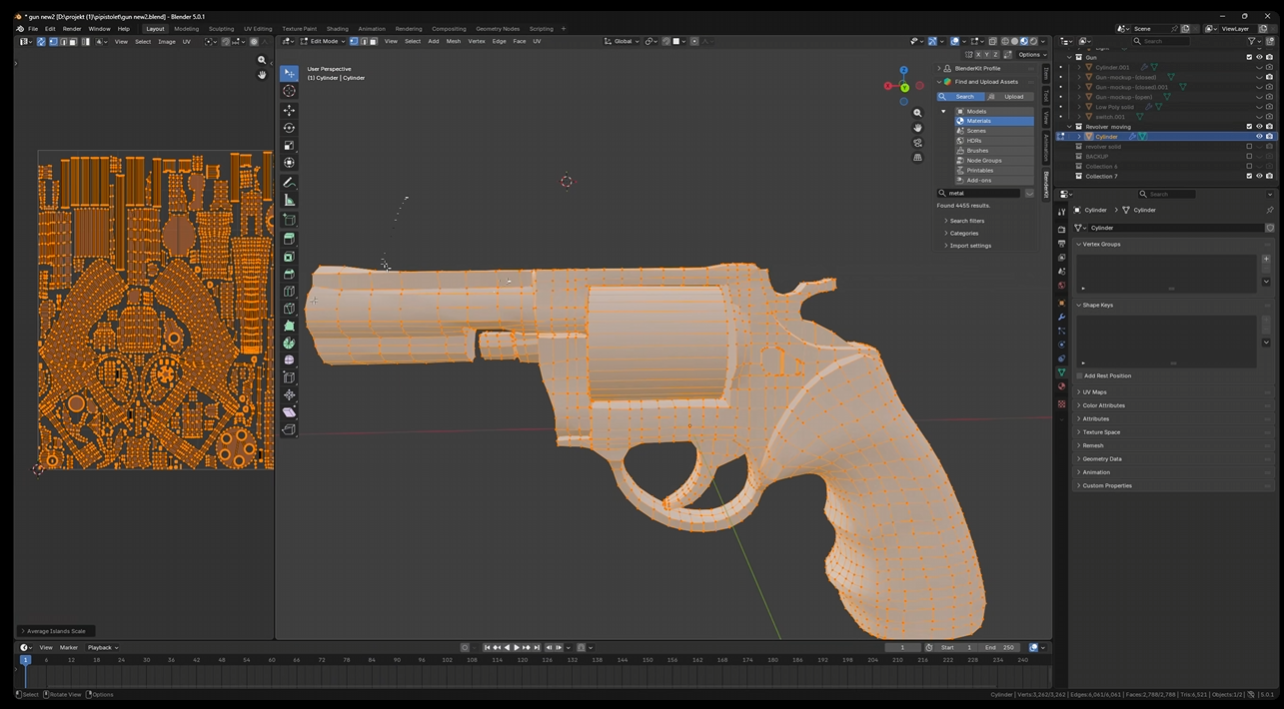
Up next, was a UV unwrap and very first high poly (scan) to low poly (topology) normal texture bake, which even though it looked promising, because of the quality of the scans (I focused more on dimensions than surface detail), the texture had some unsightly artifacts:
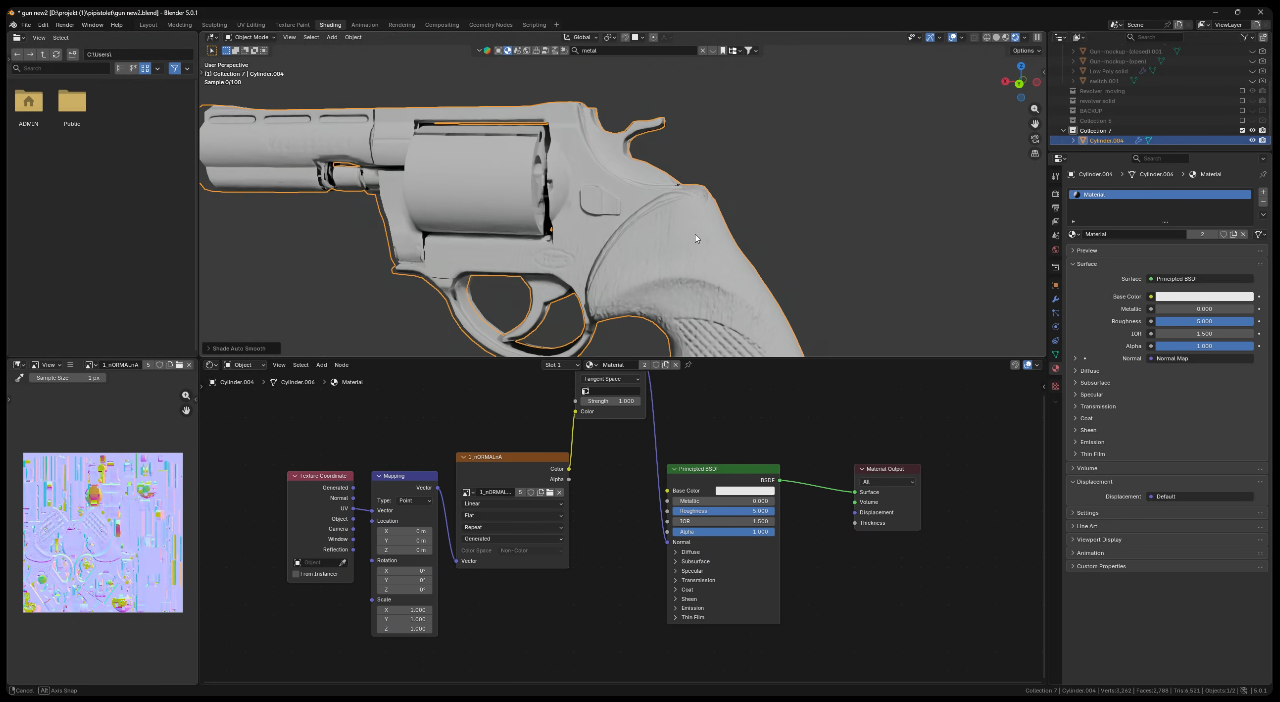
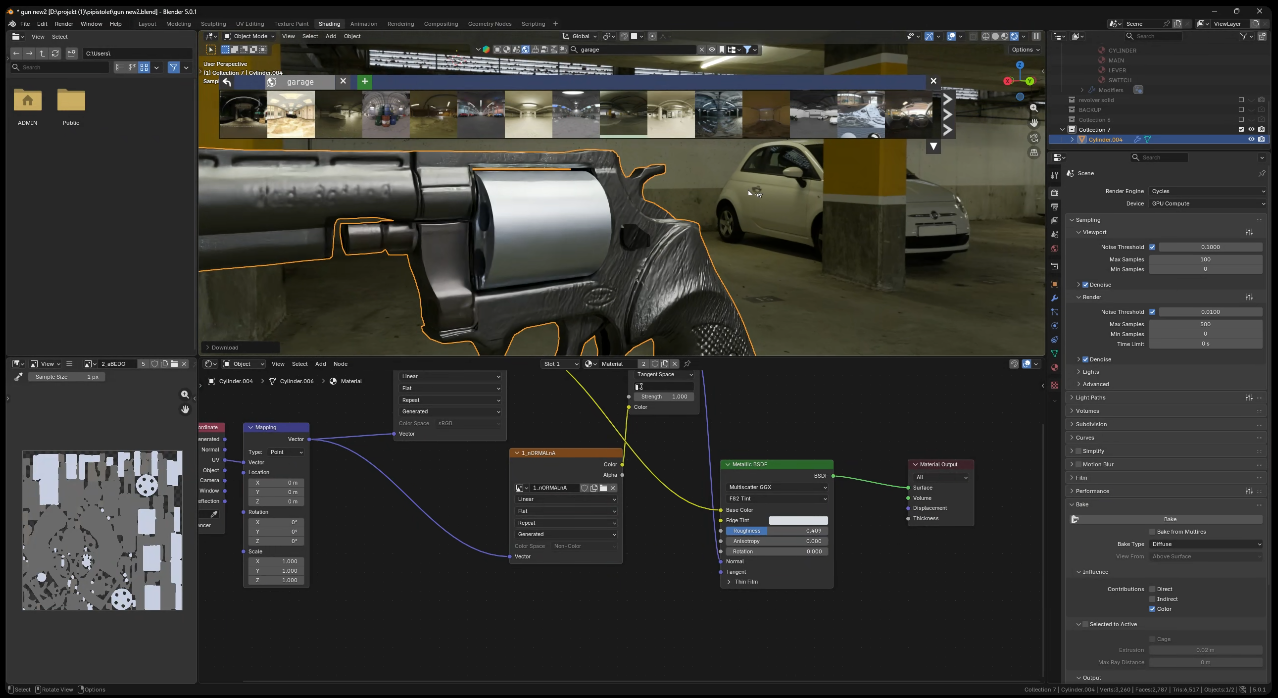
This lead me to do another (this time more detailed) scan, which turned out much better:
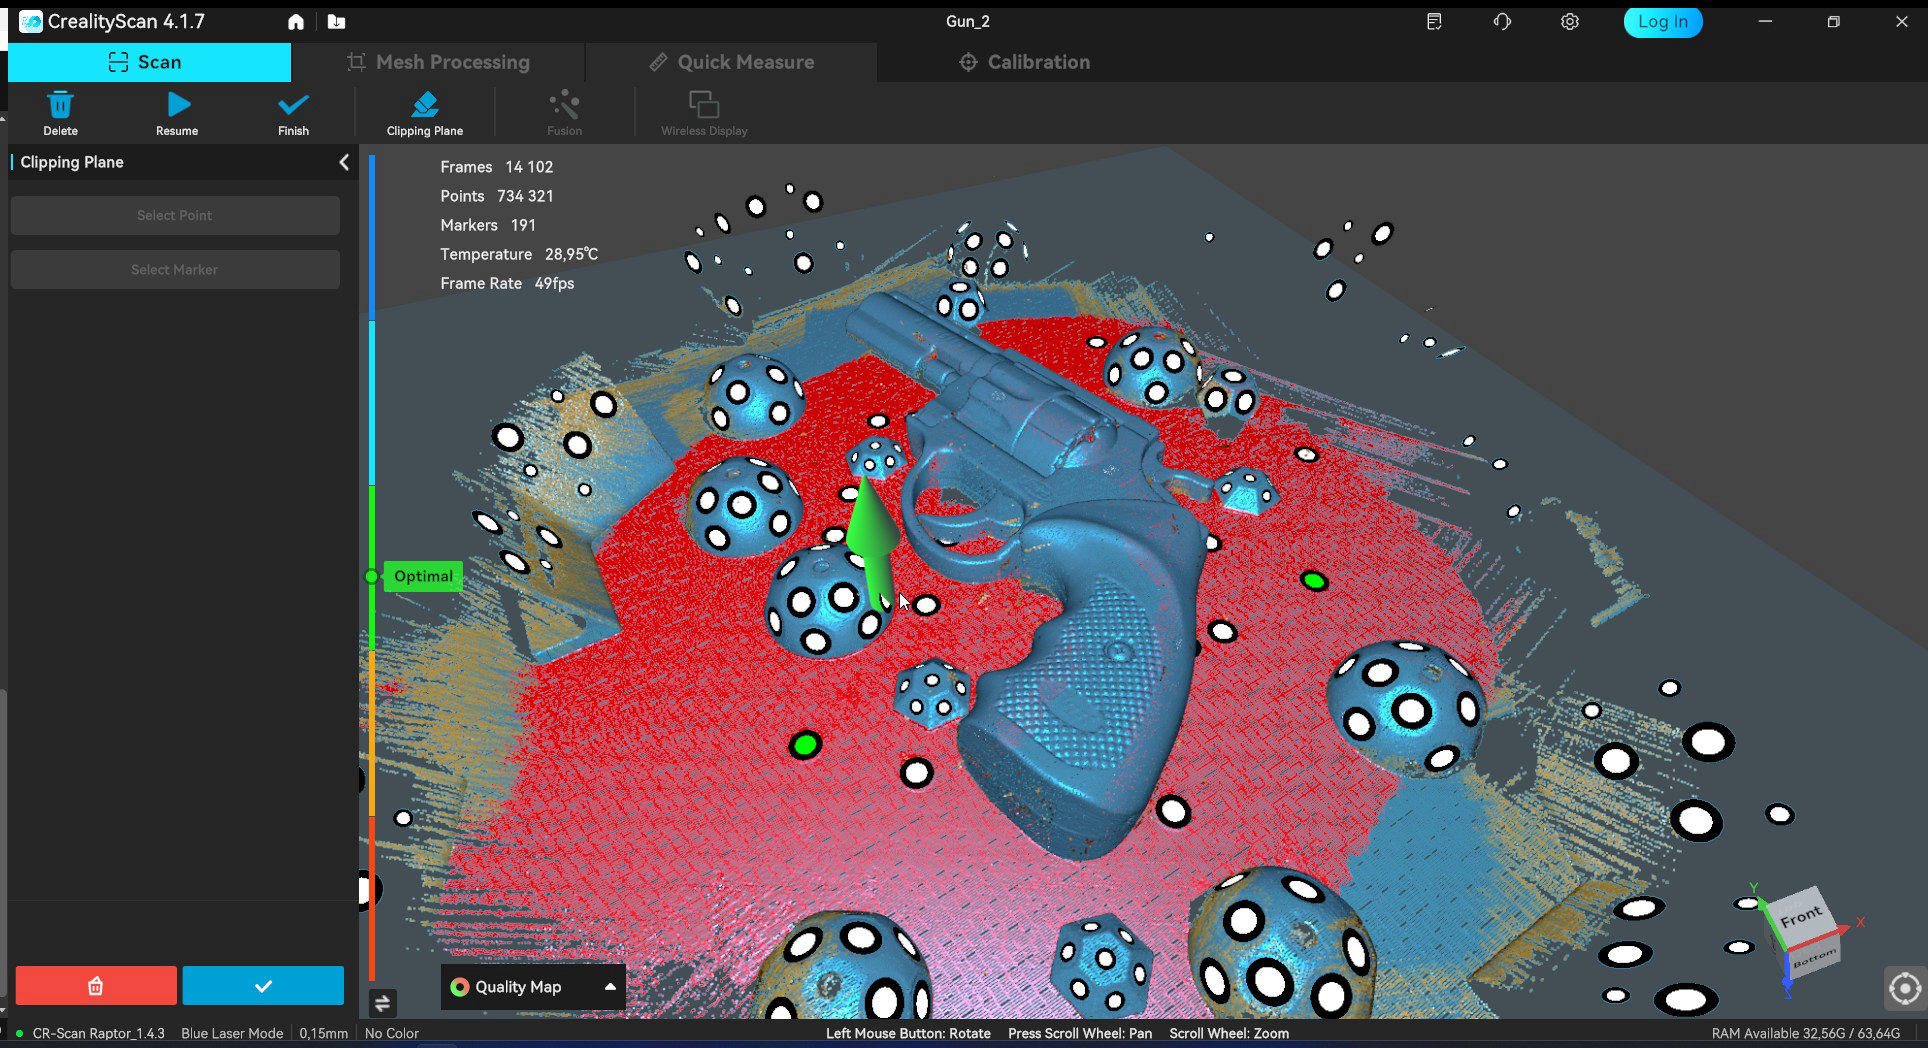
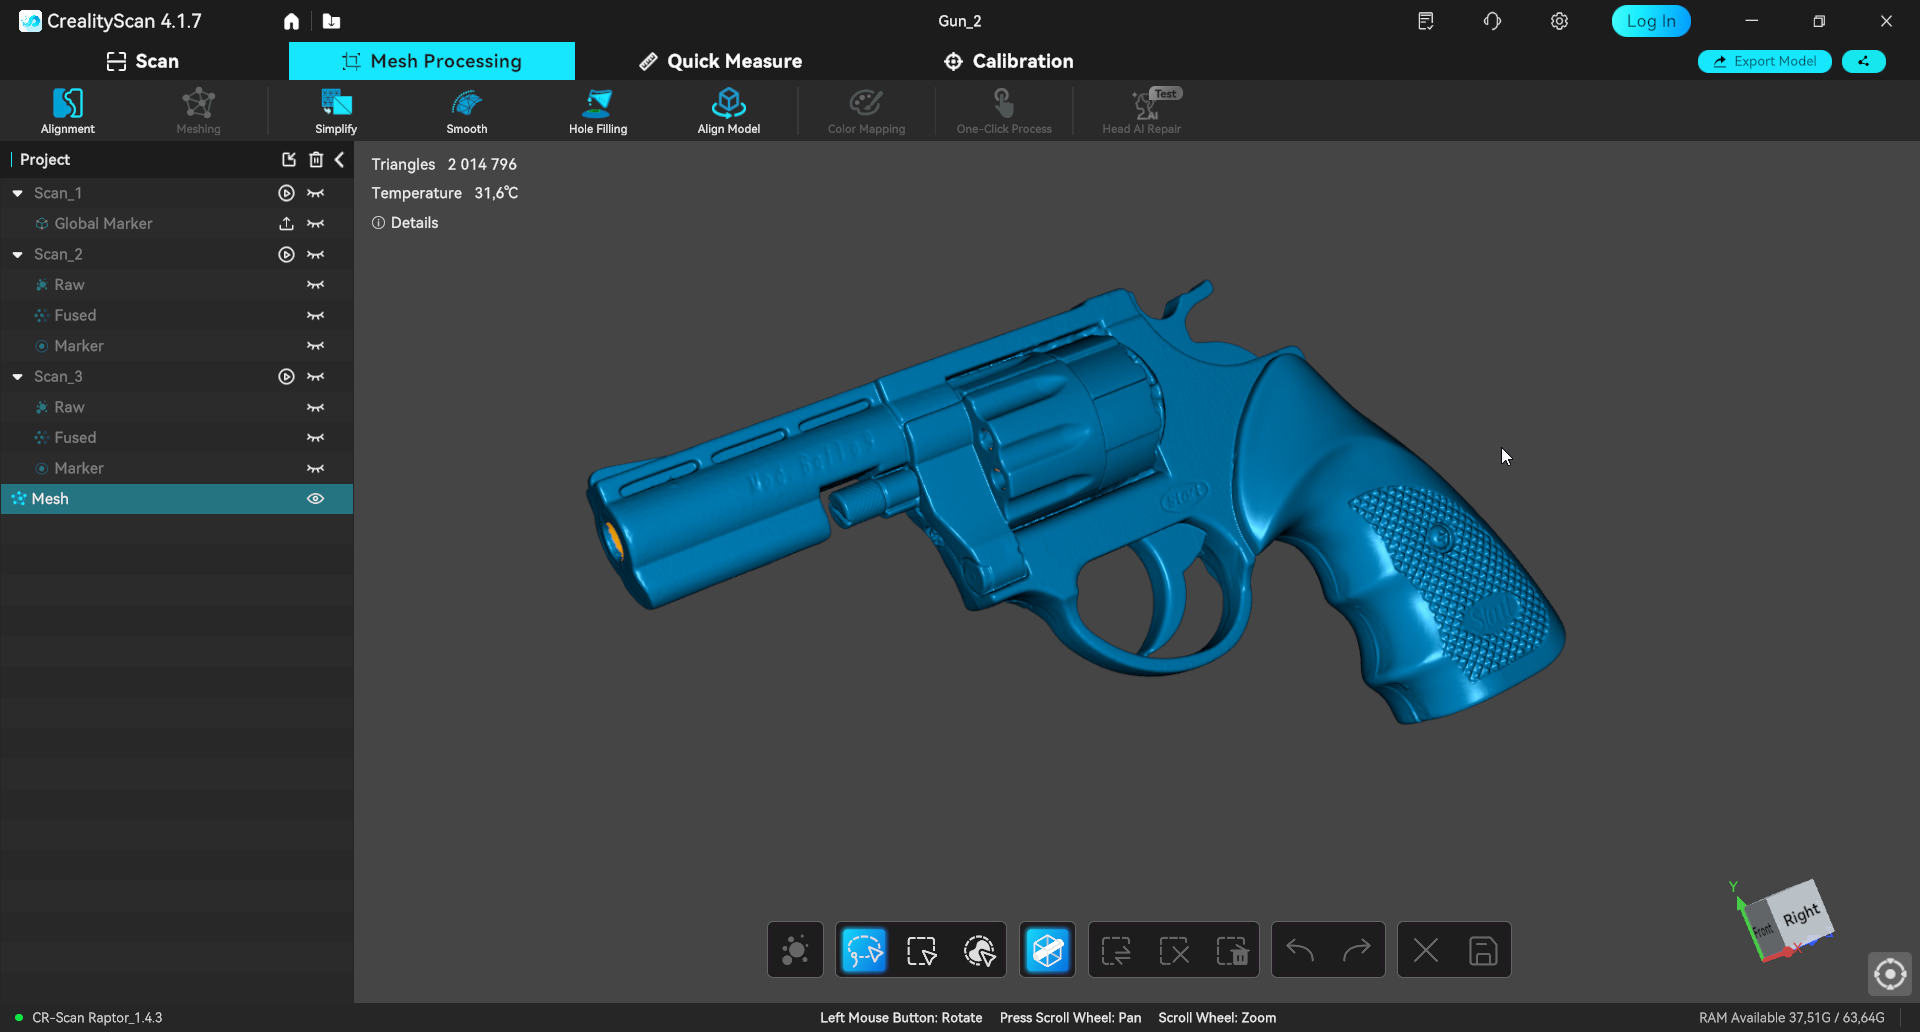
I of course did the whole Creality Scan post processing pipeline, imported it into Blender and fixed as many issues as I could using sculpting mode and my graphics tablet:
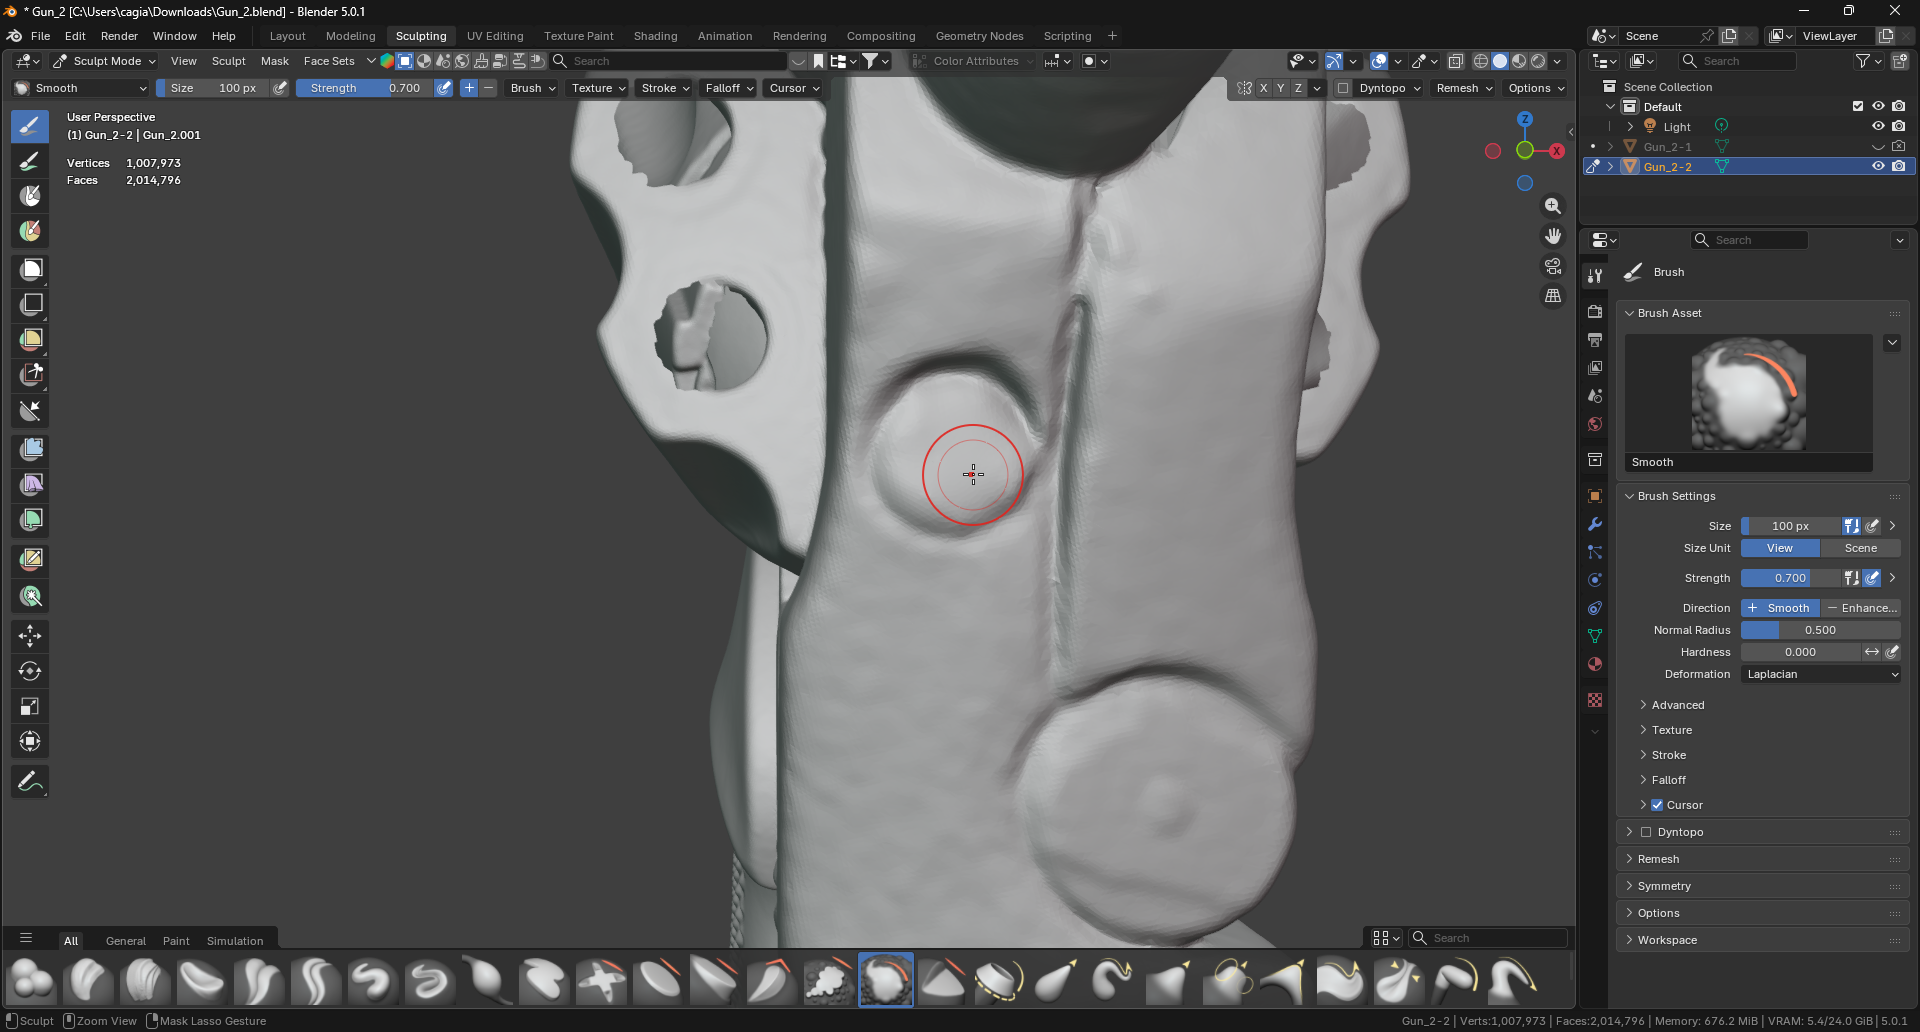
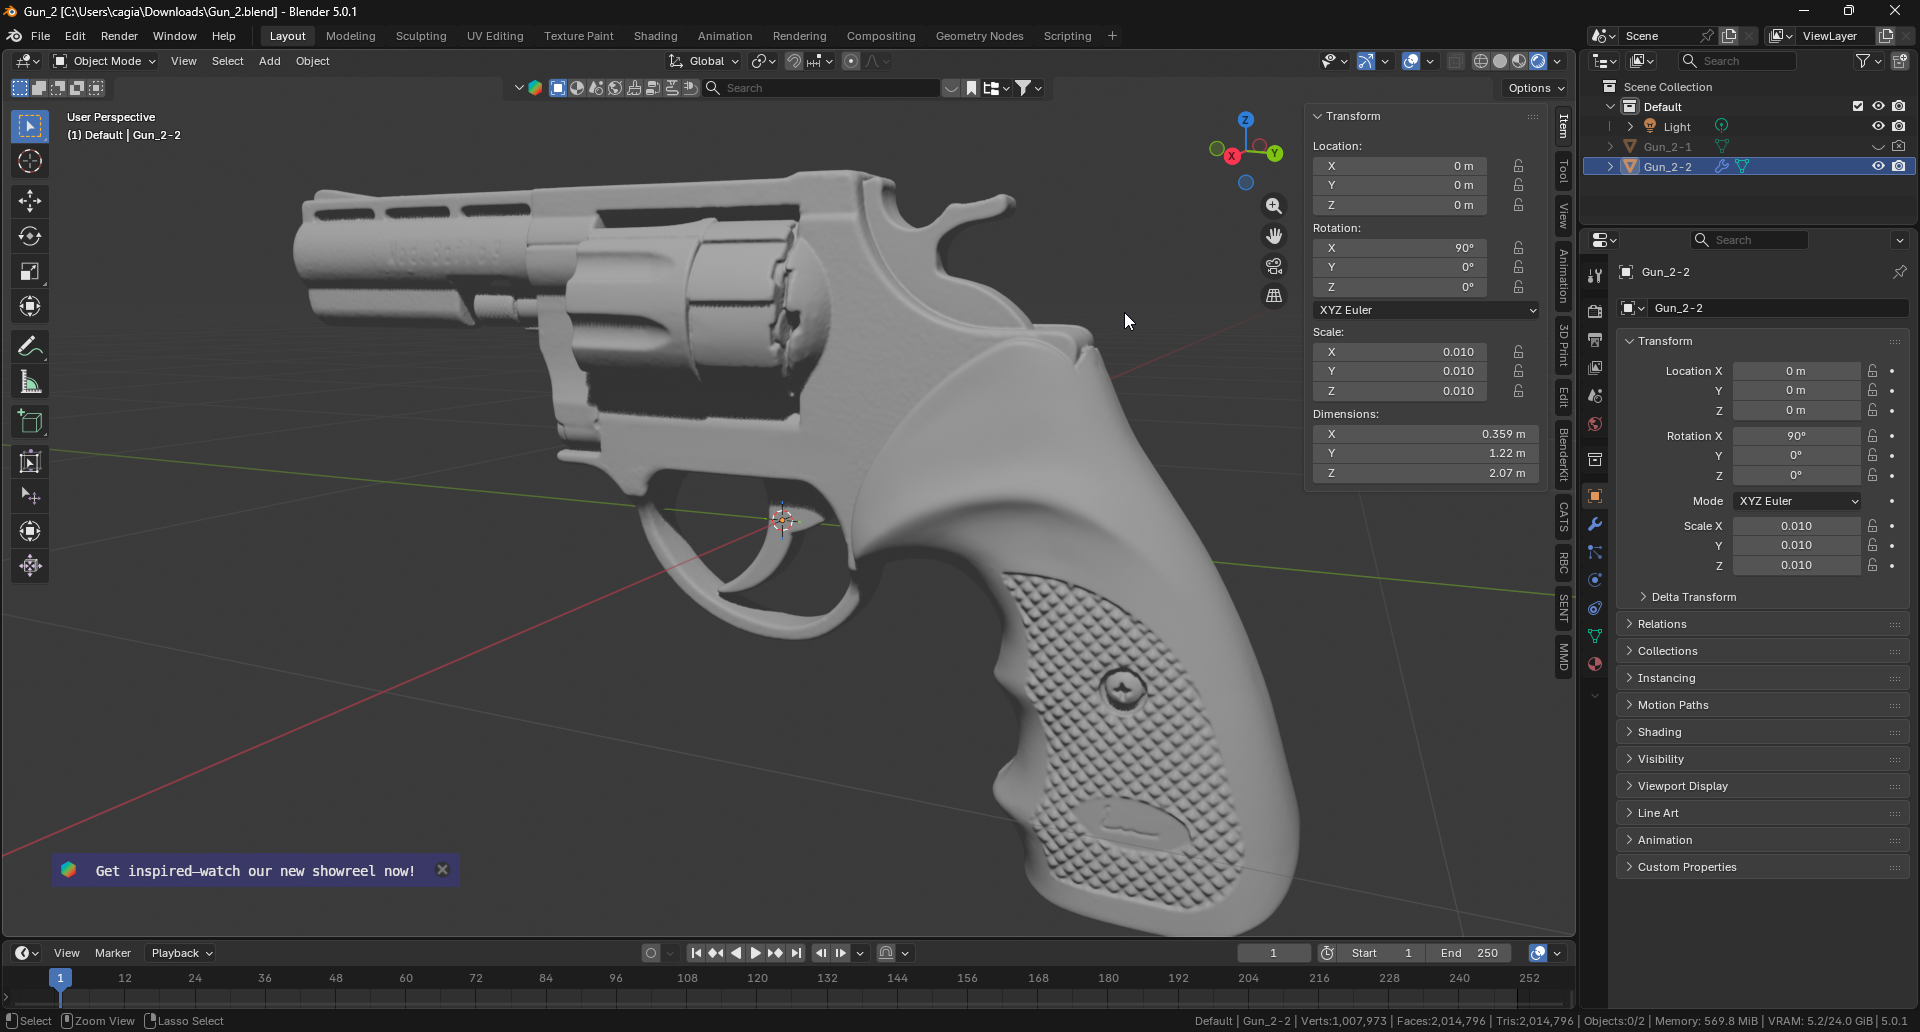
At last, we managed to get a really nice final Normal bake:
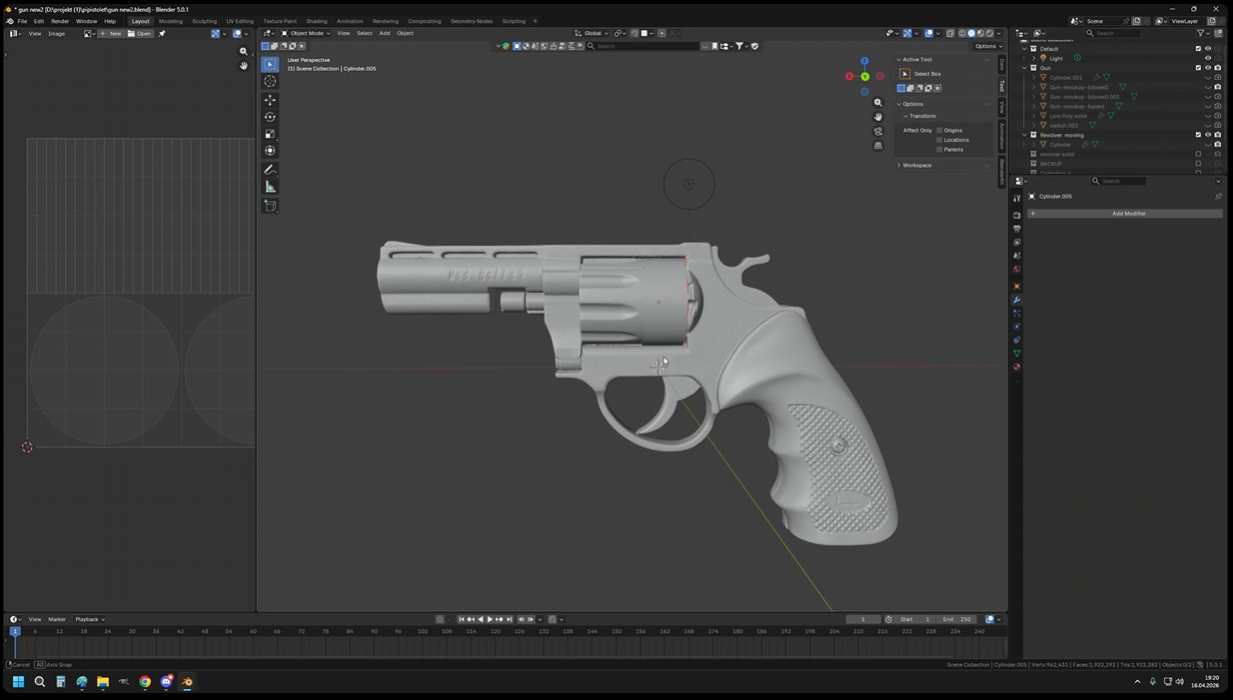
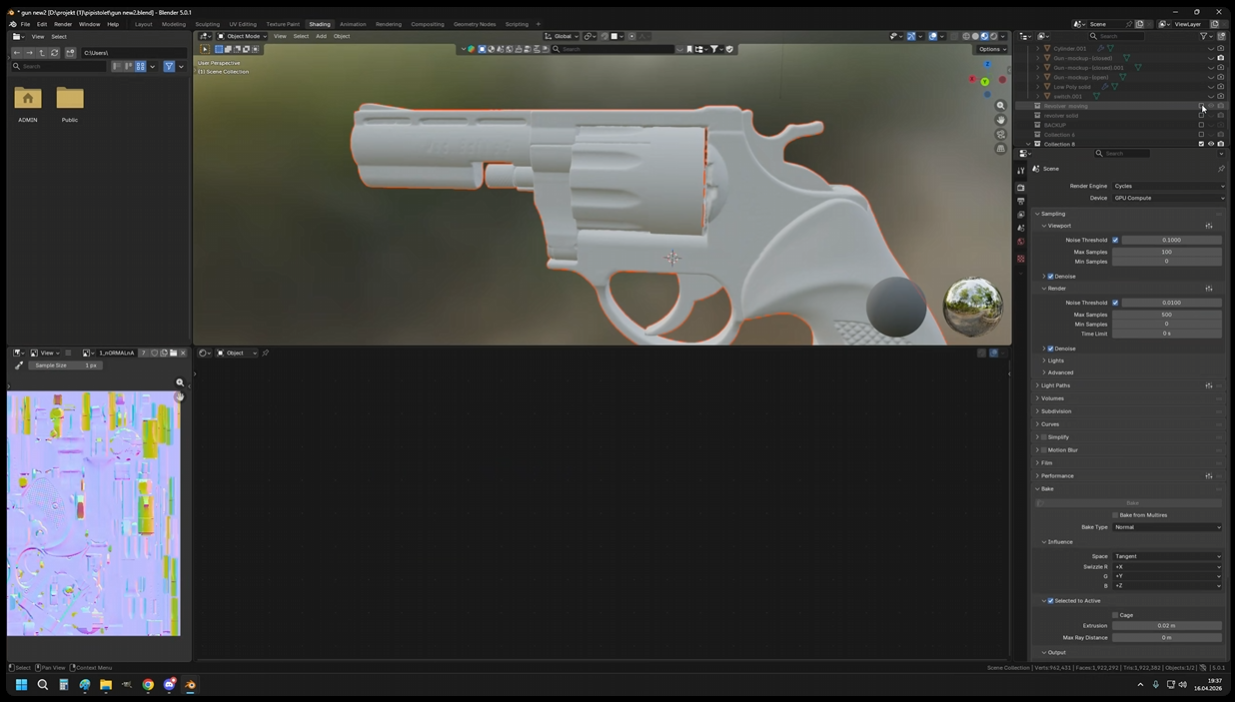
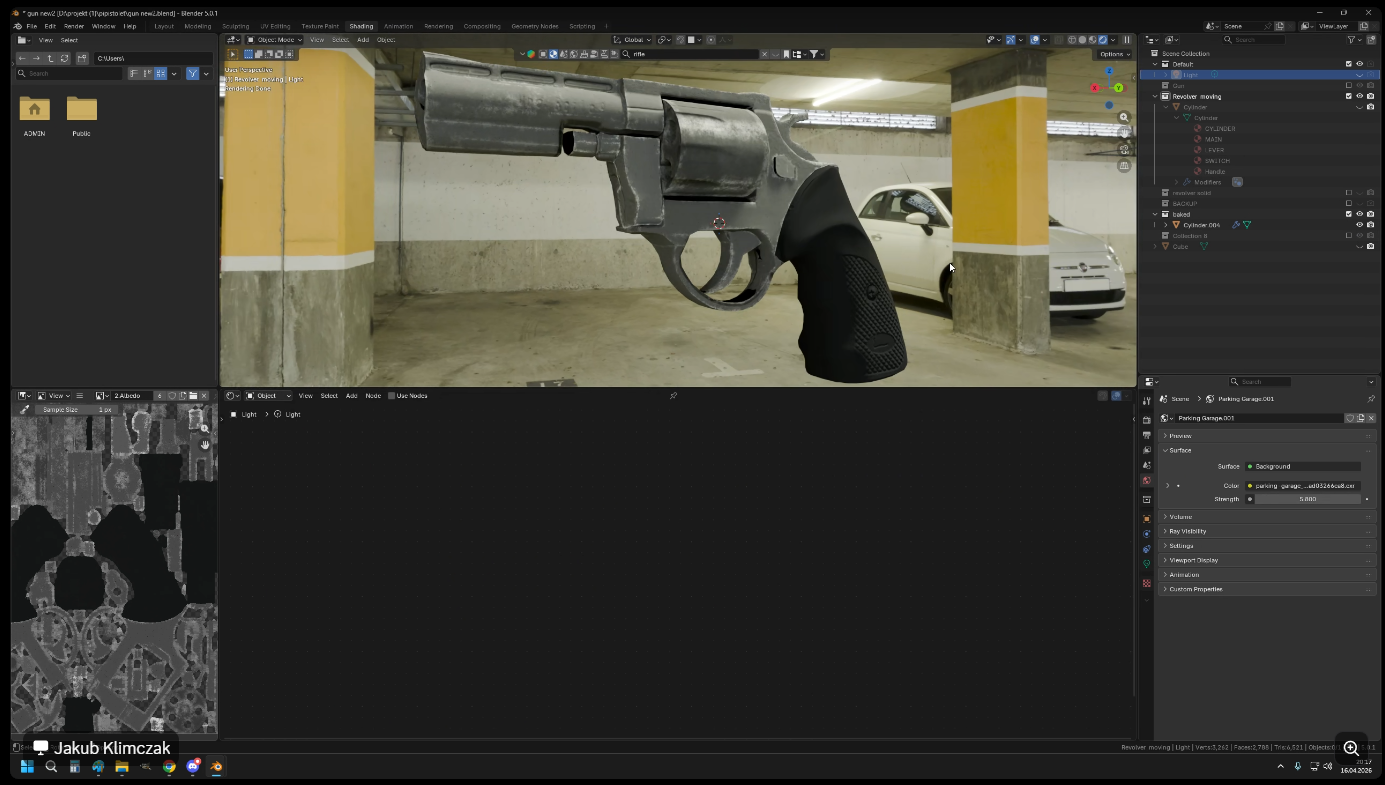
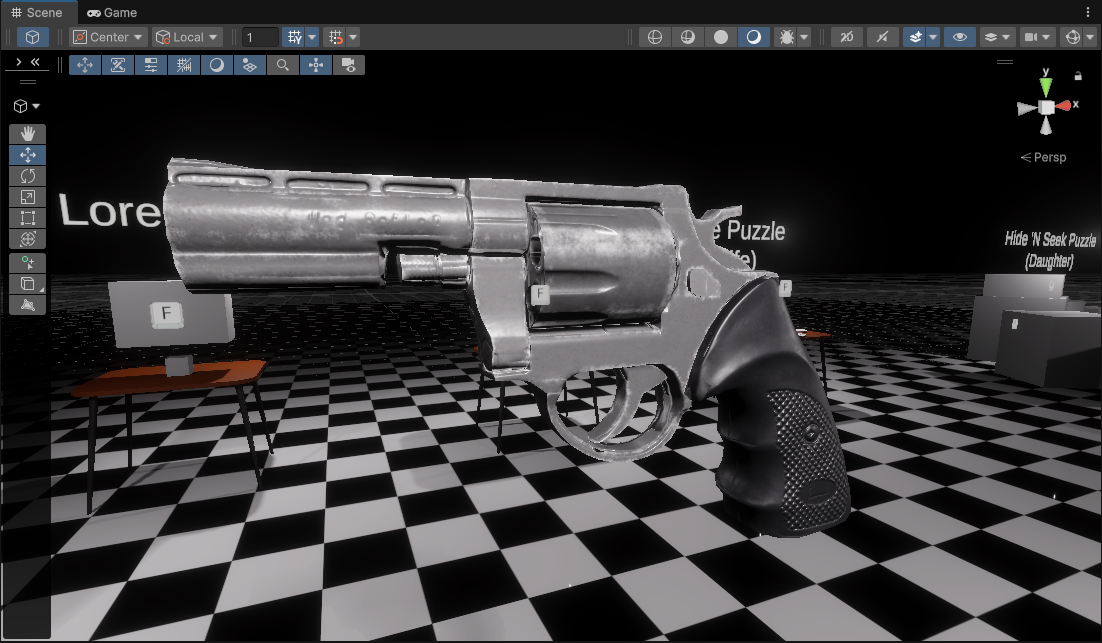
Here it is baked and, exported to Unity:
Adding An Armature
Because the gun will be used in a cutscene something that I also needed to take care of was adding the armature (which was easy enough):
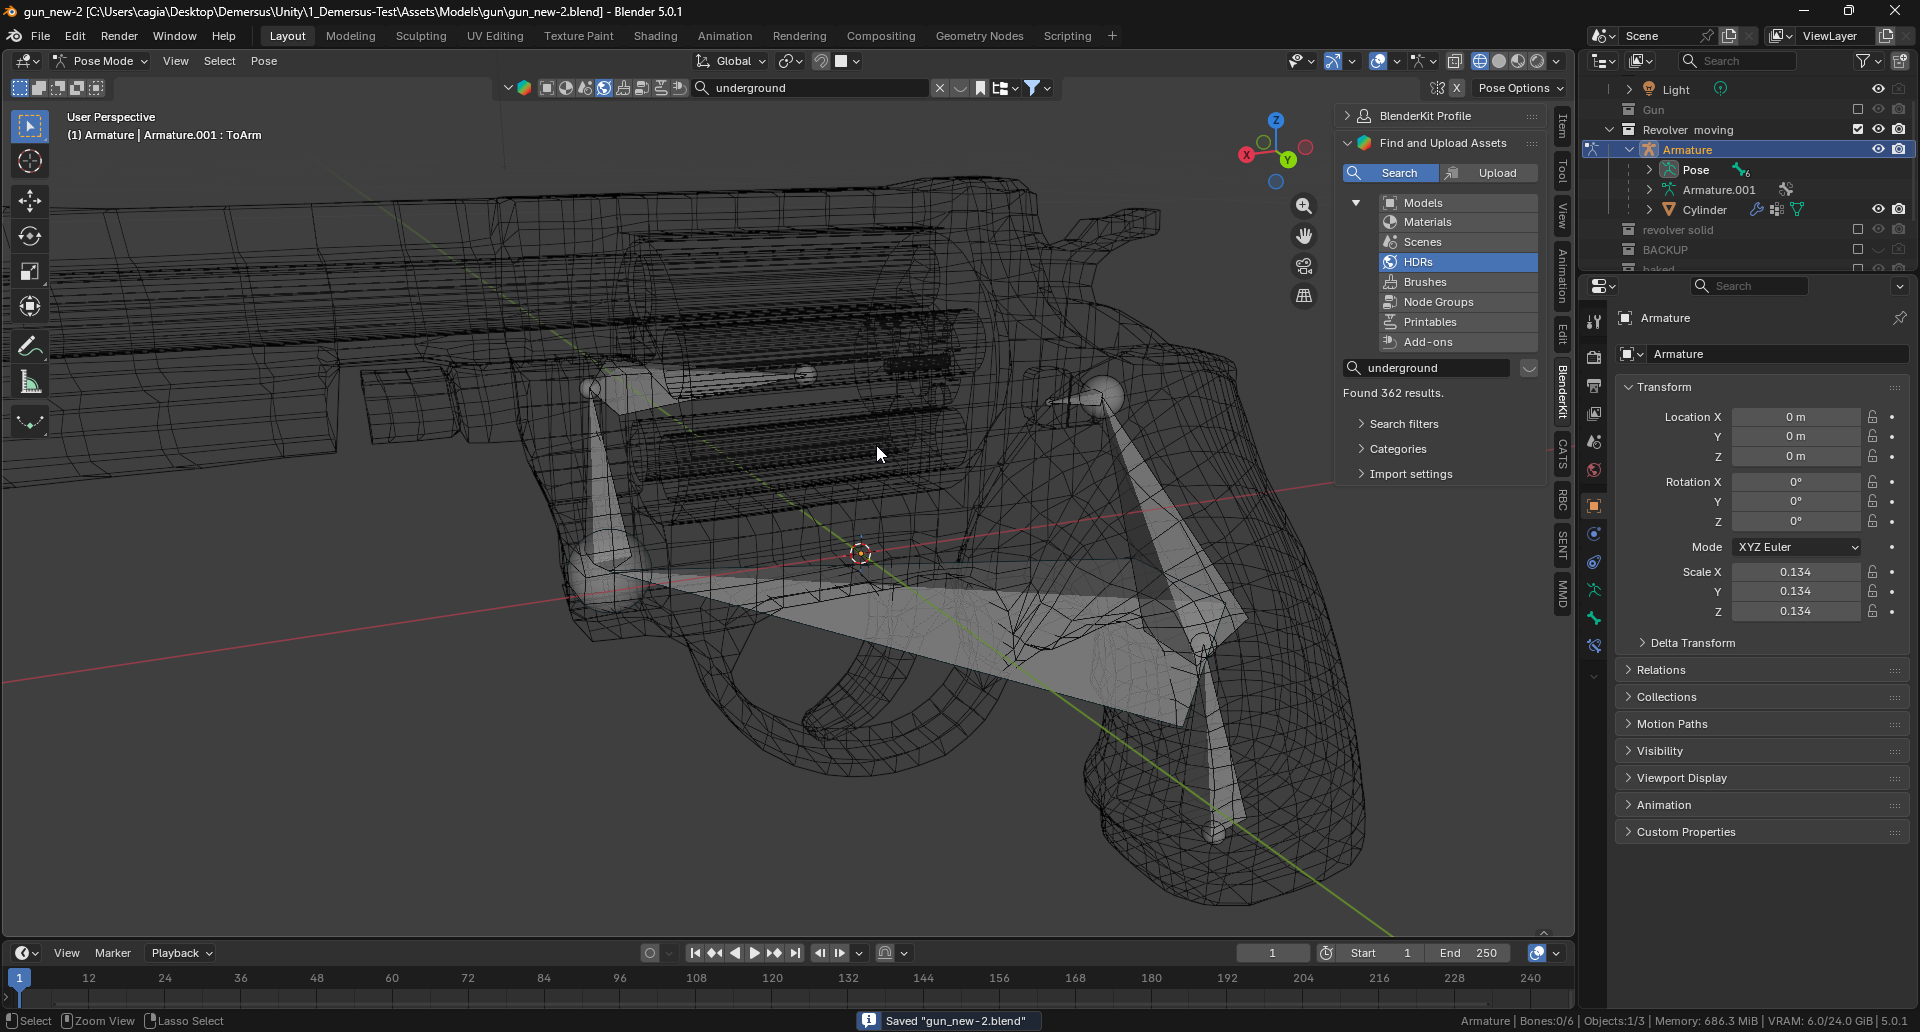
After exporting and checking in Unity however it turned out I did have to fix two things:
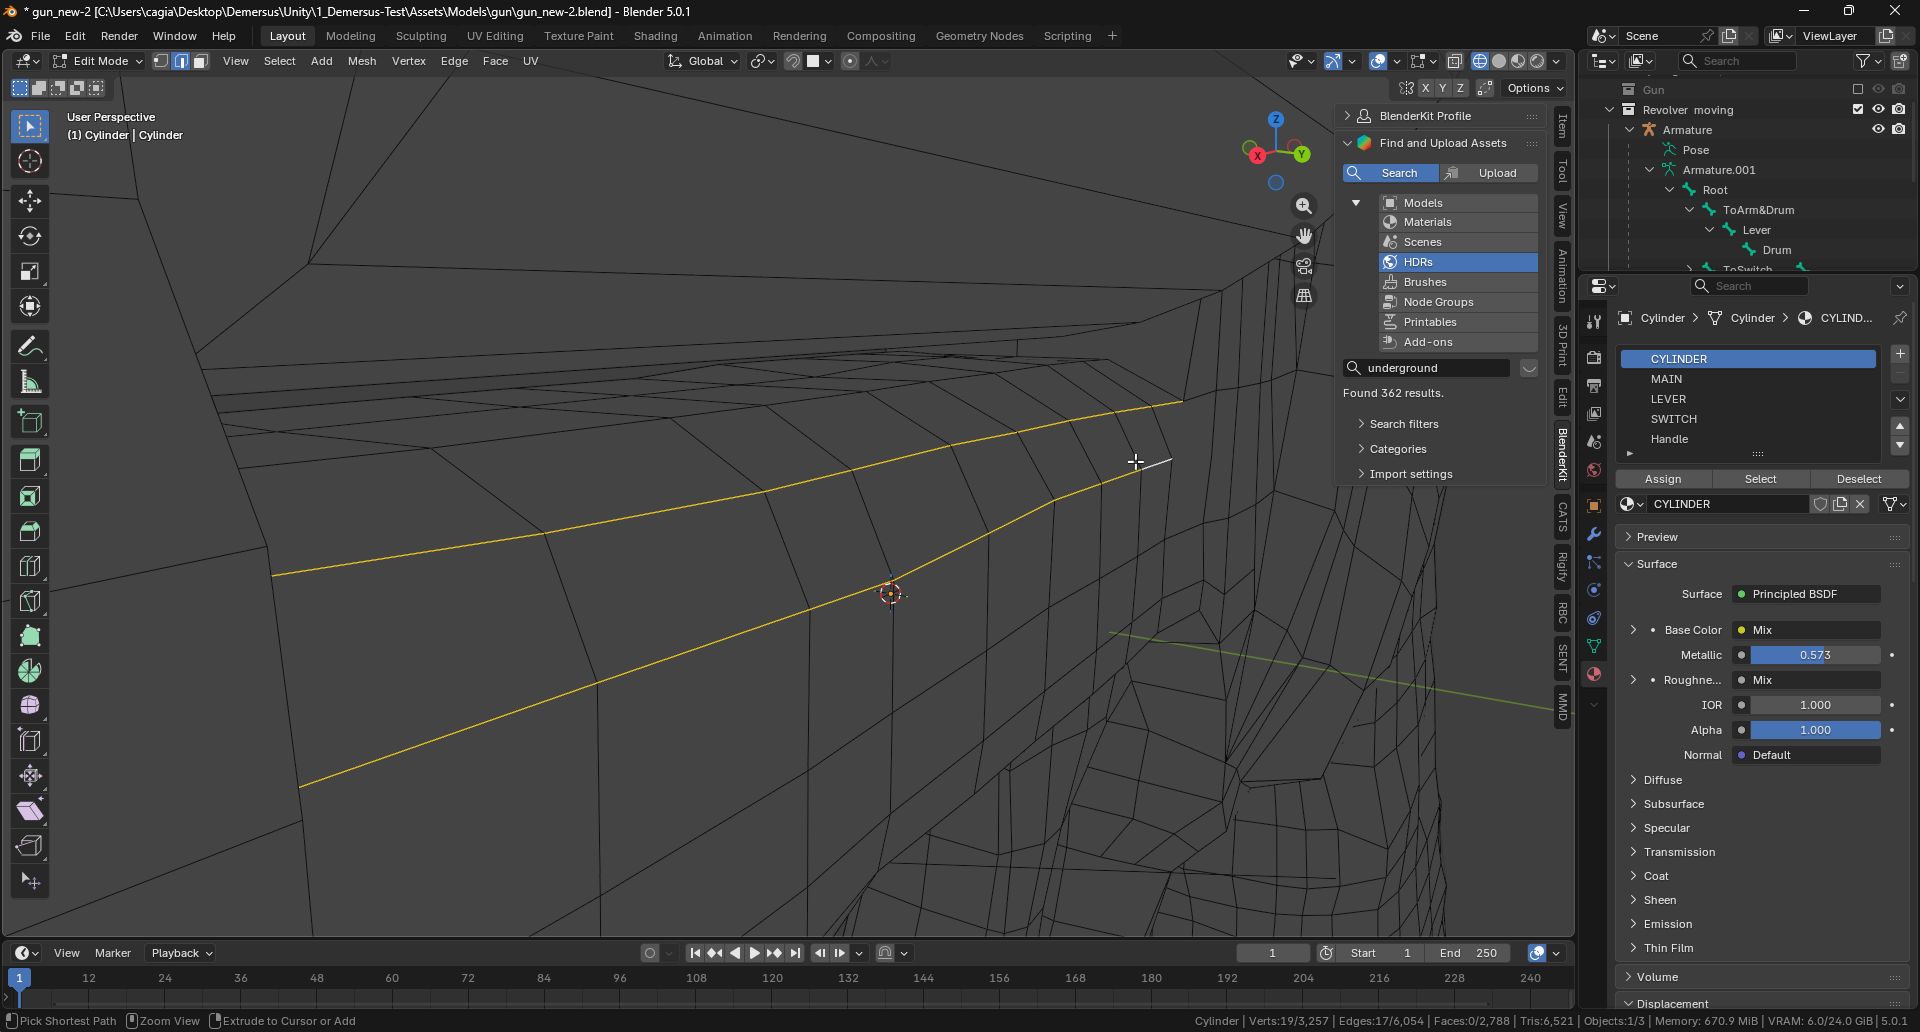
- The first being some geometry collisions of the cylinder:
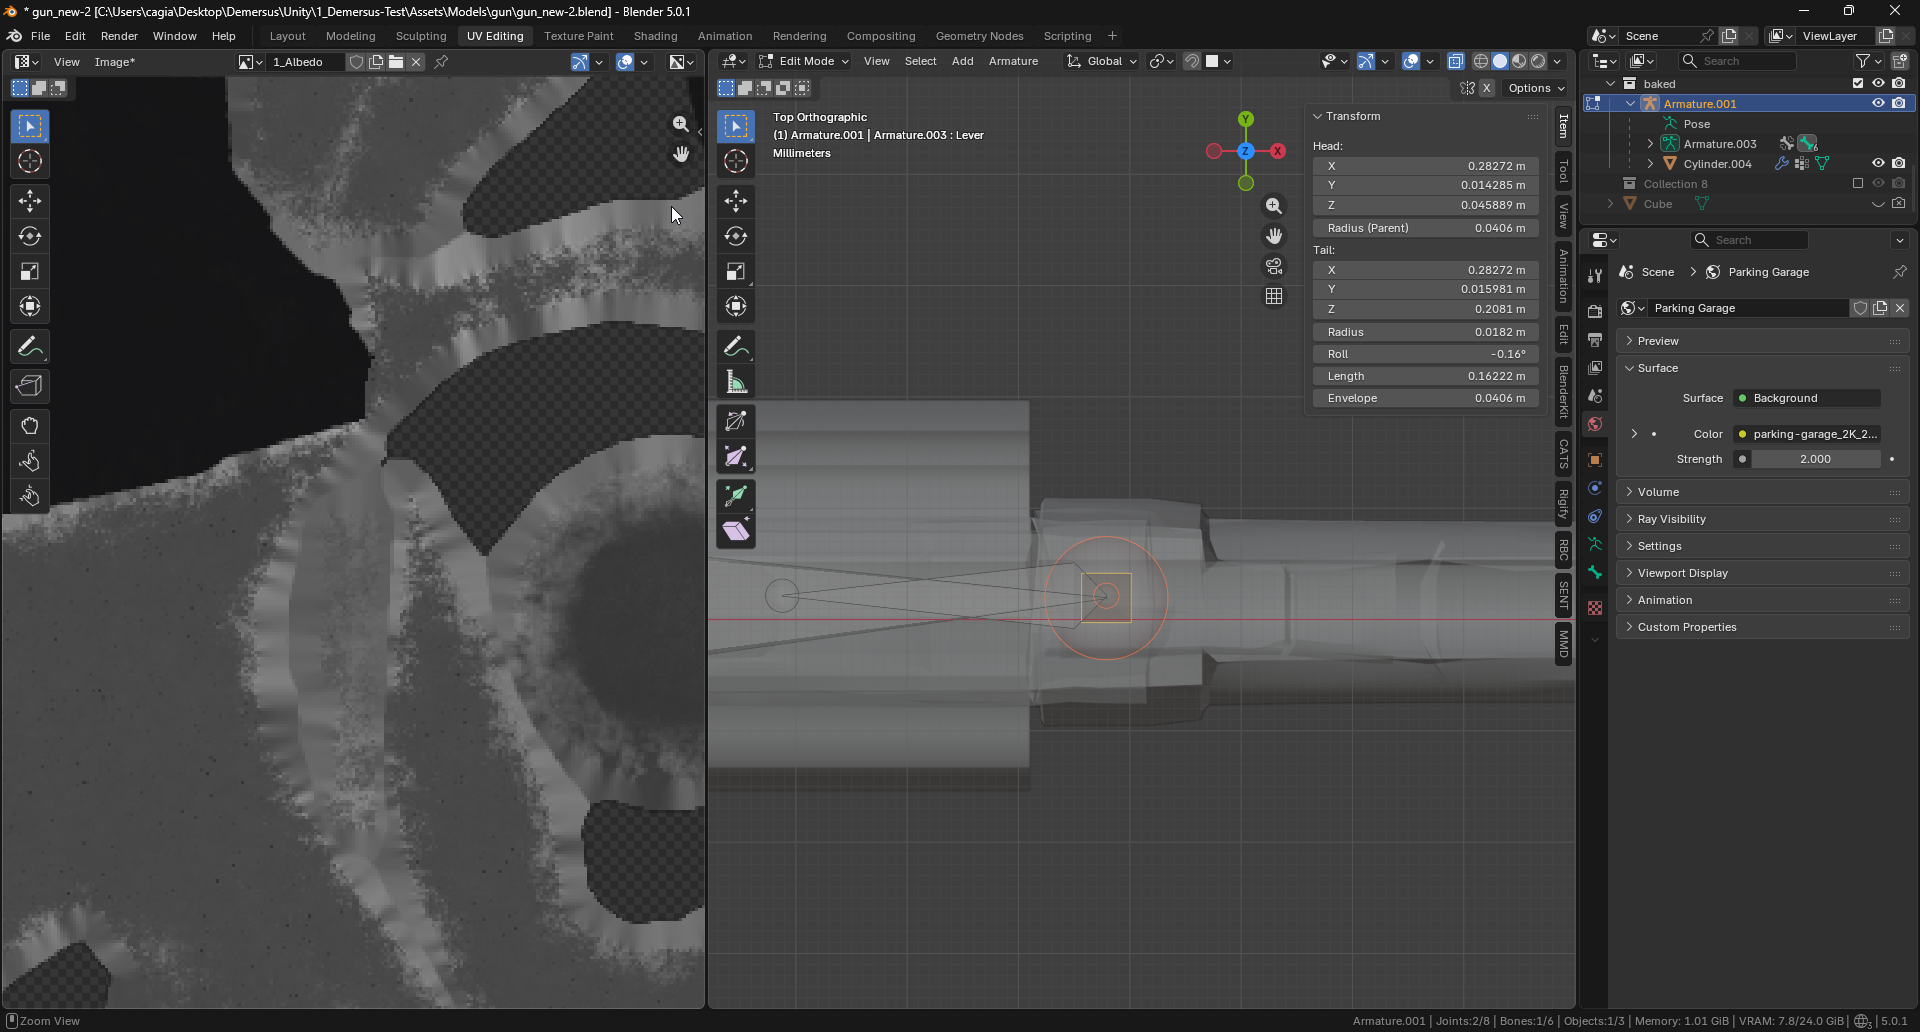
- The second one was a bit weirder as it involved rotations, the rotation (locked to one axis) on the arm bone was perfectly straight in Blender but completely crooked in Unity, funnily enough it turned out to be nothing serious and was just caused by a misalignment of the beginning and end of the bone:
Perfecting The Details
I was still noticing a few unsightly artifacts caused by the imperfect high to low poly bake (because of quite big geometry differences), so that was the final thing I took care of on the gun.
I started out by analysing everything to find the most problematic places on the model:
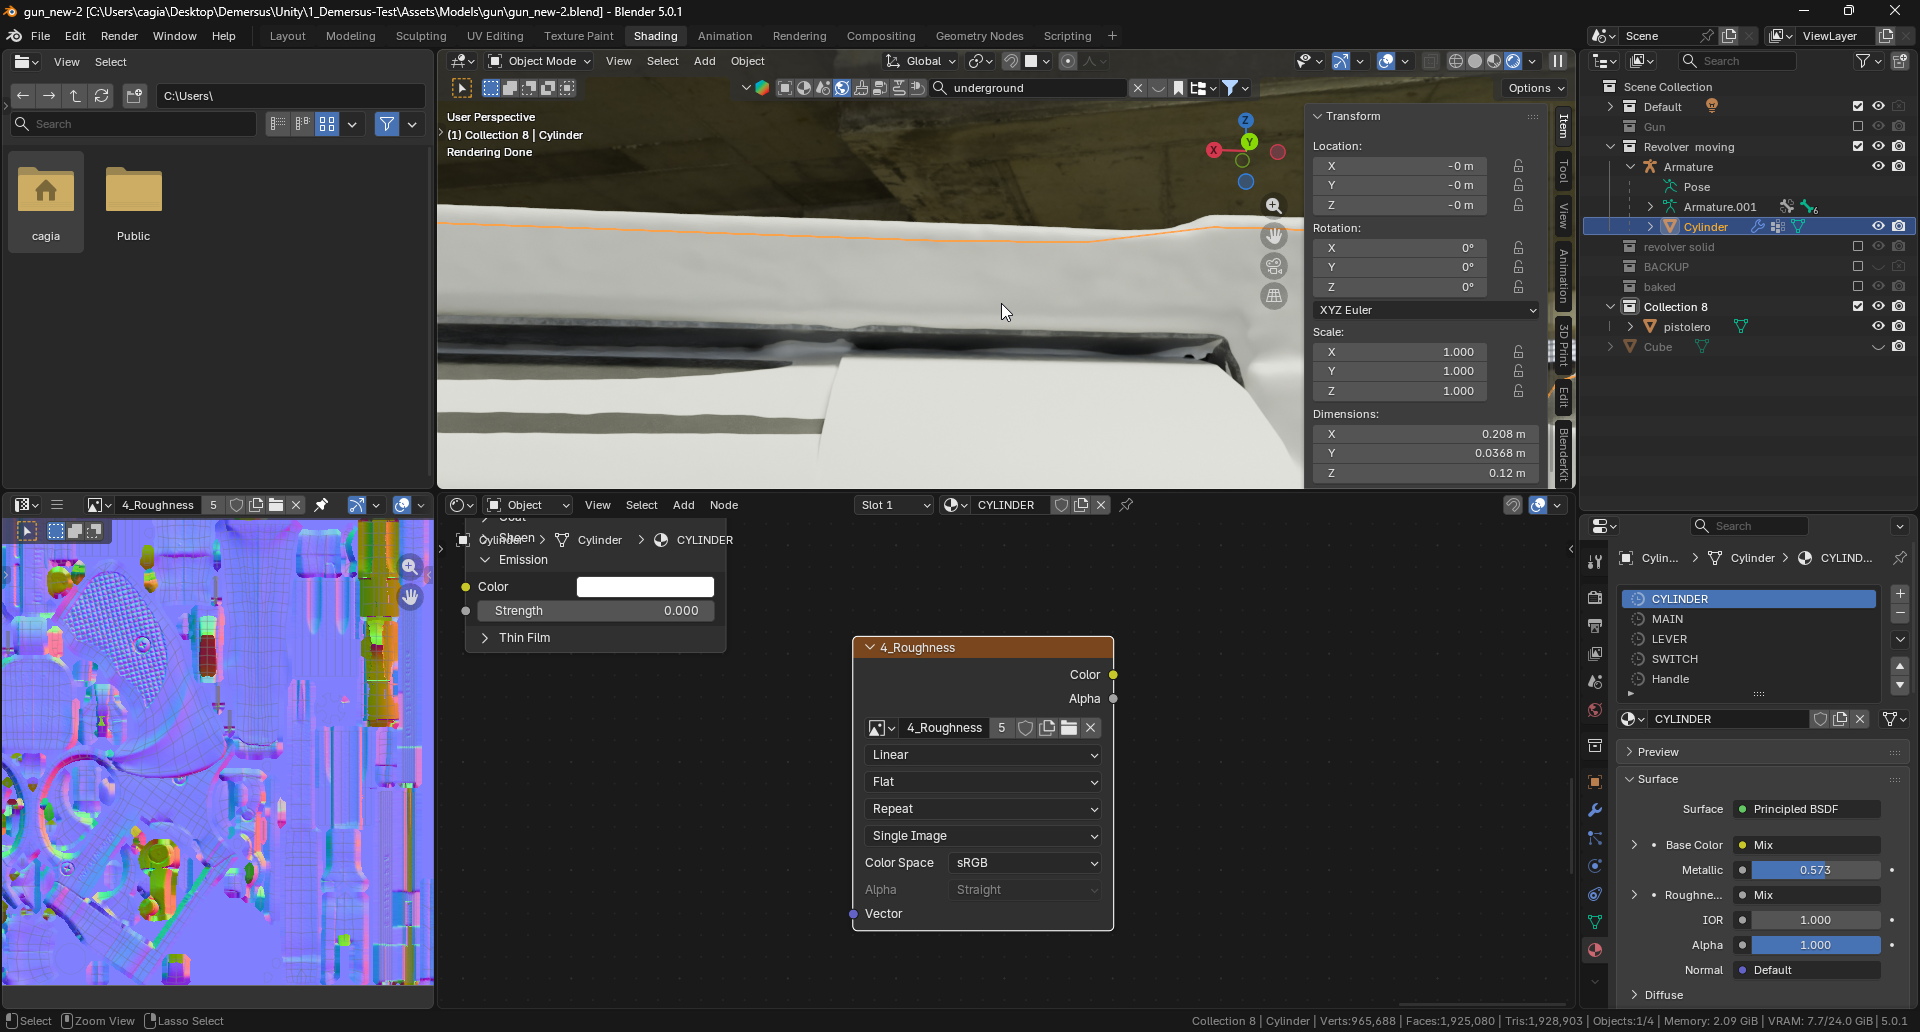
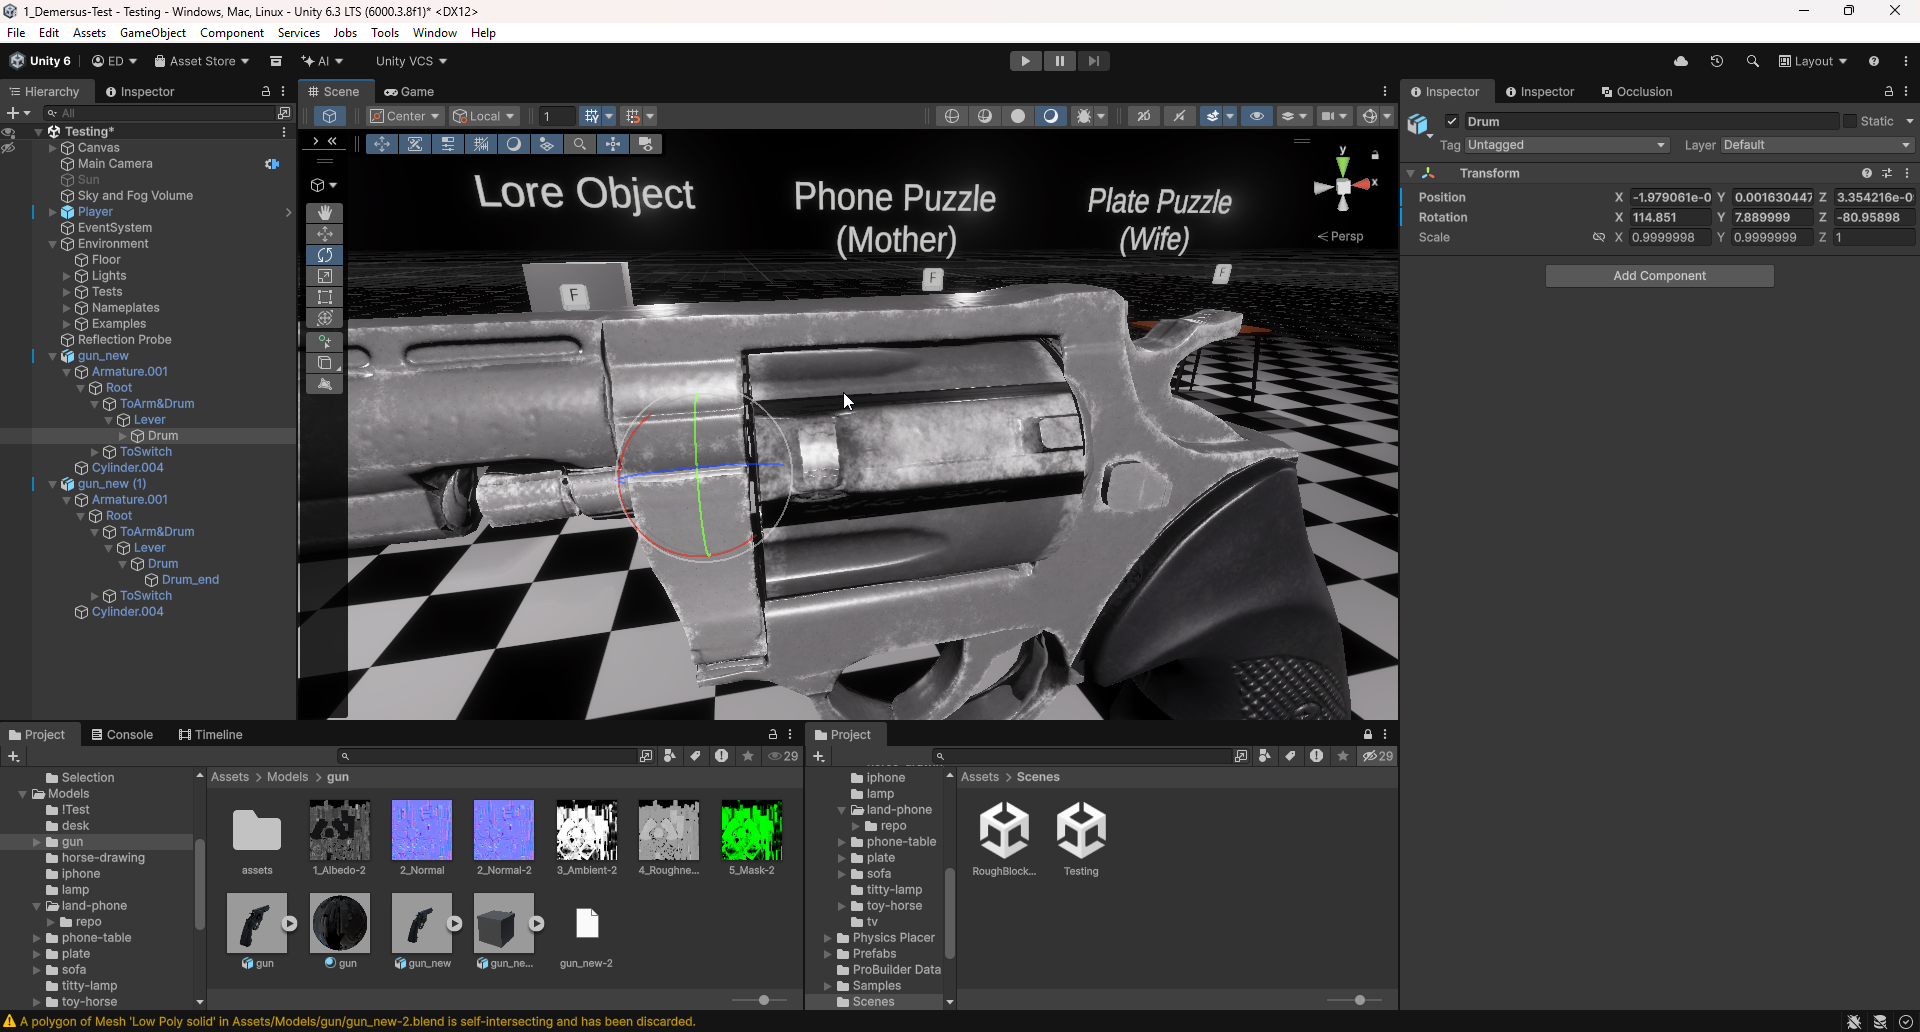
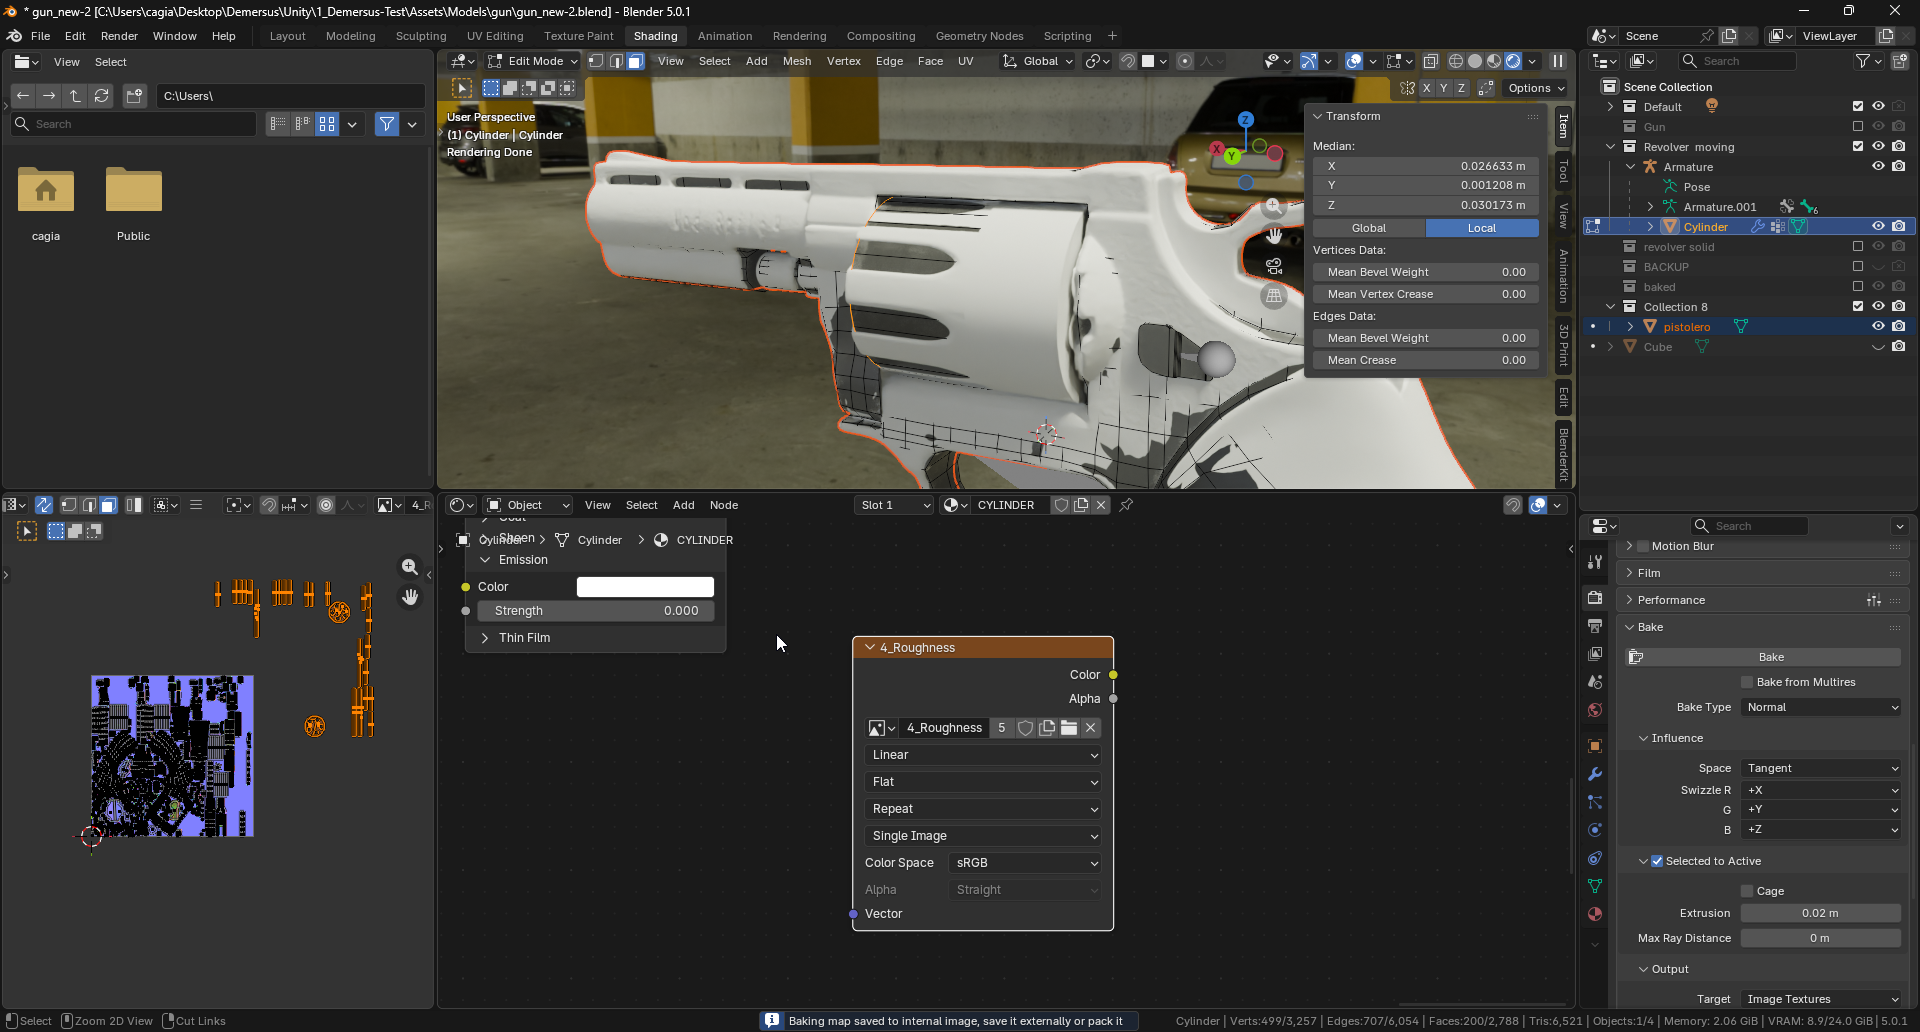
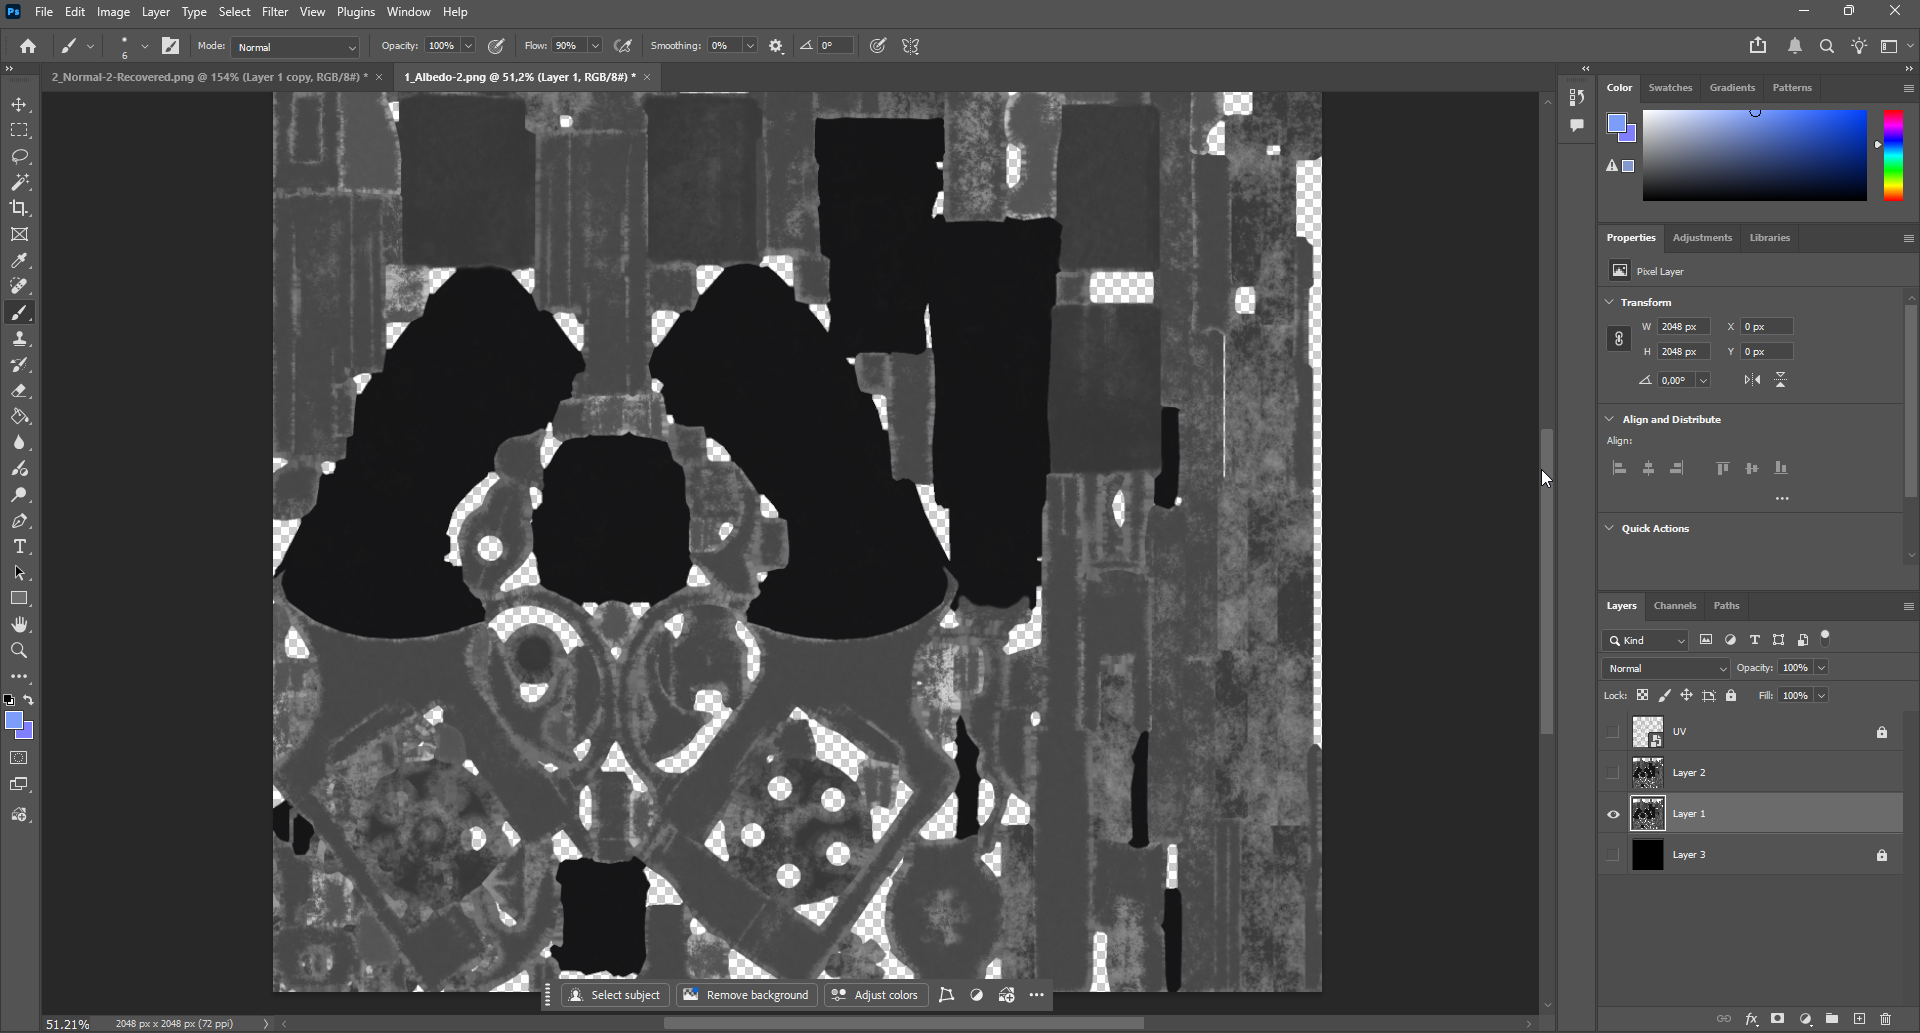
Next, I tried moving things around and tweaking to get a better bake but that ultimately didn’t do much, simply because of how blobby 3D scans are. Instead I had to first, move some UV islands, off the texture no not bake gibberish into them and second, spend some time manually tweaking the normal texture in Photoshop using my graphics tablet:
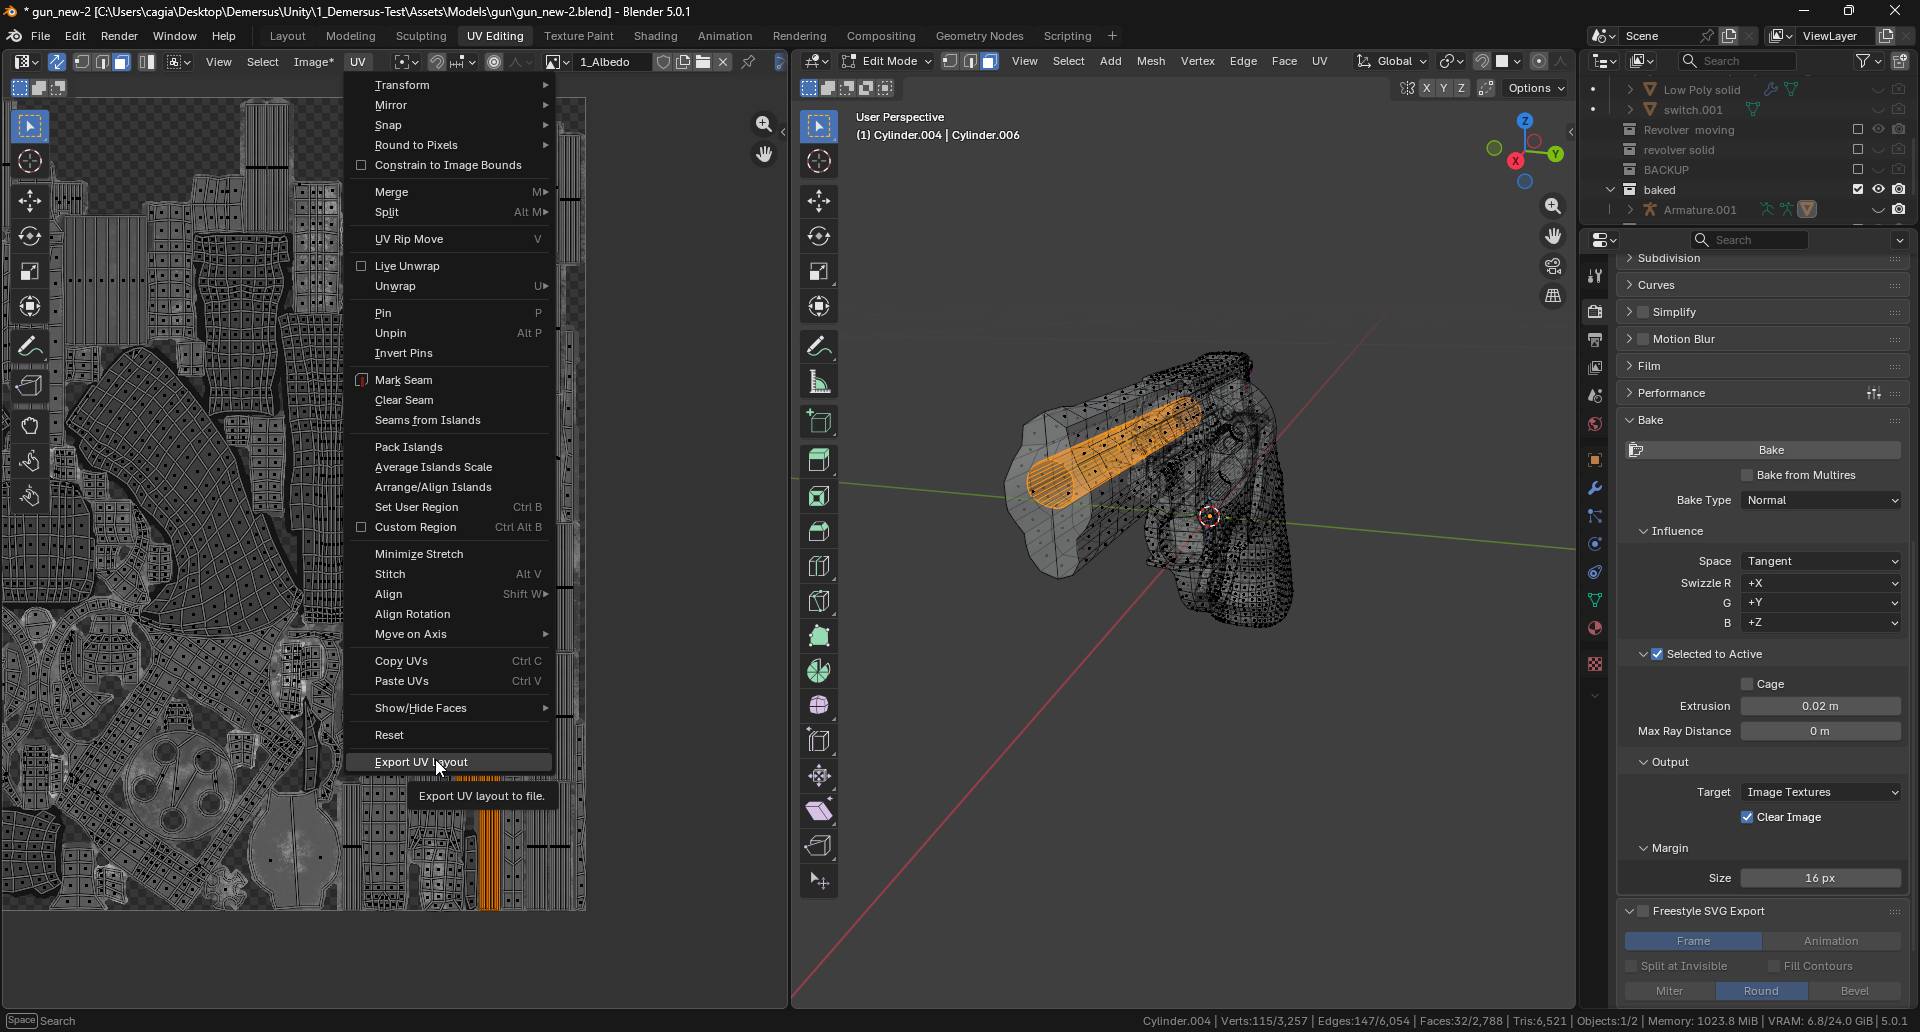
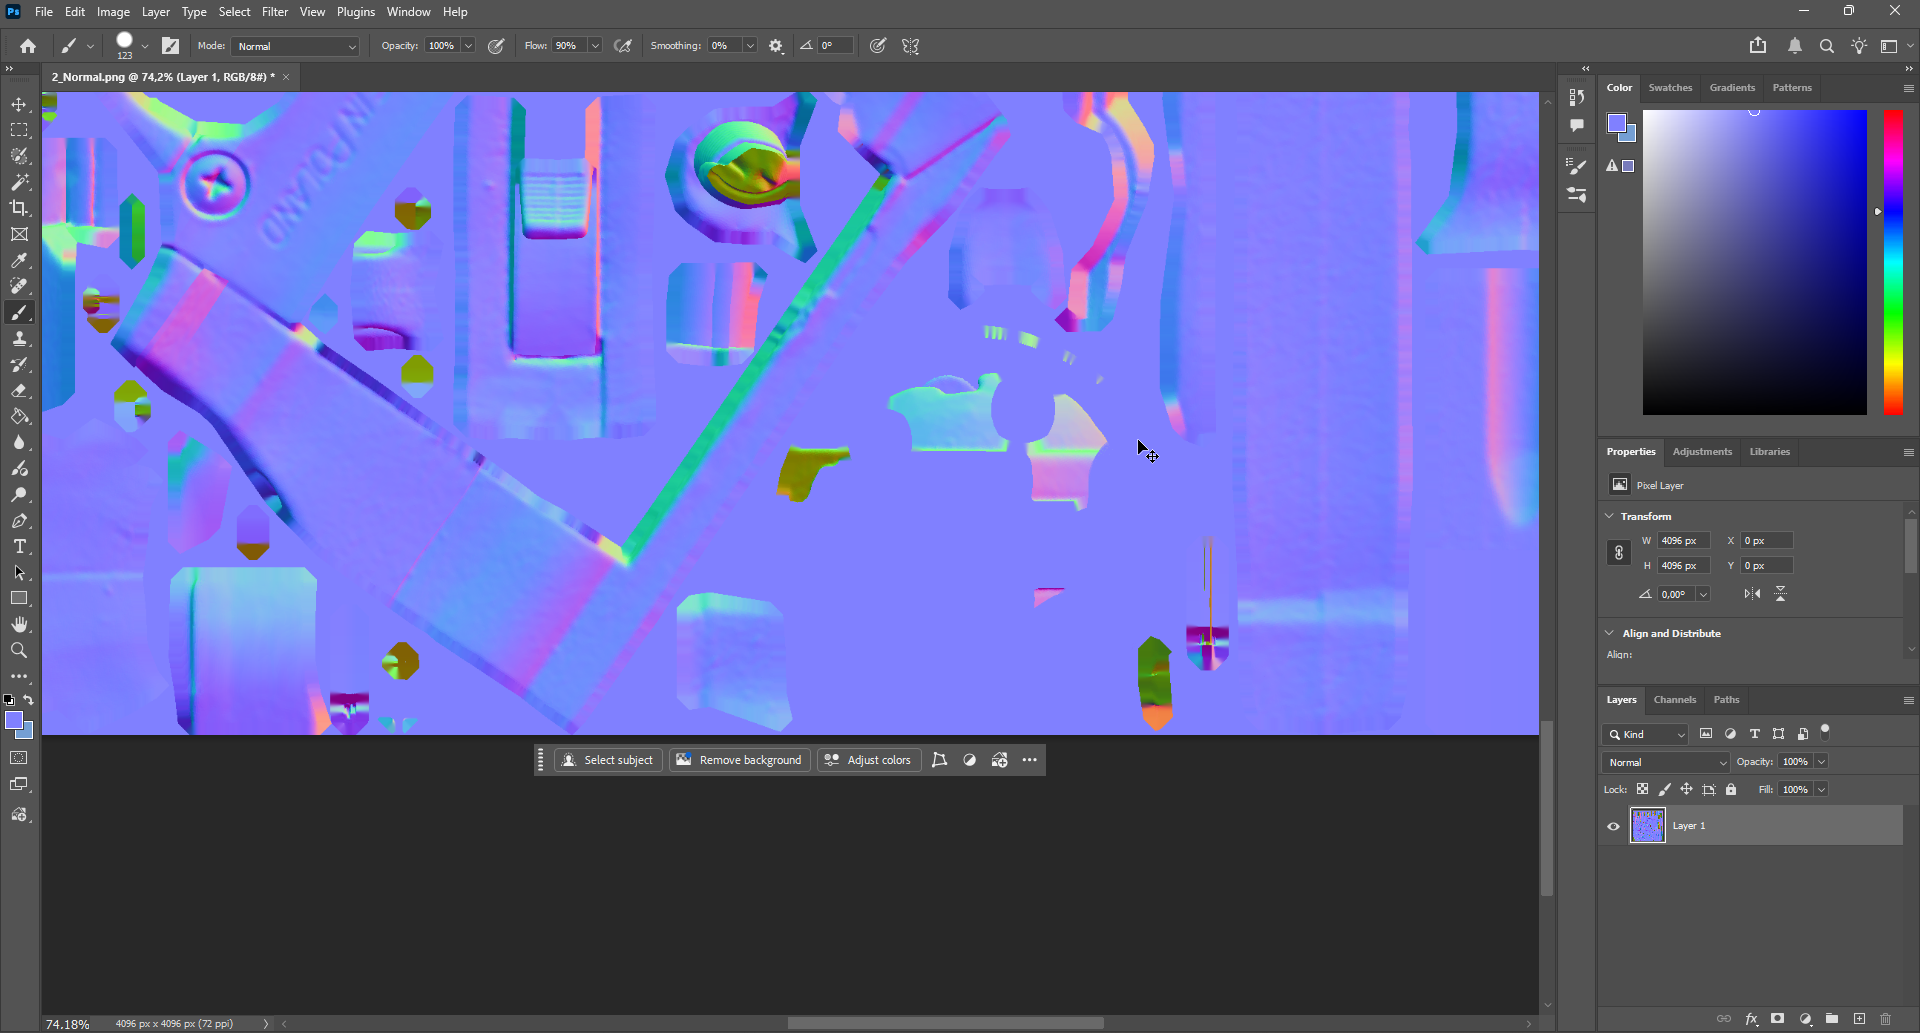
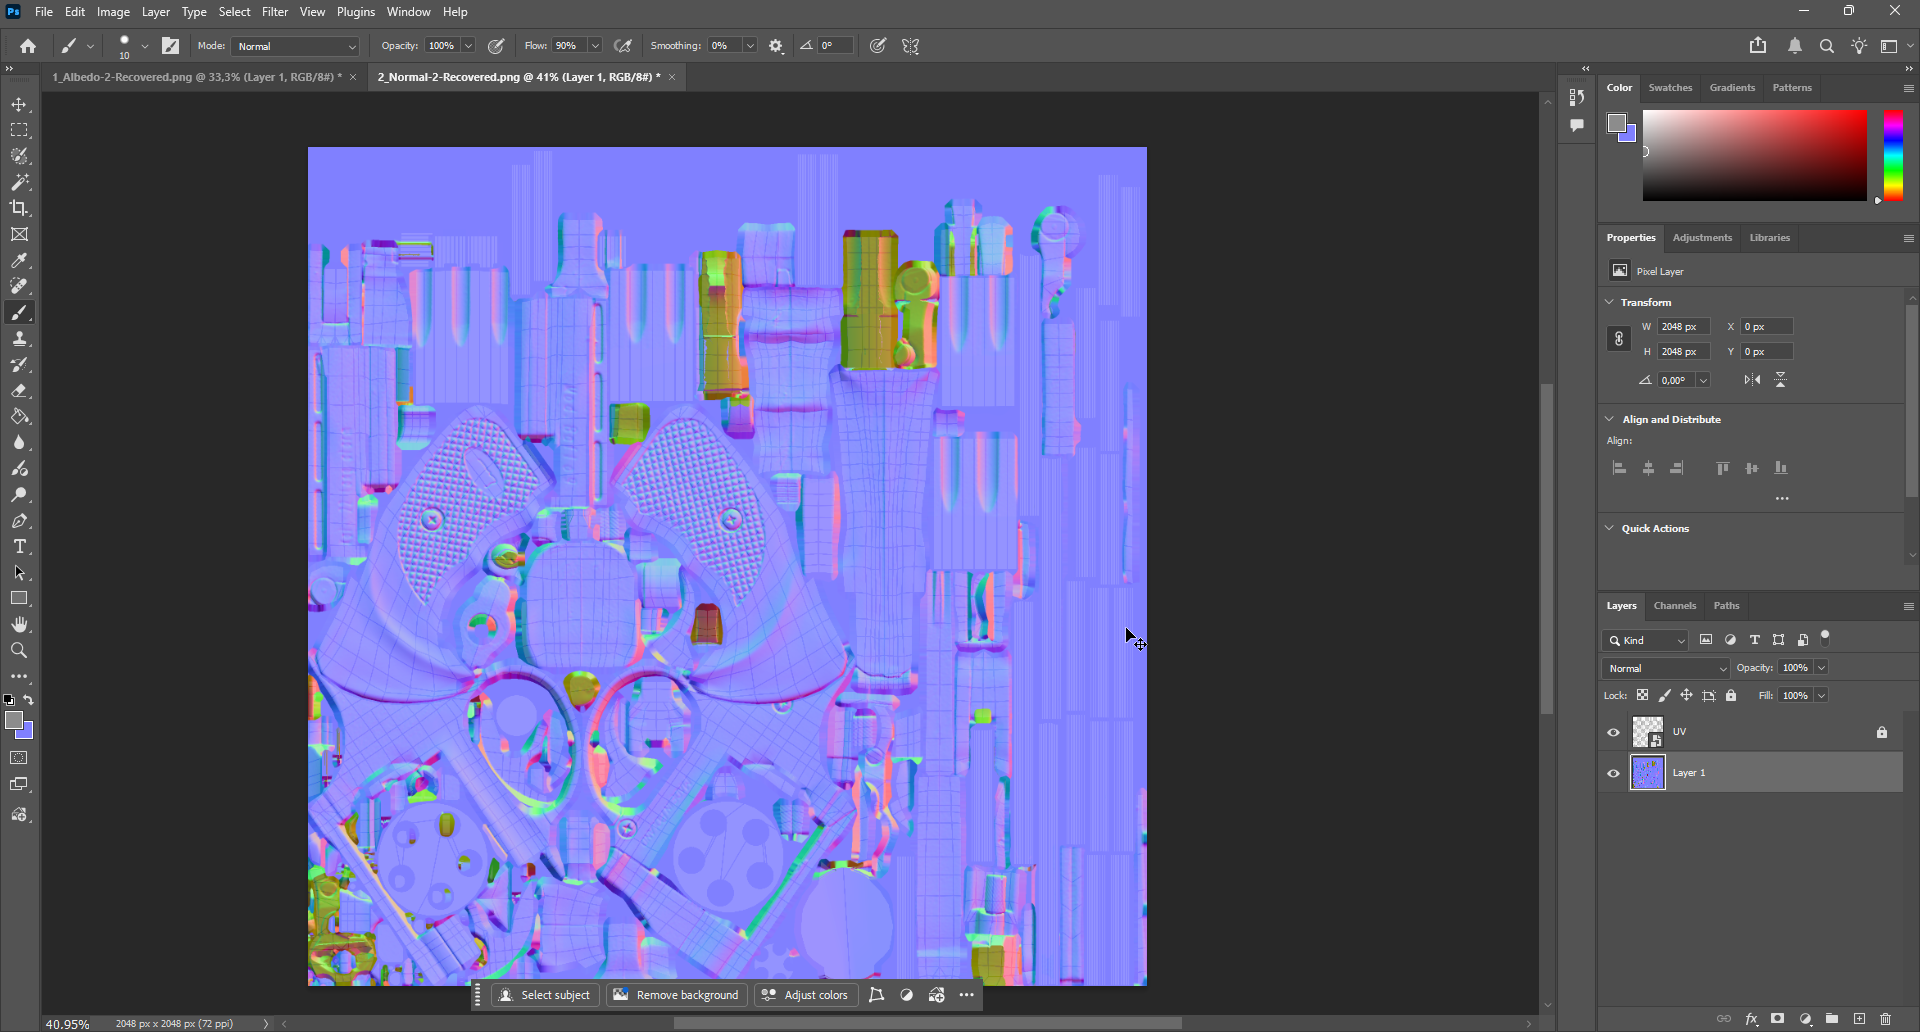
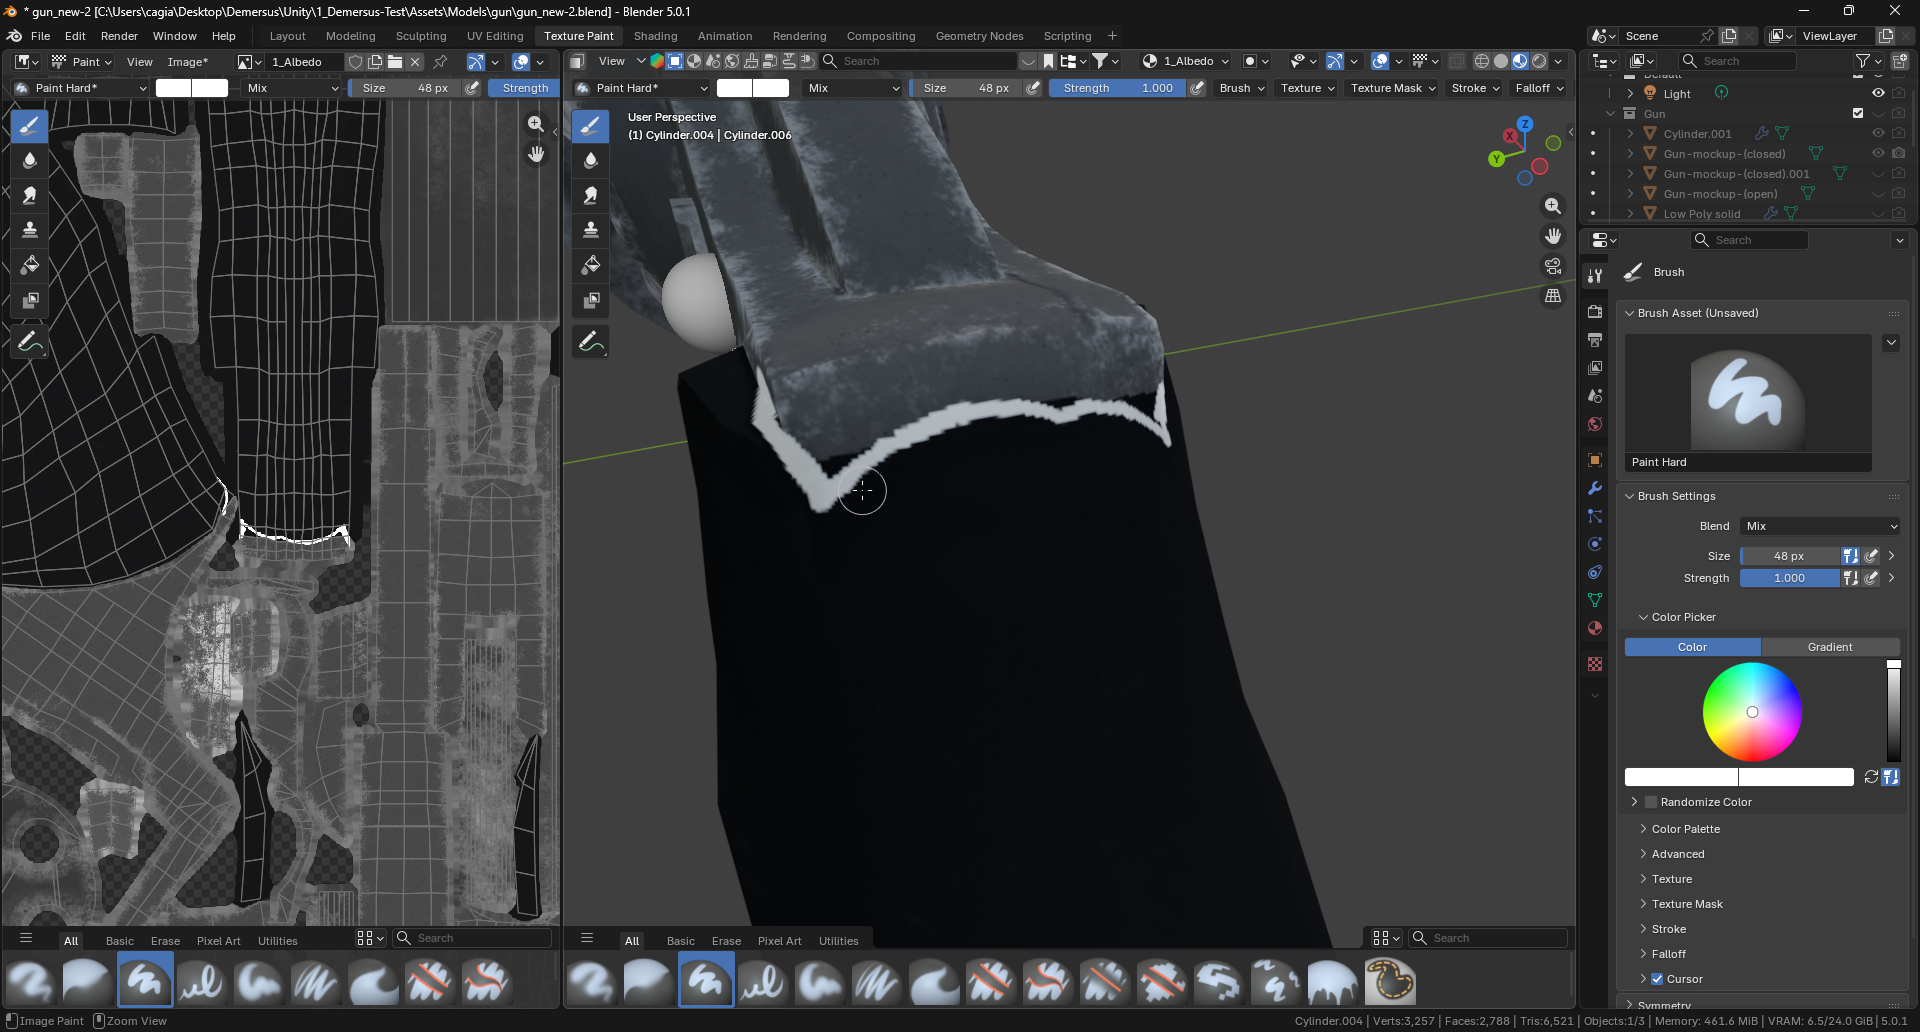
Lastly I fixed some tiny artifacts in the albedo texture using help from Blender’s Texture Paint feature to line things up better in Photoshop:
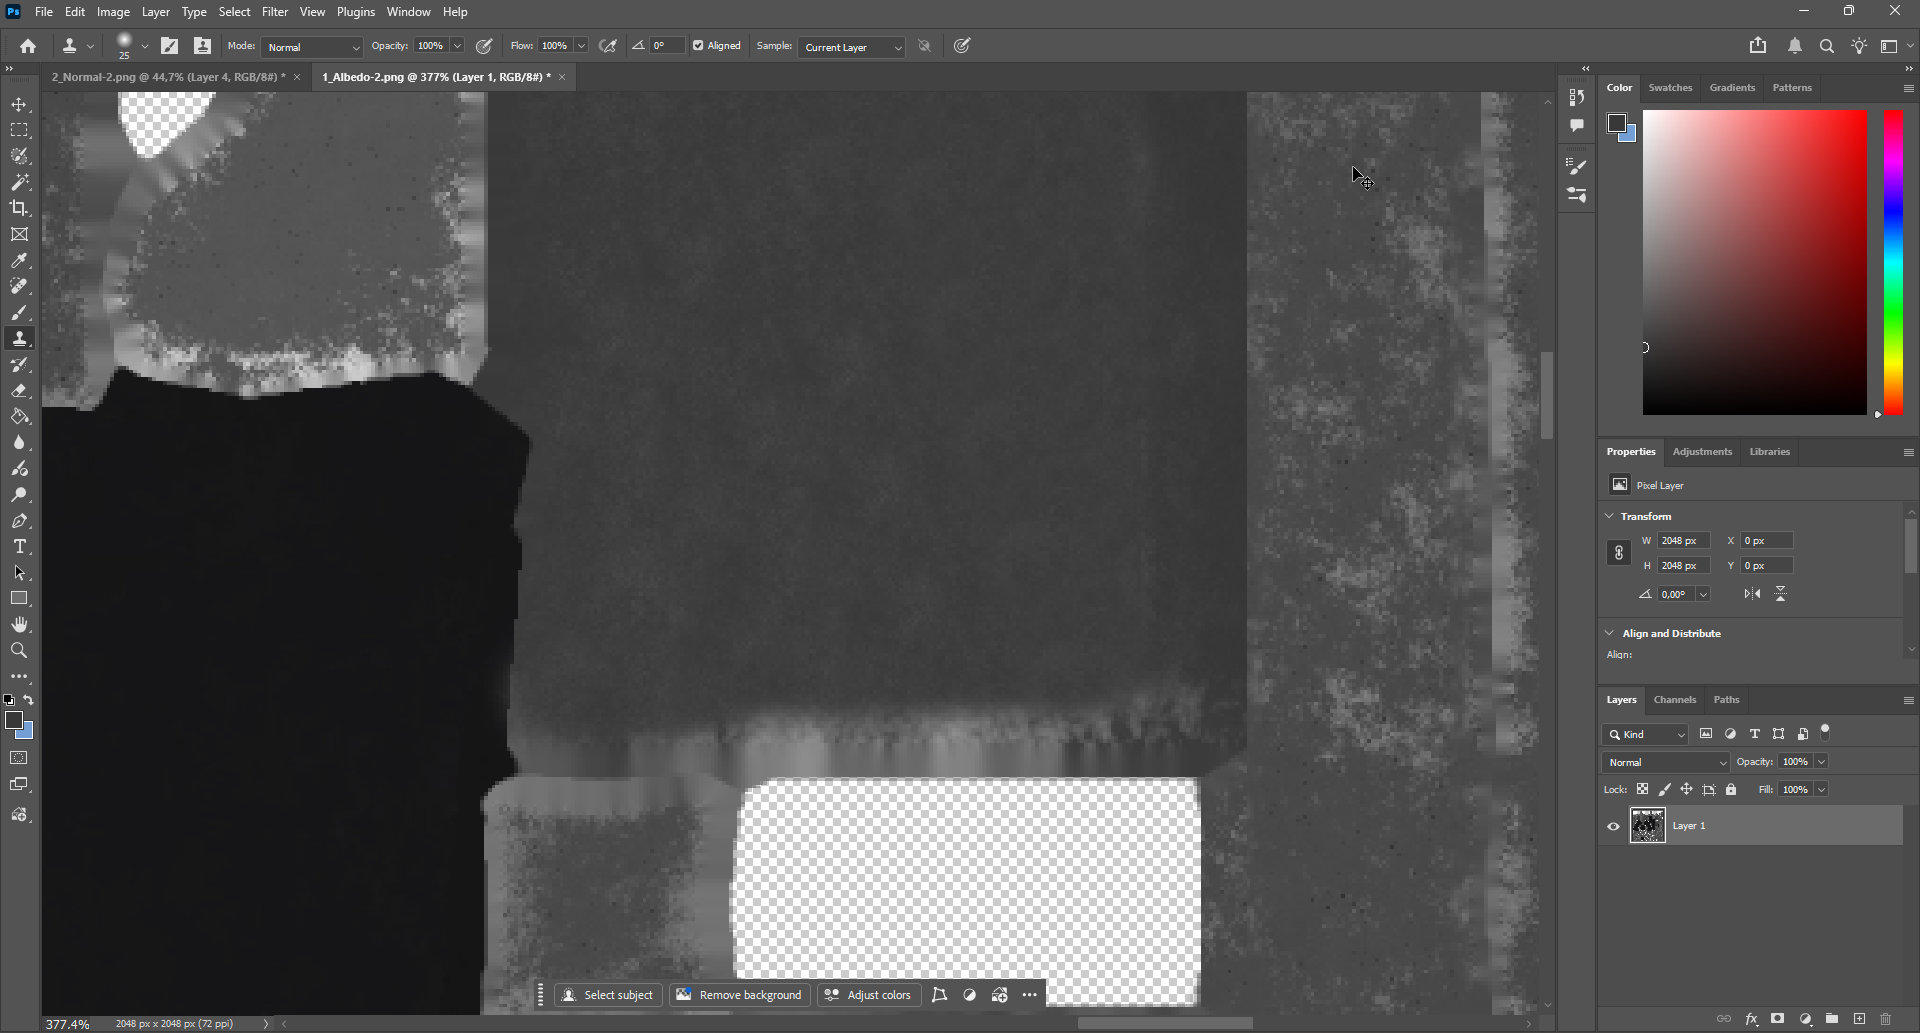
The Final Result
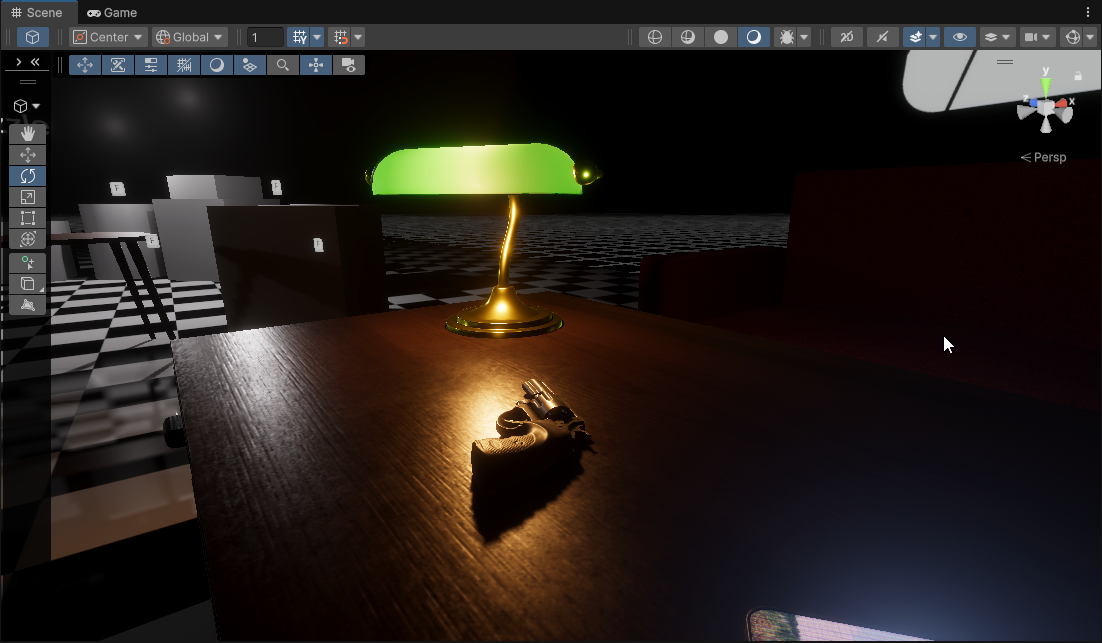
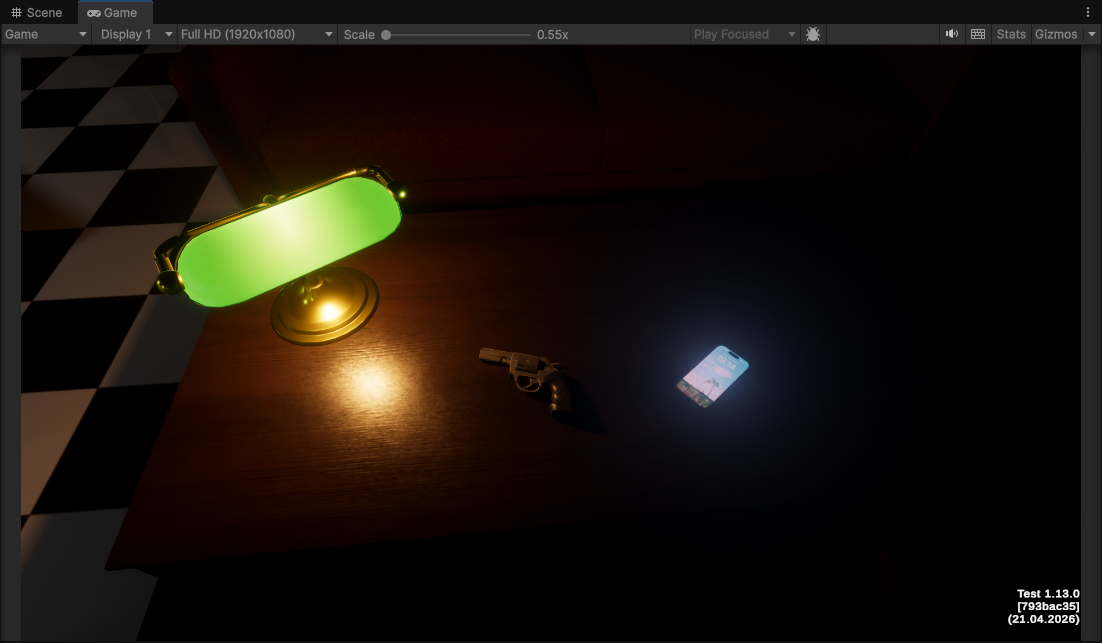
After all of this hard work, here is how the revolver turned out in Unity:
IRL Asset Pipeline
BlenderKit
What is It?
BlenderKit is an asset library add-on for Blender that gives you access to a huge set of materials, models, HDRIs, and so on, all directly inside Blender. For our purposes, what matters most is the material library, which has a huge variety of physically based materials that you can drag straight on to a mesh and then tweak to your liking through the Shading Editor.
Why We Use It?
As you might have noticed, we make most things in house, however textures were one of the things we just couldn’t make from scratch. The way we handle the IRL asset pipeline is not what you’d see in a AAA studio. I say that because we did try that first. Manual UV unwraps, Substance Painter the whole thing. Sadly, it just wasn’t working for us, maybe (most likely) it’s an issue of experience (again, this is our second video game and first 3D one), but the time investment was brutal and the results **heavily underwhelming.
So after a lot of trial and error, we ended up with a more streamlined and simple approach, and it’s not a corners-cut simple, it’s deliberately that way. The core idea is: use BlenderKit materials in Blender, tweak them via the Shading Editor, bake everything down to a texture atlases, then export everything and set it up in Unity.
So, without further ado, here is our IRL asset creation pipeline!
1. Creating the Topology
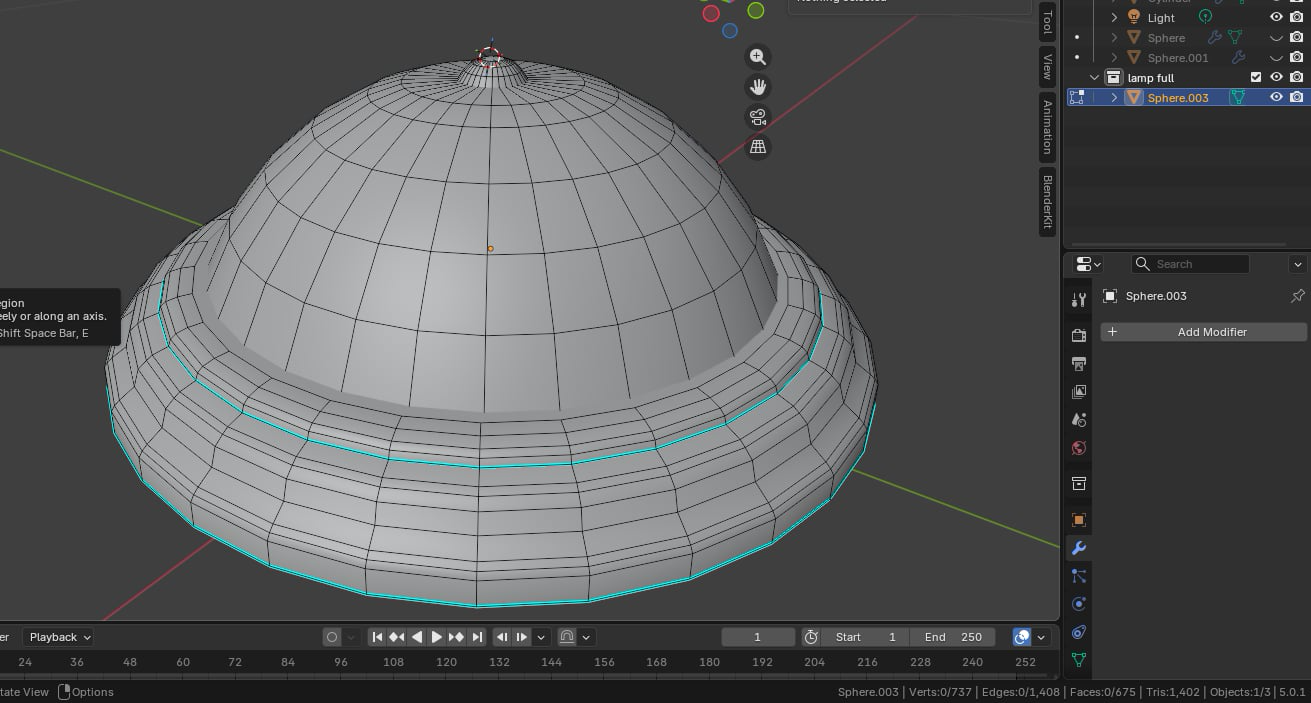
The entire process starts out in Blender. Unlike the Clay Asset Pipeline , ‘IRL’ assets are modeled in a more traditionally way, simply using standard Blender tools and modifiers. Because these assets are primarily used in cutscenes (and sparingly throughout gameplay), there is a bit more leeway on polygon count, though it’s still required to keep things under control (Shade Auto Smooth helps a lot with smoothing things out with virtually zero cost as well)!
Remember to create backups of your work using Collections before applying modifiers and other destructive steps!
- Use Blender’s modifiers like
Array,Mirrorand others to your advantage in order to simplify the modeling process for yourself. Right from the start make sure you’re creating simple, correct and high enough poly count topology for good detail, but low enough so performance doesn’t get hit too hard. However, (outside of a few cases) ‘IRL’ assets will be pretty much exclusively used in cutscenes, so performance isn’t as much of a priority (there is definitely a bit more leeway here):
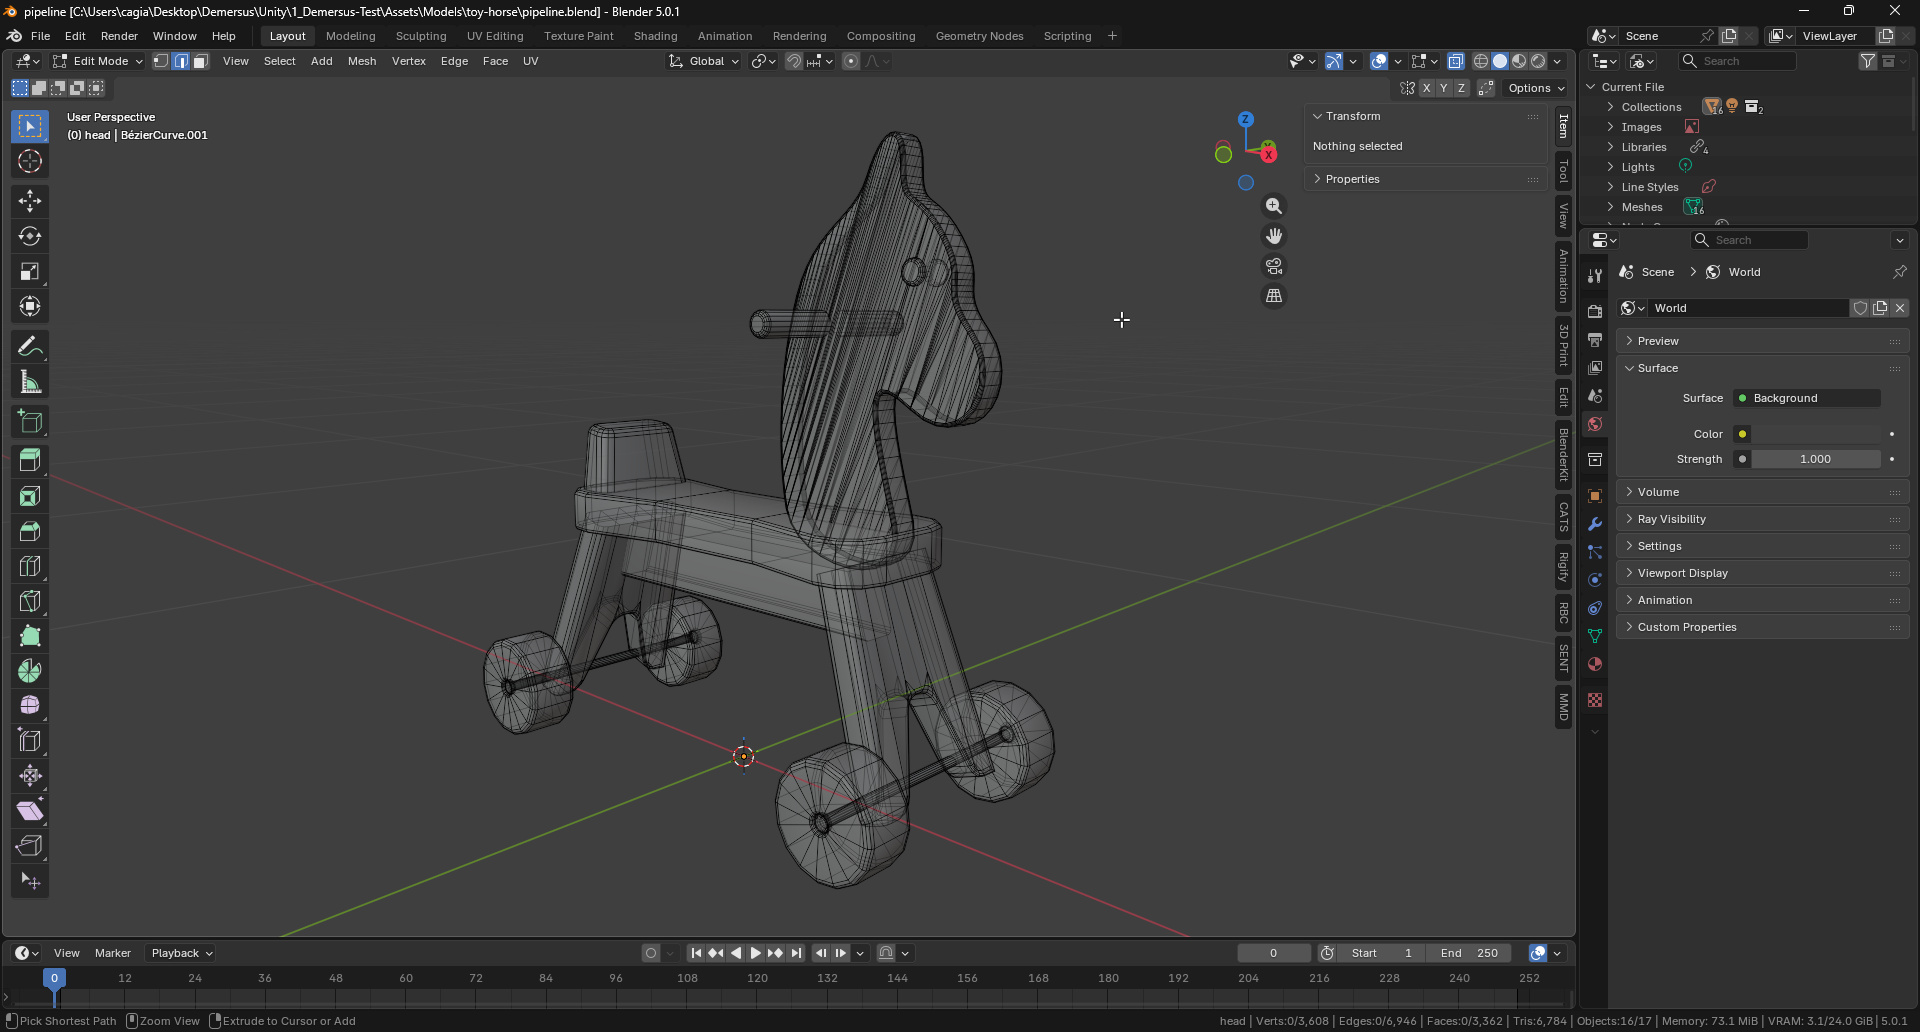
2. Clean Up
Before applying materials it’s important to make sure the mesh is in a clean state. Issues with such things (if left untreated) will pile up later on and become more visible and harder to deal with further down the pipeline, so it’s important to be thorough at this stage.
To easily check the normals of a model, enable Face Orientation under Viewport Overlays in the top right corner.
- Before proceeding, check and fix any issues with:
- Topology (use x-ray view and inspect the model in detail)
- Duplicate vertices / edges etc. (Merge by Distance)
- Normals (flip them if there are any that are wrong)
- Surface artifacts (glitching faces / garbled surfaces and so on)
- Duplicate your work from the previous step into a separate collection as a ‘backup’.
- Apply Shade Auto Smooth or Shade Smooth (depending on the situation, I found myself using the first option most) on all meshes in your project, to give a lower poly model a ‘fake’ more detailed / smoother look (remember that you can also change the Shade Auto Smooth angle in the modifier settings to get a better result)!
- Apply all modifiers on all meshes.
- For each mesh, perform
Apply All Transformsvia Ctrl + A (this makes it so your UV projections and height maps behave predictably in the next steps).
3. UV Unwrapping & Prep
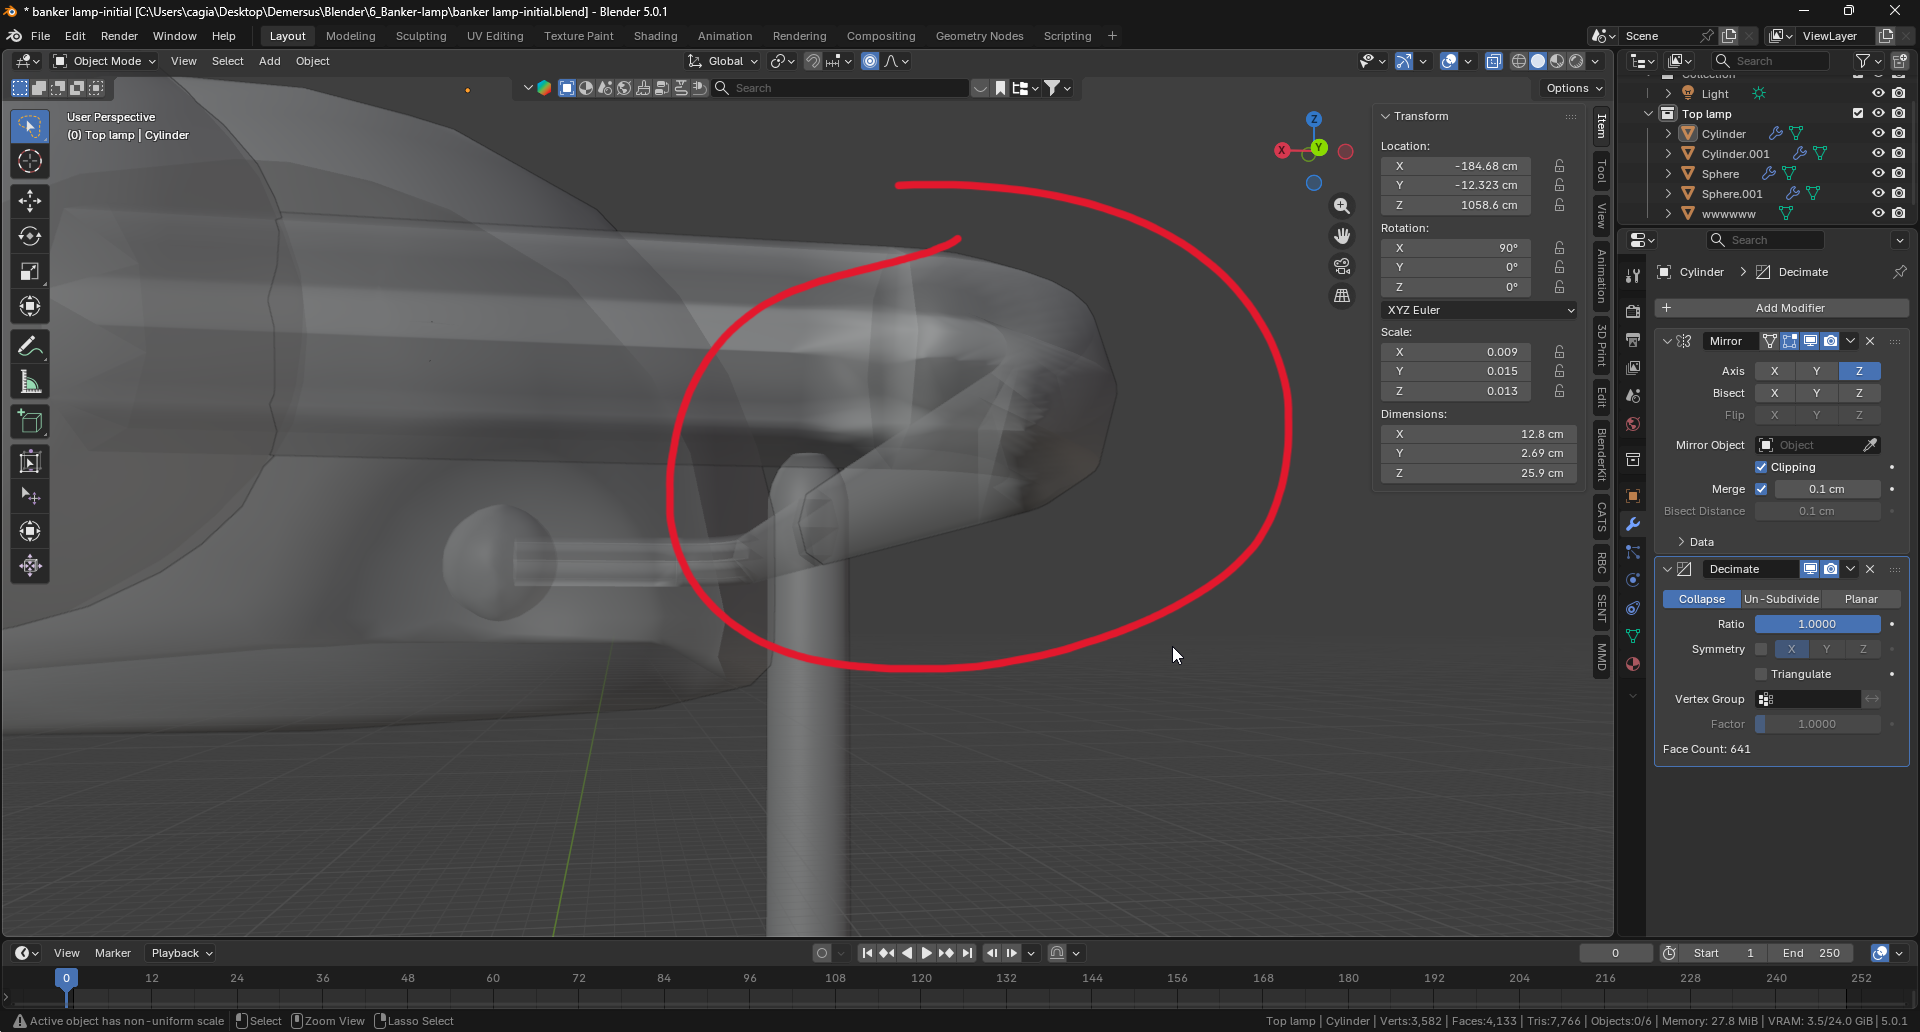
After everything is cleaned up, it’s time to set up the UVs. This step is very important as it defines how the materials we’ll be baking in the next steps get mapped on to the geometry (how they’ll look on the model). For simplification and time cost benefit, we’re relying on Smart UV Unwrap for this (I’m aware that this is not the best way to go about it, but it simply makes sense for us in this situation).
If you change the topology of a UV unpacked mesh, you will have to unwrap again to make sure everything is mapped right. Of course you’ll also have to go through the entire chain of re-baking, re-creating the export mesh and so on as everything will still be based on the old UVs, so it will simply not apply correctly!
The below described approach can sometimes cause slightly blurry textures after importing into Unity, this is most likely down to the sizing of the UV islands. You can brute force it by creating 8K textures instead, but that’s obviously not the right approach, it’s just something we have to deal with as we’re not doing manual UV unwraps.
A more manual approach to UV unwrapping should be done instead of Smart UV Project as it can offers higher quality results and gives more control, however because of the manpower and time constraints we are unable to do that!
- Select all meshes.
- Perform UV projection by going into Edit Mode, pressing A, pressing
U and clicking
Smart UV Project>Unwrap. - In the UV Editor, do UV >
Average Island ScaleandPack Islandswith the following settings:
- Rotation:
OFF - Margin:
0.004
However, the Margin setting does depends on a few factors and simply has to be tested on
a per object basis. If you’re having texture spillage issues, check both the bake margins
and this setting. The most common values that worked for me are respectively 0.004 and
0.008. For example I had to bake the toy horse model using 0.008 and 2px on the bake.
4. Setting Up Materials
You can have multiple bodies, use different materials / slots, whatever, it doesn’t really matter as the baking process should take care of it all the same regardless, just make sure you follow everything properly or things won’t get included in the atlas.
For every mesh, every time you apply a BlenderKit material, make sure to remove the automap UV map (found in the green triangle menu). It’s the automatic projection mapping caused by BlenderKit and will cause issues we’ve already done the UV unwrapping step previously!
- Apply the materials you’d like to the model (either using BlenderKit or self made from scratch).
- Dial in the materials using parameters, the coordinate mapping node (size, scale, rotation) or the whole the node setup itself, using the Shading Editor to achieve the desired look.
- (optional but recommended) Here is where you can also do a bit of cleanup, unfortunately,
BlenderKit leaves a lot of trash in the project (left over materials, thumbnail images
and so on). You can go into the
Blender Fileview in the right inspector window, use the shield icon on the right to ‘guard’ the materials you’re actually using from getting deleted, and slowly but surely remove everything you don’t need that’s dirtying up the project.
5. Baking the Textures
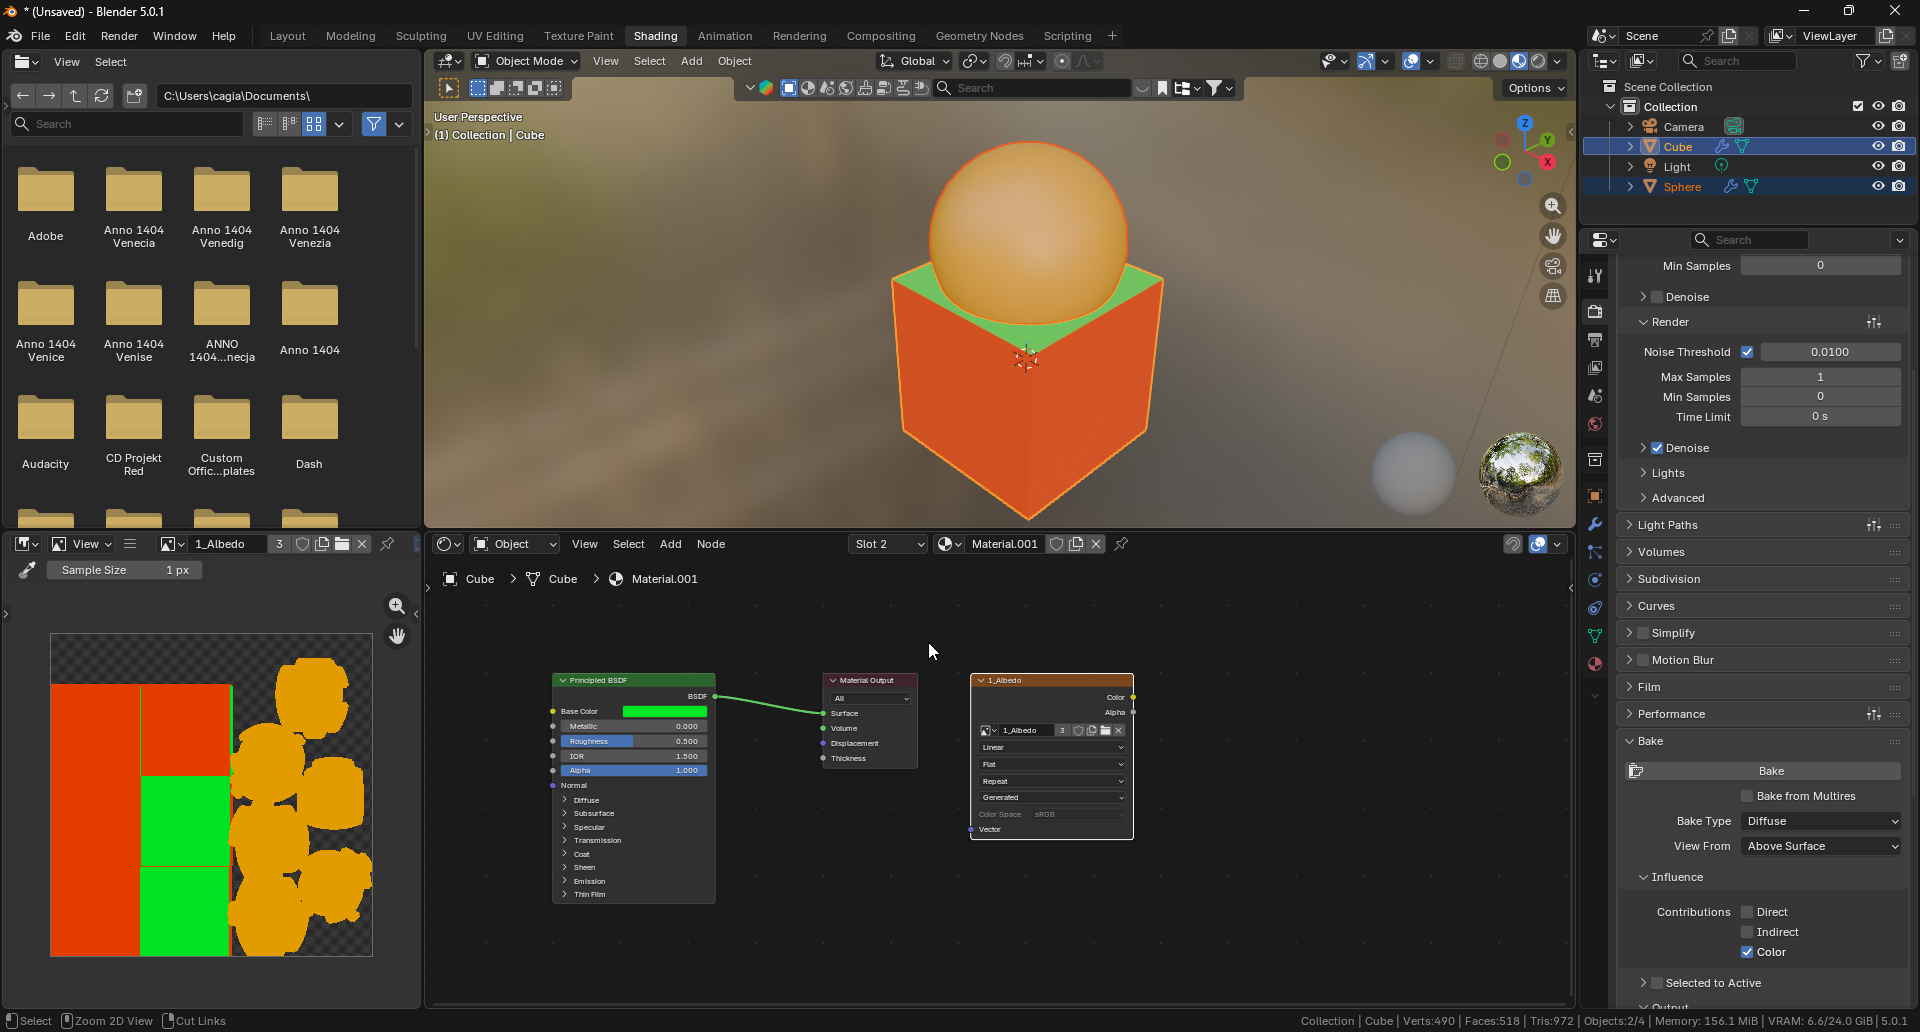
This is the step where all of the materials get baked down into texture atlases that we later export and use in Unity. We bake everything (albedo, normal, ambient occlusion, roughness and so on) down to a single image atlas per type, keeping things clean and efficient to work with in engine.
Something really important to keep in mind is that this step can vary wildly depending on the type and complexity of both the model and materials used on it. So make sure you have a solid understanding of what the model is / how it’s supposed to be used and how the materials are made / constructed so you know how to bake them correctly, before diving in. That knowledge will save you a lot of time and headaches when trying to figure out how to bake and prep everything correctly.
‘Standard’ Textures
The standard textures are things like the albedo (diffuse), ambient occlusion and roughness.
They should mostly be baked at 2048x2048.
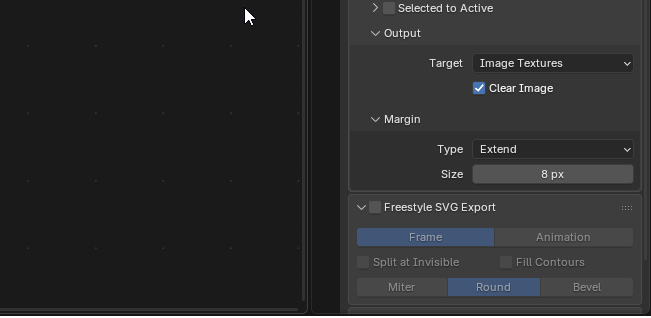
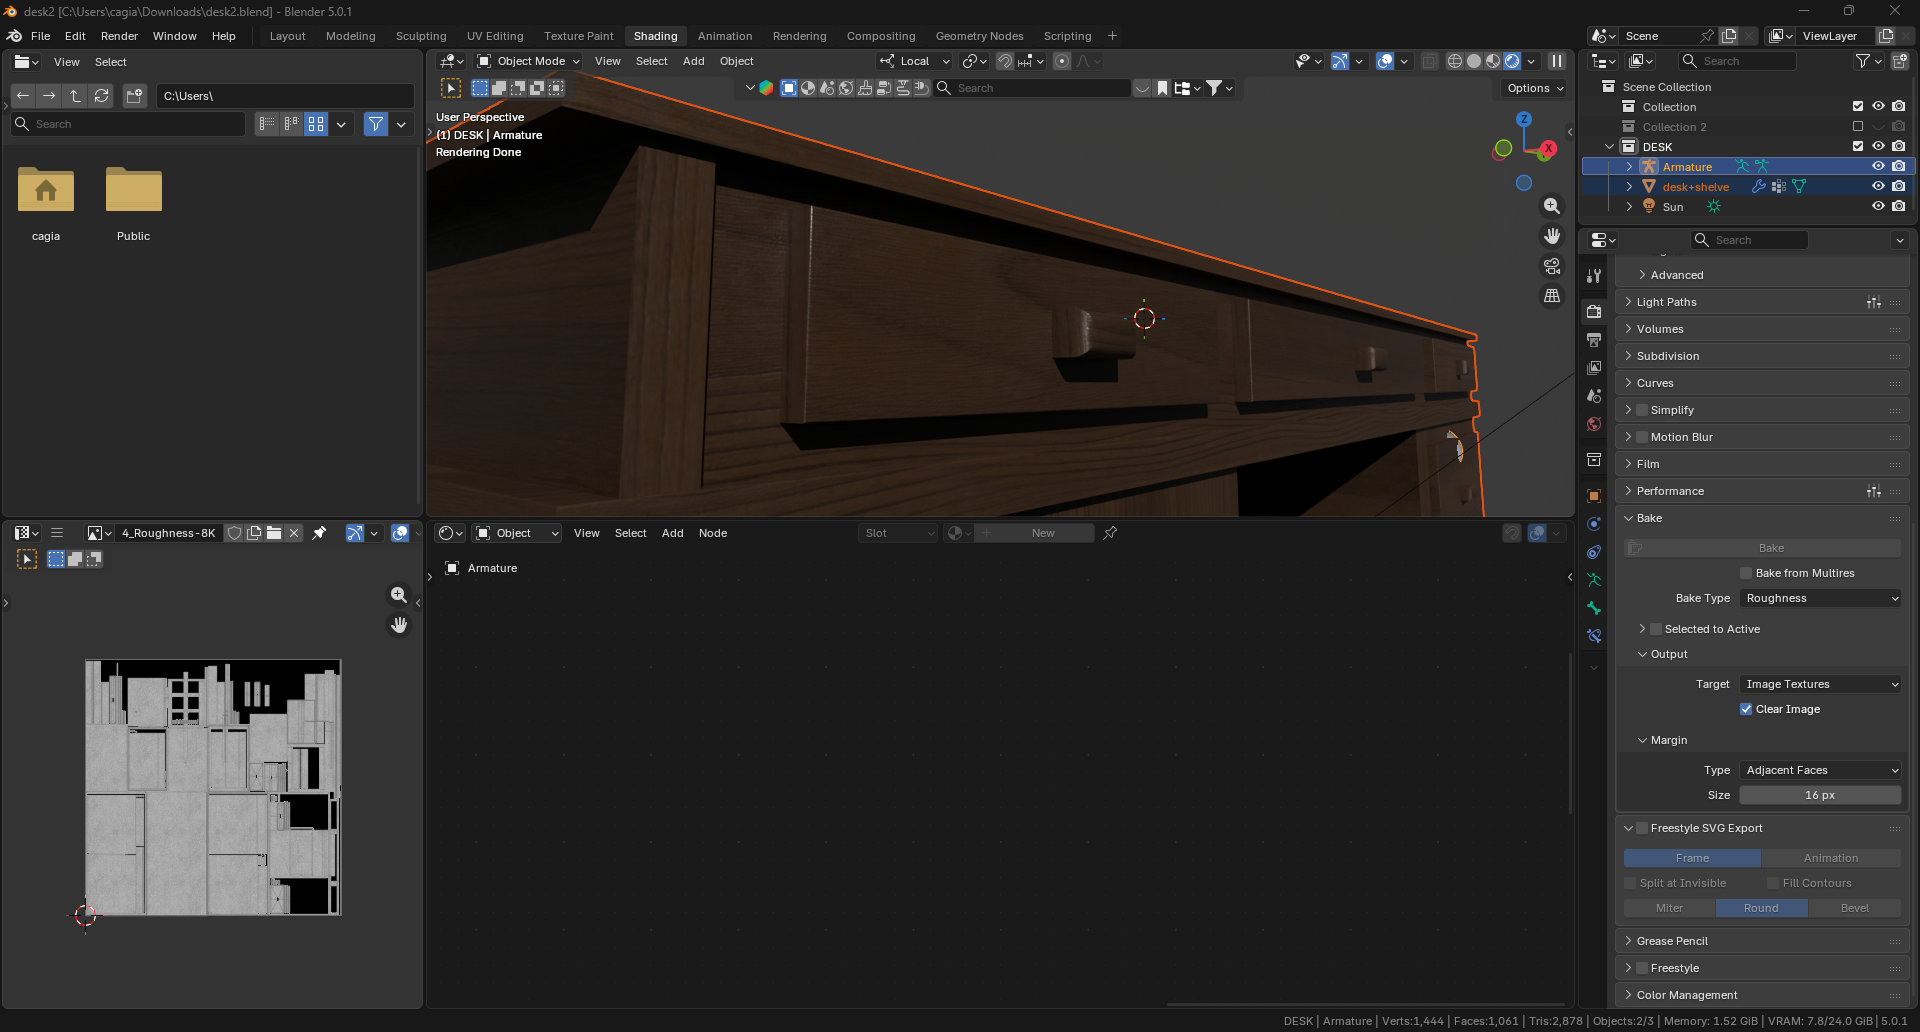
Be careful with bake margins, values that are too low can sometimes cause Blender to just crash every time, but values that are too high will cause bleed between textures. Try messing around with both this value and the margin in the Island Packing step together (Extend in the bake type also usually works better than Adjacent, therefore should be used instead)!
Overall you want to reduce the denoise steps to a minimum to save on baking time and resources, however some more complex materials can behave weirdly / incorrectly (for example the wear on the revolver) so remember that and increase the steps in those cases!
If you have a bunch of models that aren’t properly hidden (for example via collections) in the hierarchy (the eye is what you see and, the camera is what the renderer sees), you can have issues when baking certain textures (like ambient occlusion for example), make sure to properly hide them (use the renderer button or both to keep things consistent)!
Make sure Selected to Active is OFF when baking standard textures!
- In the Shading tab, for each body ; each material / material slot, create a new
Image Texturenode and a new2048x2048image. - Make sure that every
Image Texturenode is selected and the correct image is active inside them (this ensures everything gets baked into the same atlas). - Bake
diffuse(remember to turnOFFInfluence of all butColorwe only want the albedo, no lighting),ambient occlusionandroughnessone at a time, selecting the correct Bake Type for each and creating plus swapping out the target image accordingly. - Make sure to save all the baked textures in a safe place after each render with proper naming so you don’t loose them.
Normals
Normals are (usually) baked the same way as the standard textures (check above steps), but
at 4096x4096 instead of 2048x2048 for better visible detail. This step could also
include baking high poly details on to a low poly mesh (this was actually used for the
revolver earlier in this very devlog), but that’s NOT the usual approach for this
pipeline, so I wouldn’t worry about it if I were you, just had to mention this for
completion sake (it works the same as described
here
).
Remember to bake on Shade Auto Smooth (or the same mode you’ll use for exporting, which will usually be this one) or you’ll get the low poly look baked into the texture!
In some cases (especially when baking high poly details on to a low poly mesh) you’ll most likely get artifacts, you can take care of these by either moving certain UV islands off the texture plane so they don’t get baked, and/or by fixing up the texture manually in graphics software like Photoshop!
Metallic, Emissive and Transparent
Some materials are more complex than others and will need to be examined on a case by case basis to figure out how to bake them correctly. These things simply need to be done through trial and error. For example, in the case of an iPhone screen we had to bake the screen using the emissive texture and at a higher resolution than usual.
A few specific things worth knowing:
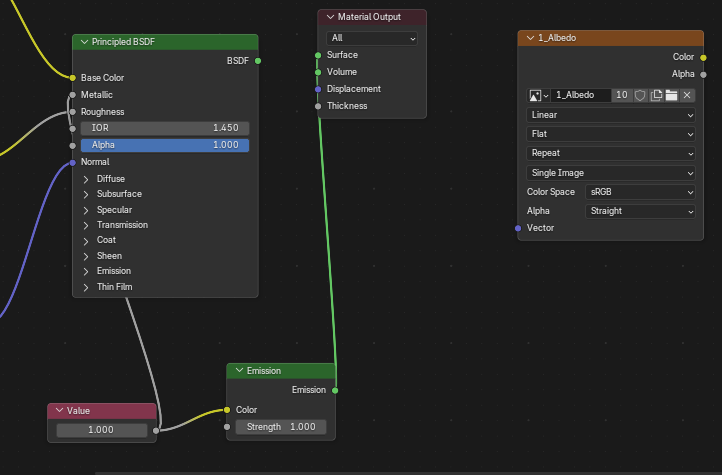
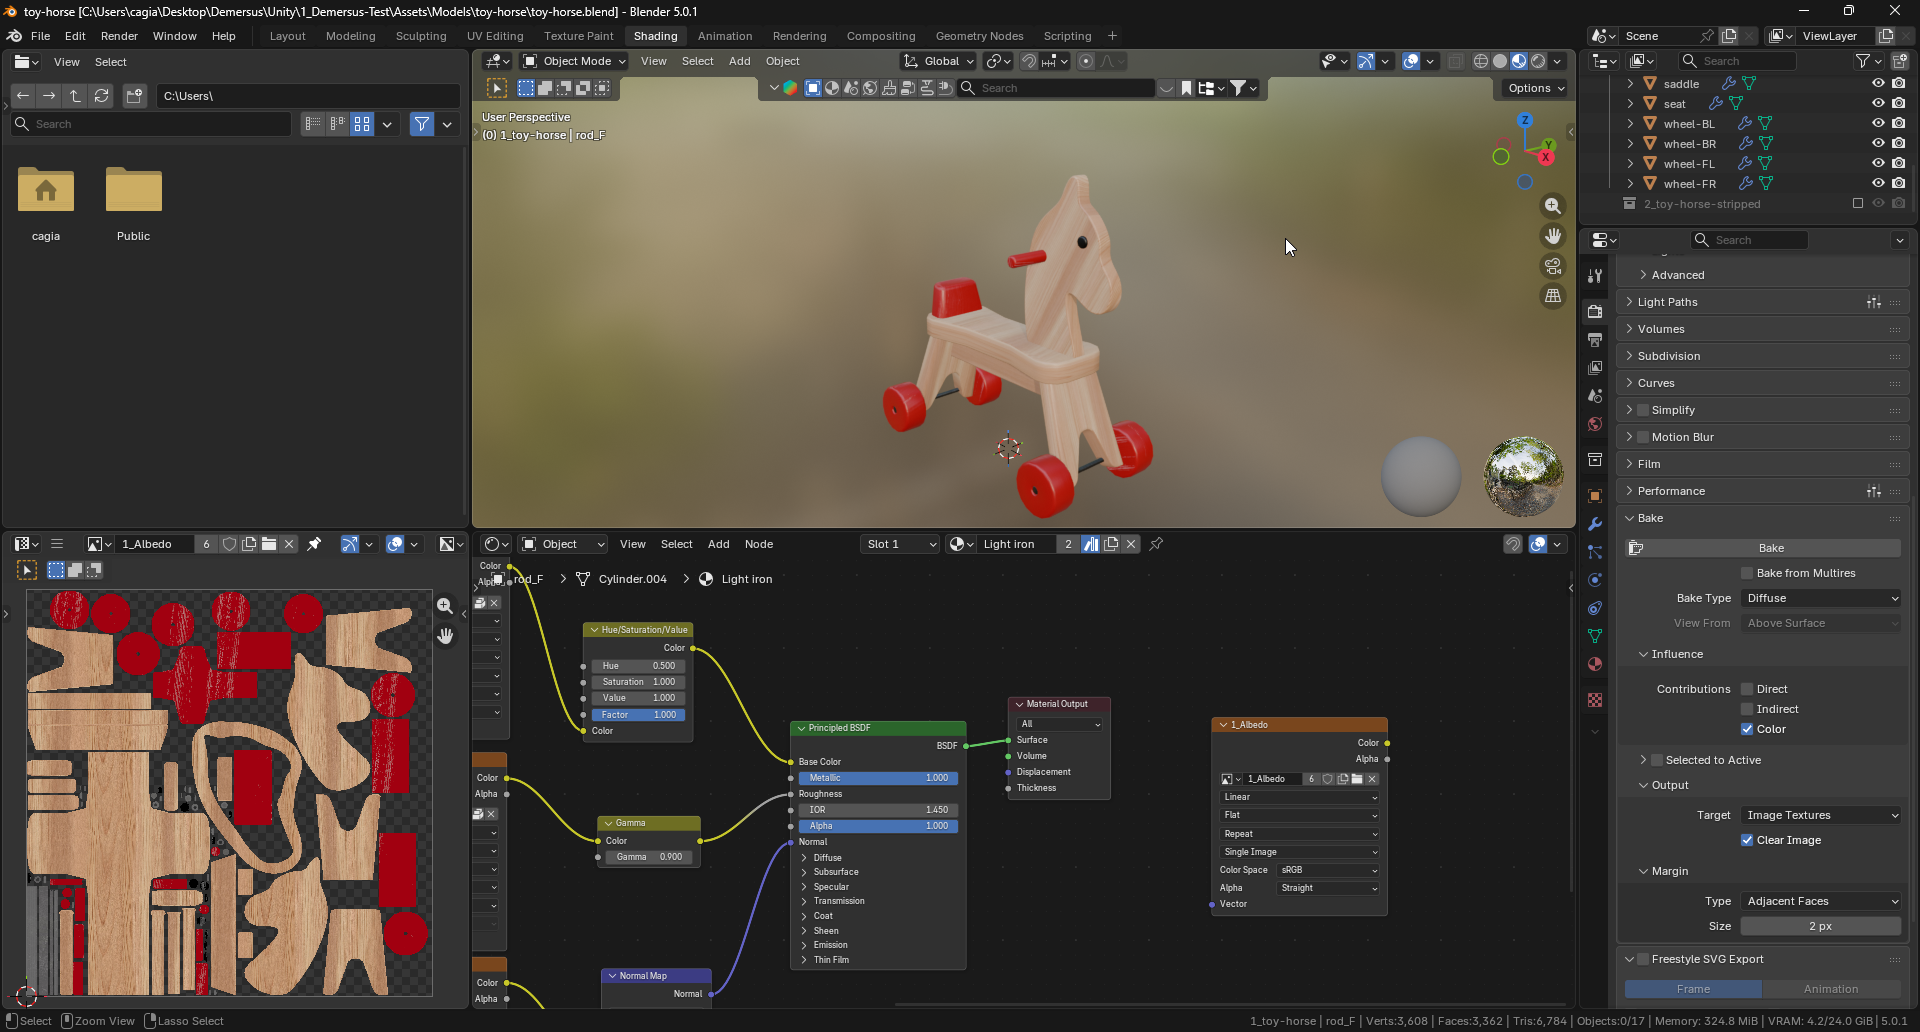
- Metallic: You can bake it from Blender by setting diffuse to zero and using an
emissive node with the metallic map / value, connect it to the output temporarily and bake
it as an
Emissivein the bake mode. Alternatively, you can just create a separate slot for it on export and build the material from scratch in Unity (this obviously highly depends on the engine, rendering pipeline, the look you’re going for, convenience and so on):
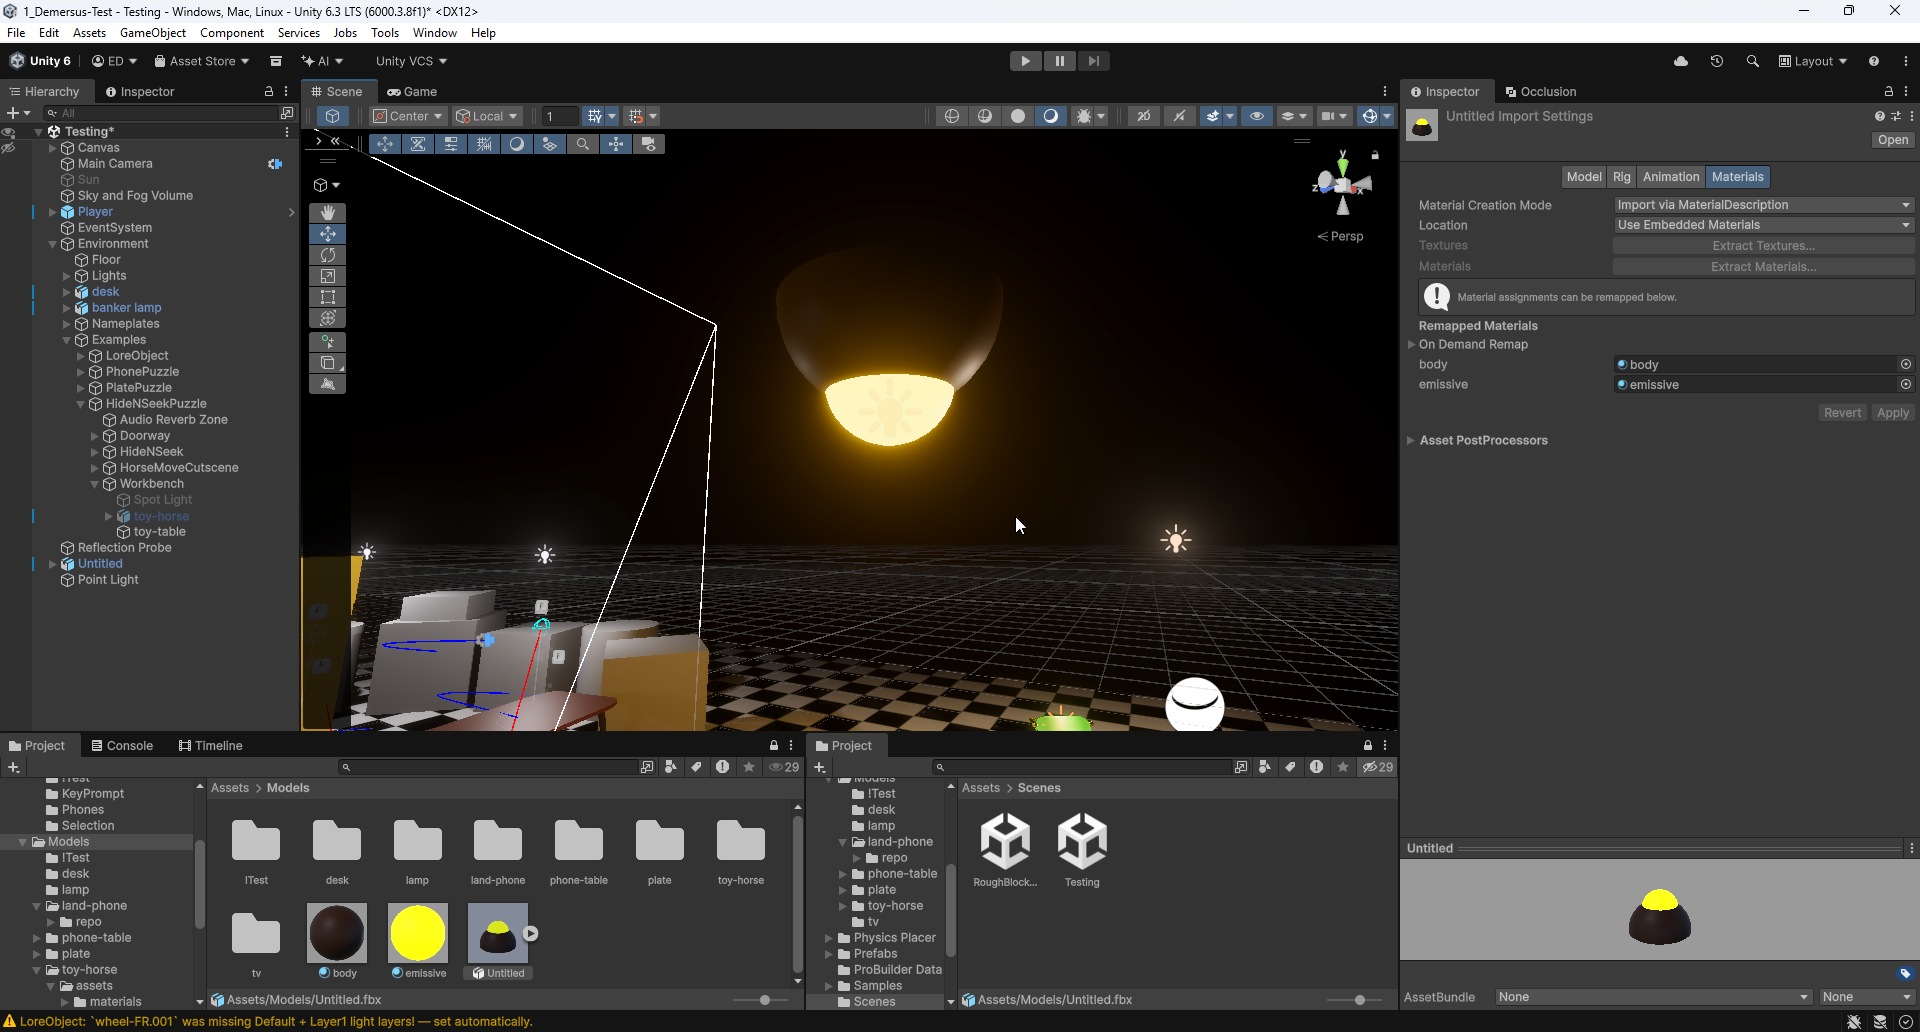
- Emissive: These can either be rebuilt in Unity from scratch (like in the example
above) or (the preferred method), baked in Blender. This is done very similarity to
the metallics (shown above). If the material is more advanced, you can just bake it using
the
Emissivebake mode. If nothing shows up, you can use theEmissionnode, combined with either a set value or map texture (see screenshot in the metallics section above). If you’re having visual glitches with the texture in Unity, use a graphics editing software (such as Photoshop) to manually fix it. An important tip here is, if the object you’re setting up has multiple material slots, remember to apply the Emission Map to each of them - otherwise you’ll get weird glowing artifacts where the whole thing glows).
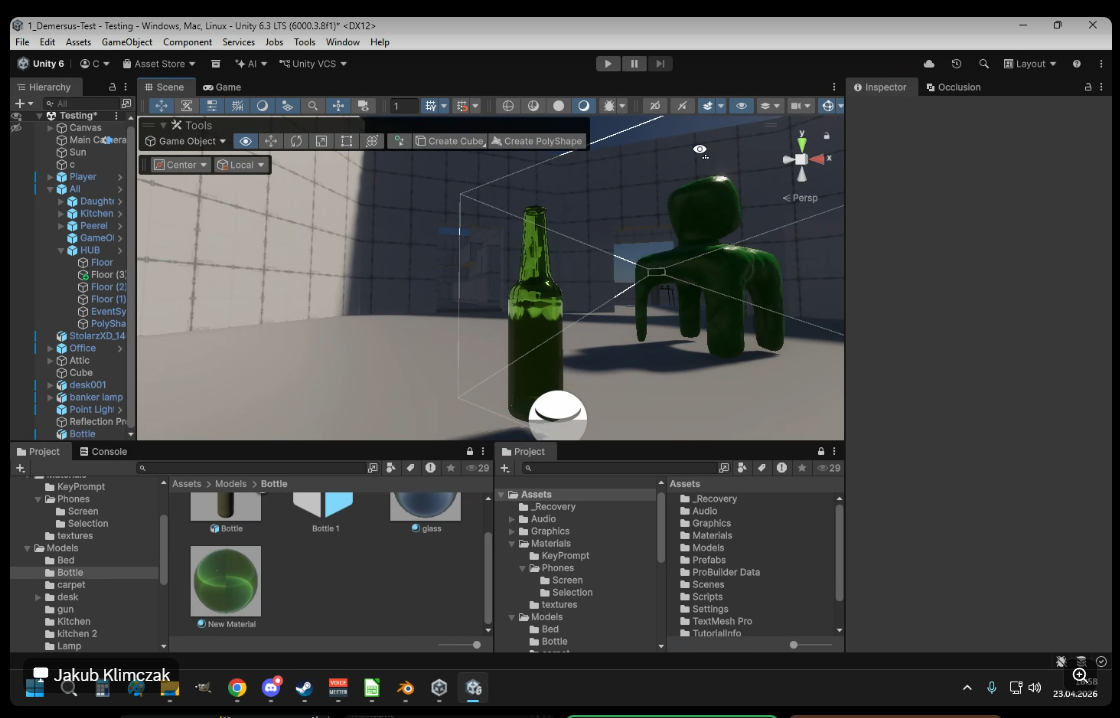
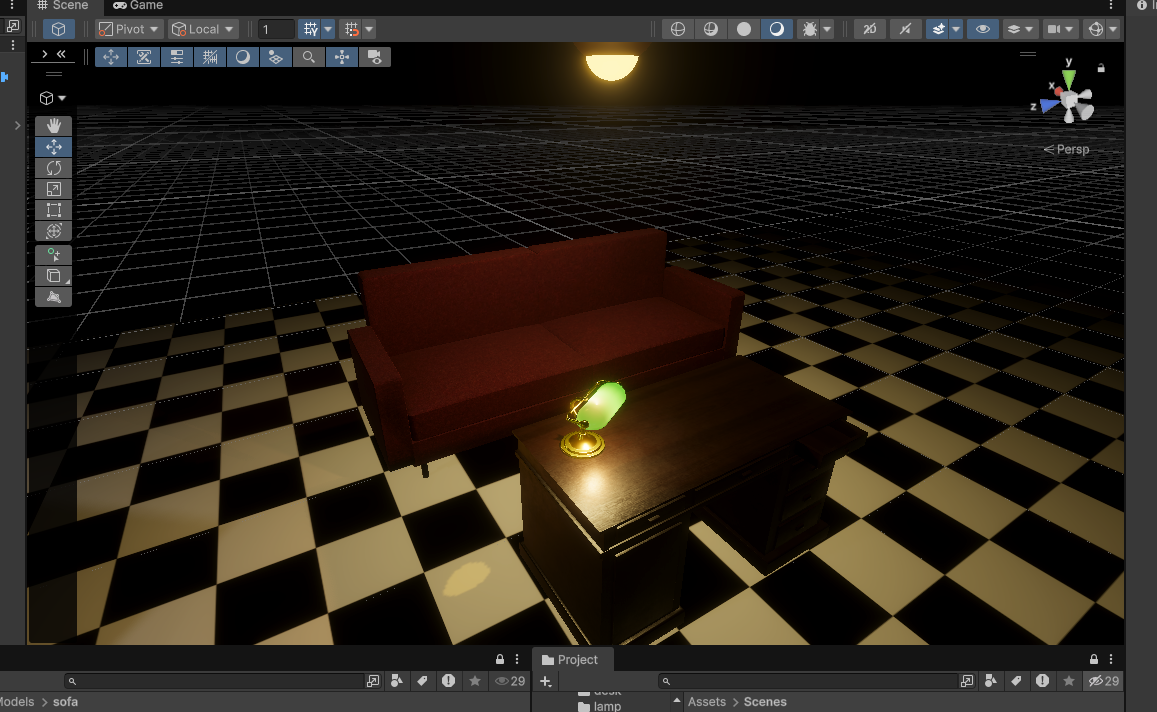
- Transparent: These need to be rebuilt in Unity from scratch
(don’t forget a reflection probe). For example, the banker lamp and beer bottle weren’t
baked at all, they were just exported with enough material slots (respectively
2and1) and built in engine (this obviously highly depends on the engine, rendering pipeline, the look you’re going for, convenience and so on).
Some resources on baking complex materials that might come in handy:
- So, you want to make Custom Matcaps in Blender?
- Baking multiple materials/objects on one texture (Blender Tutorial) (03:46 / 07:18 / 08:52)
Texture Painting Pass
Doing just albedo is usually enough, however if for some reason, you’d like a better representation of the model in this step, you can also bring in the normal map. Don’t forget to set it’s type to Non-Color however as it won’t display properly otherwise!
Something worth knowing is that after baking the standard textures, you can bring them
back into Blender, apply them (Image Texture node combined with Texture Coordinate
and Mapping using the Ctrl + T shortcut) to the simplified, export
mesh (the one with reduced / single material) and use Blender’s built in Texture Paint
view to paint additional details directly on to it. Once you’re done, you just save the
texture and use that updated version instead of the original going forward:
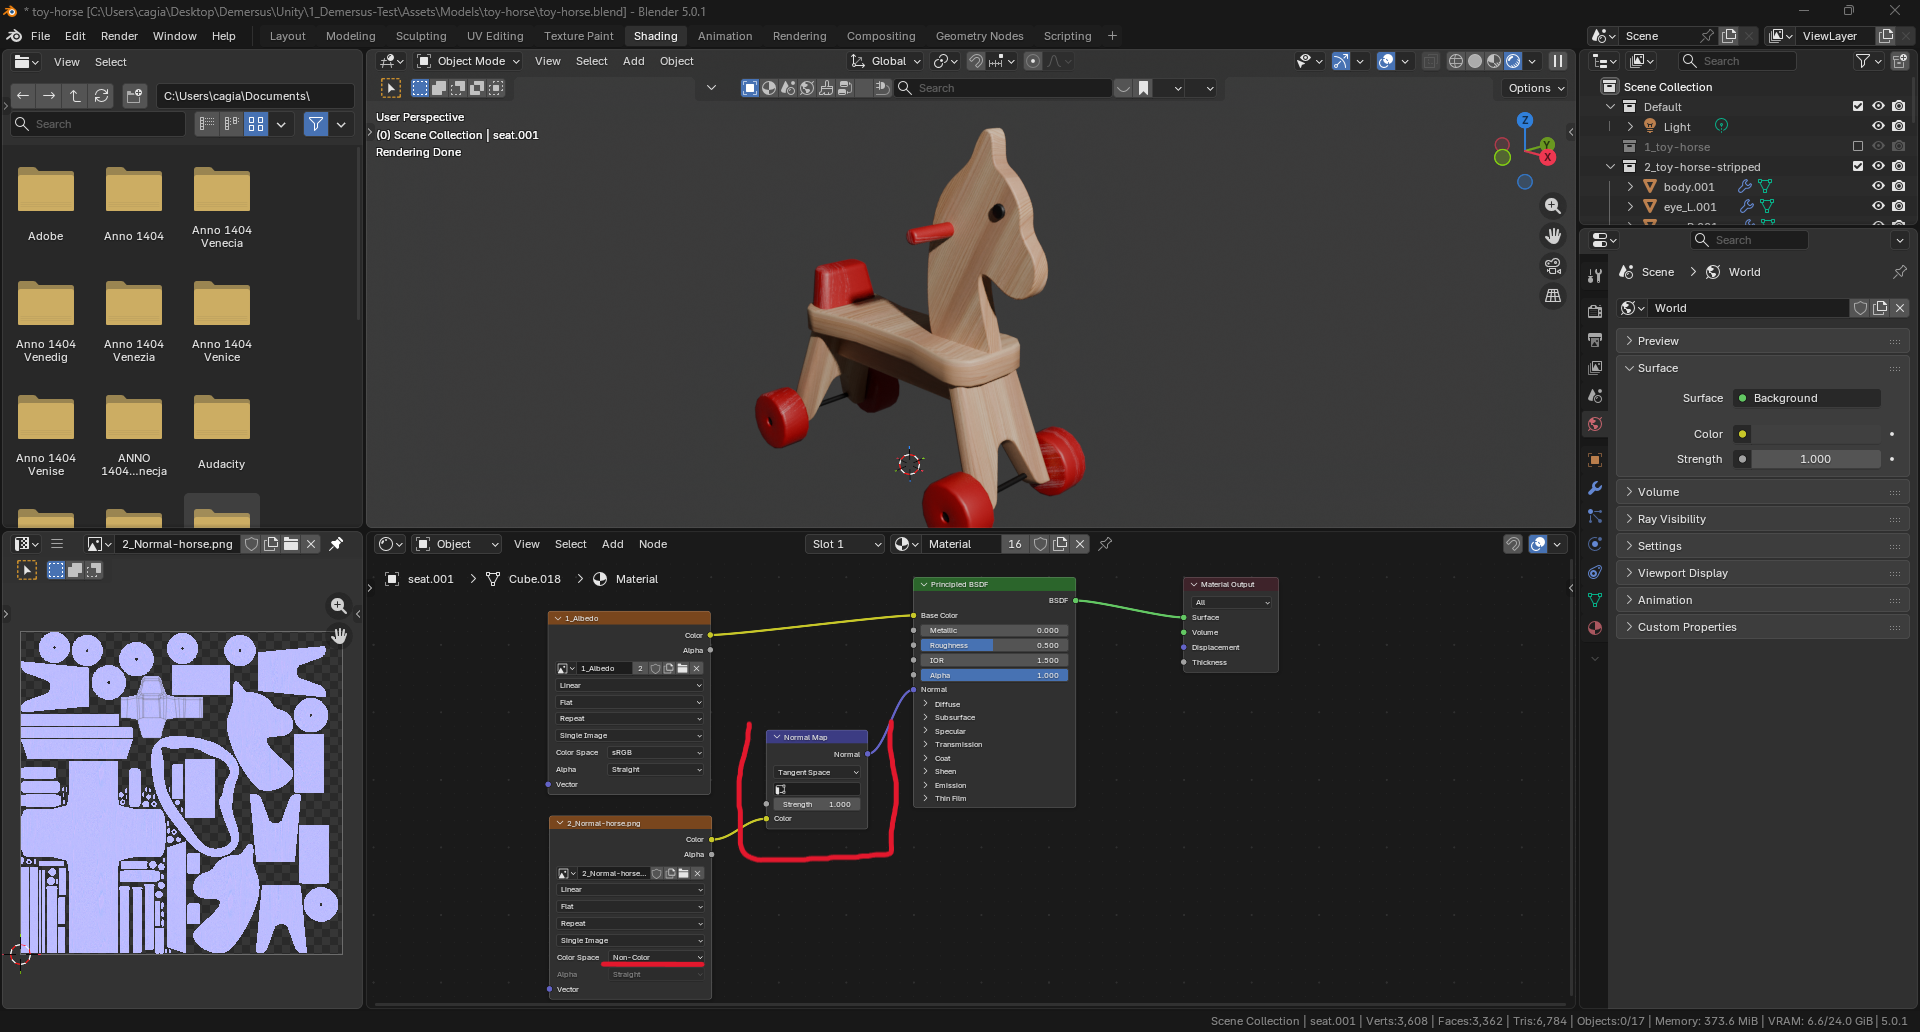
The reason this has to be done after baking, and specifically on the export mesh rather than the original, is that the mapping node tweaks you made earlier (scale, position, etc.) mess with the UV coordinates in a way that makes texture painting behave incorrectly if you try to do it before this point.
To paint on a specific part of the mesh, go into Edit Mode, select the faces you want to work on using Object Select Mode, then switch back and go into Texture Paint, (it will only affect the selected area). Make sure you’re in Material Preview mode while doing this so you can actually see what you’re painting. You can also make use of the Mirror toggle in the toolbar, which can be a helpful shortcut depending on what you’re doing.
6. Armature, Shape Keys etc.
This (depending on your needs) is the step where you can add an armature & bones , Shape Keys (blendshapes) and such to the model.
Because this is supposed to be just an overview of the pipeline, I’ll not be going into
details in this paragraph, but you simply do what you’d normally do in the Blender
workflow (add an Armature modifier, assign certain vertices to Vertex Groups named
after the bones, then weight painting and so on). If you have to do it, you’ll know how to.
A useful tip is that you can have a single, joined mesh with vertices divided into groups, via a material assigned to them, Vertex Groups can work for this as well, but that can be problematic with bones (you can use Assign / Select etc. to manage them).
Another useful tip is that you are able to unlink a bone from a parent. In order to do that, go to Edit Mode, select the bone, then in Bone Properties > Relations set Connected to OFF.
7. Exporting from Blender
This step revolves around preparing the final material configuration of the model for export and exporting it, so the textures get mapped and work correctly upon importing everything into Unity.
Remember to create a backup of your work into a separate collection before starting this step as it is somewhat destructive and you’ll most likely need to have both of the models available!
Remember that the material / material slot names you write out in Blender will get exported with the FBX and be visible in Unity so take care to name them appropriately!
Be careful with this step, as it can vary quite a bit depending on if you’re doing a ‘standard’ bake or have additional effects you want to add to the model!
- Remove all material slots from the new model and apply a new flat / empty material. (This only applies if your model doesn’t use ’effects’ that need to be handled through an in-engine material, otherwise, you need one slot to apply the atlas too, and however many you need for additional things).
- Perform
Apply All Transformsvia Ctrl + A (this shouldn’t be strictly necessary, but it’s here just in case, if some adjustment happened even by accident along the way, it’s good to do this as otherwise it can show up in Unity with a wrong scale, rotation and so on). However, if you have a need to change the origin point of any of the bodies, you can do after like it was described here . - Perform the finalization checklist:
- Check / fix up geometry
- Check x-ray / normals / merge by distance
- Fix up scale (compared to ground truth)
- Apply all transforms
- Check UV maps
- Re UV unwrap + pack*
- Fix up look of materials
- Prep export FBX
- Check if adding Shade Auto Smooth fixes visual artifacts
- Bake textures
- Test look / triangulation issues in Unity (after next step)
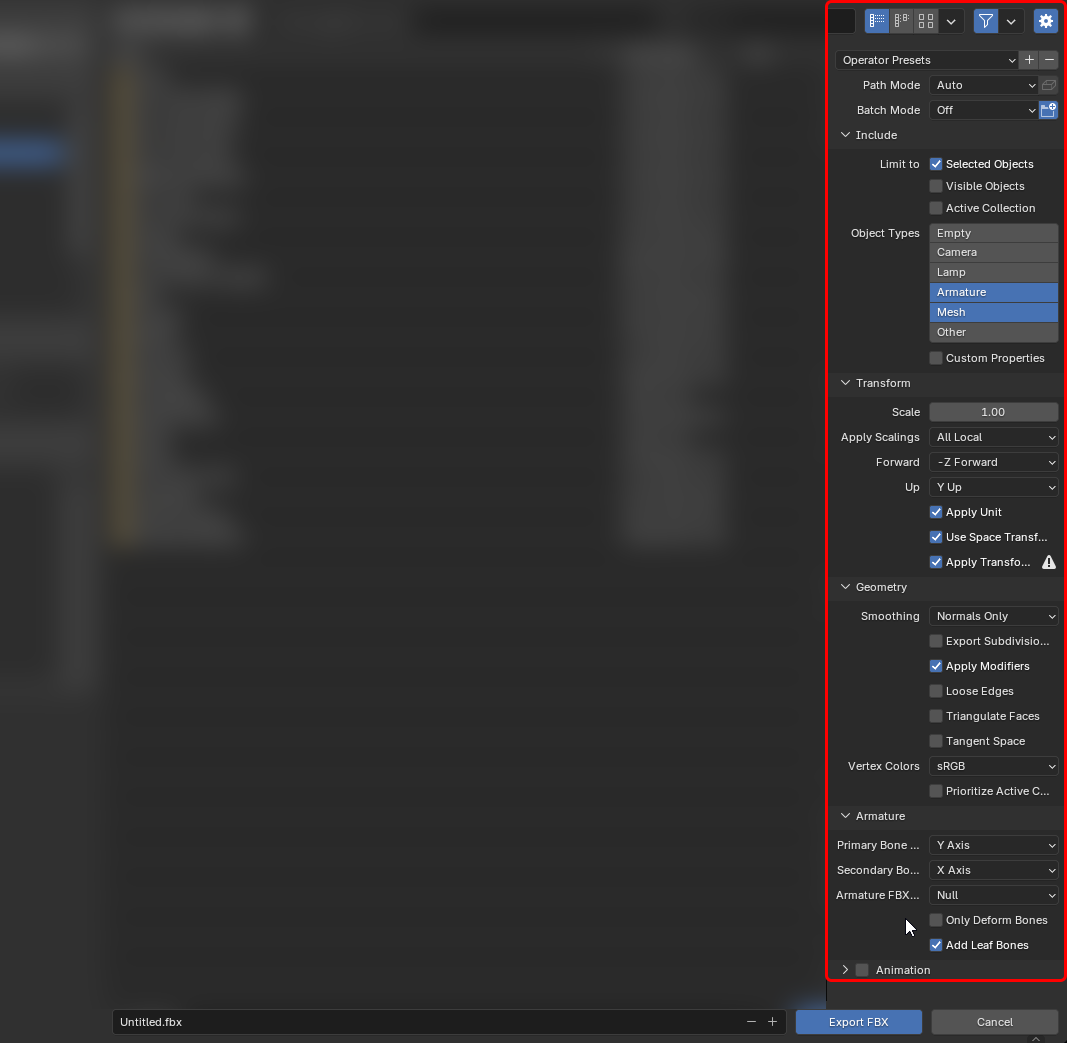
- Export the mesh to FBX using our custom
Unityexport preset (remember to not pack anything):
8. Setup in Unity
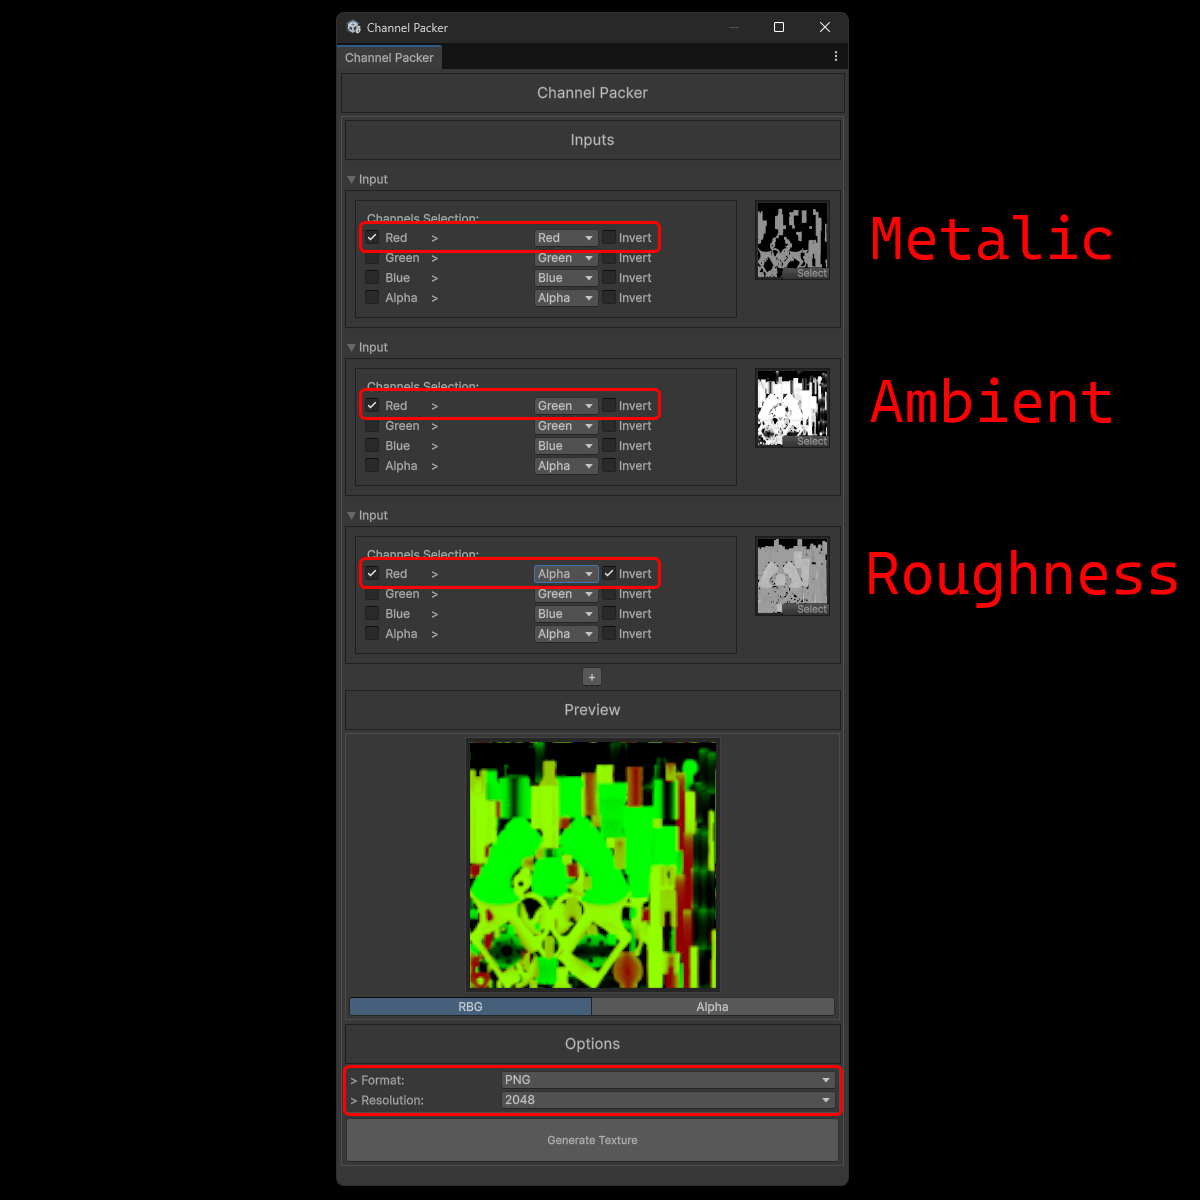
This step goes over the process of importing and setting up the assets we’ve prepared in Blender into Unity. Because we’re utilizing Unity’s HDRP pipeline, we have to use a Map Mask, in order to optimize and streamline the process I also go over how to use a Channel Packer.
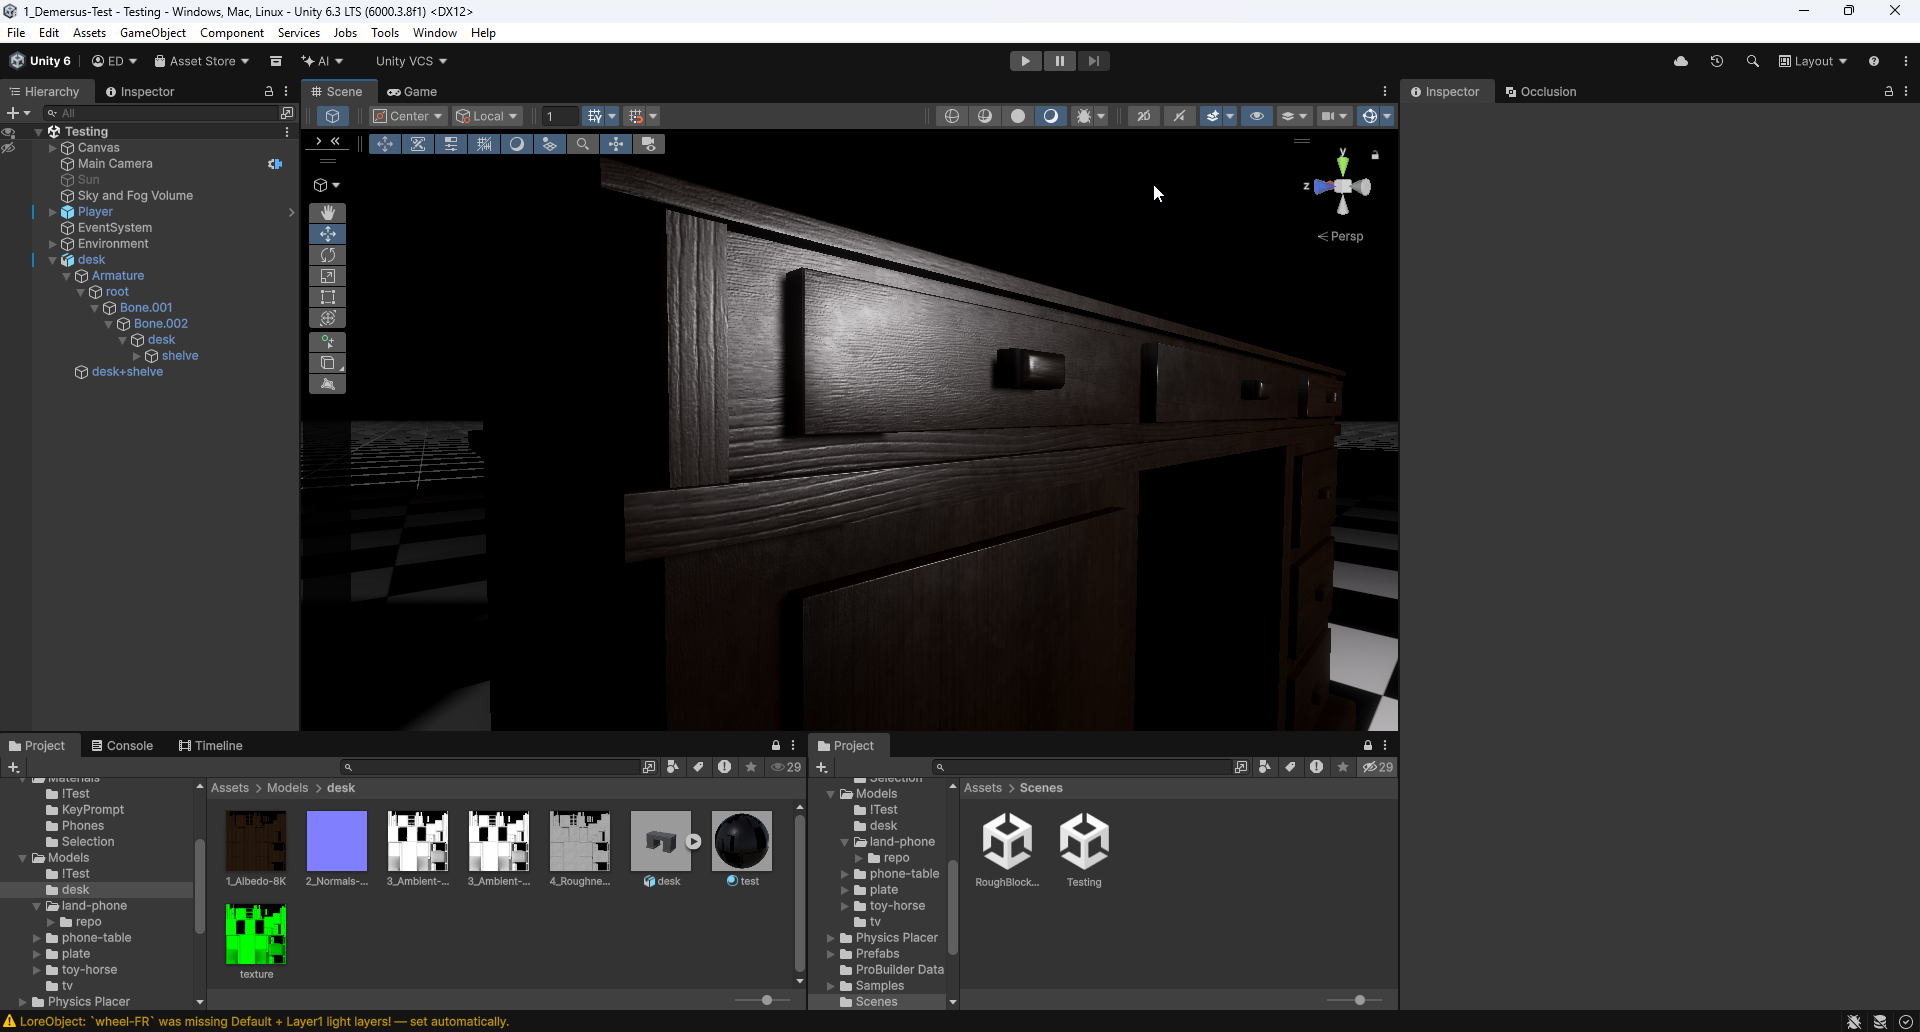
With every deletion and reimport of textures into Unity their settings will reset, this can range in effect from unnoticeable to catastrophic (like in the case of the normal map), remember to fix them each time (though this could depend on the import presets set in the project)!
Take a lot of care to setup the resolutions, compression types and channel packer settings / order correctly as otherwise the model will look broken!
- Import the FBX of your mesh and all of the needed textures into Unity.
- Make sure the normal map’s type is set to
Normal Map. - Set a proper import resolutions (mostly
2048/4096) and compression toHigh Qualityas these have the highest impact on perceived quality in engine. - Create a new material (most will be based on
HDRP/Lit). - Open a channel packer tool (like this or this one), then add the textures, setup the parameters and generate the map mask texture (see image below).
- Assign the diffuse (albedo), normal, map mask and any other textures to the material you created in the step above:
- metalic = (depending on the case) goes into the map mask / is done in-engine on a separate material slot
- emissive = (depending on the case) is baked and goes into it’s separate slot in the material / is done in-engine on a separate material slot
- transparency = is done in-engine on a separate material slot
- Assign the new material to the FBX in the import settings so you don’t have to re-apply it each time you use the FBX Prefab .
Potential Baking Issues
- Not having all required meshes selected.
- Not having the right Bake Type selected.
- Not having the right Render Engine selected (
Cycles). - Not having the right image open in the UV Editor panel.
- Having Selected to Active enabled (if not baking the normal map).
- Not having Selected to Active enabled (if baking the normal map).
- Not having
Generatedset inImage Texturecausing an ‘Uninitialized image’ error. - Not having all
Image Texturenodes selected in all materials and/or material slots. - Not having two meshes selected correctly when baking high poly details into the normal map.
- Not having the same image selected in every
Image Texturenode (for examplenormalandnormal.001). - Not having a proper
Selected to ActiveExtrusion value (this will cause artifacts on the normal map). - If you’re getting a ’low poly’ look, make sure you’re baking on Shade Auto / Shade Auto Smooth and not Shade Flat.
- Weird, inconsistent, unexplainable errors / problems (most likely Blender being Blender, just do a restart).
- Having weird shading, could be caused by the specific material from BlenderKit (more likely) or the topology.
- Some materials are more complex and can look wrong upon baking if you set denoise steps to a value that’s too low (like
1). - Color bleeding in places but otherwise correct coordinates means your
marginin the baking section is too high, or the margin between islands in the island packing step is too low. - Garbled textures / wrong coordinates can be caused by having multiple UV maps, this is caused by BlenderKit’s materials, just remove
automap(in the green triangle menu) if you forgot to do so earlier.
More IRL Assset Stuff
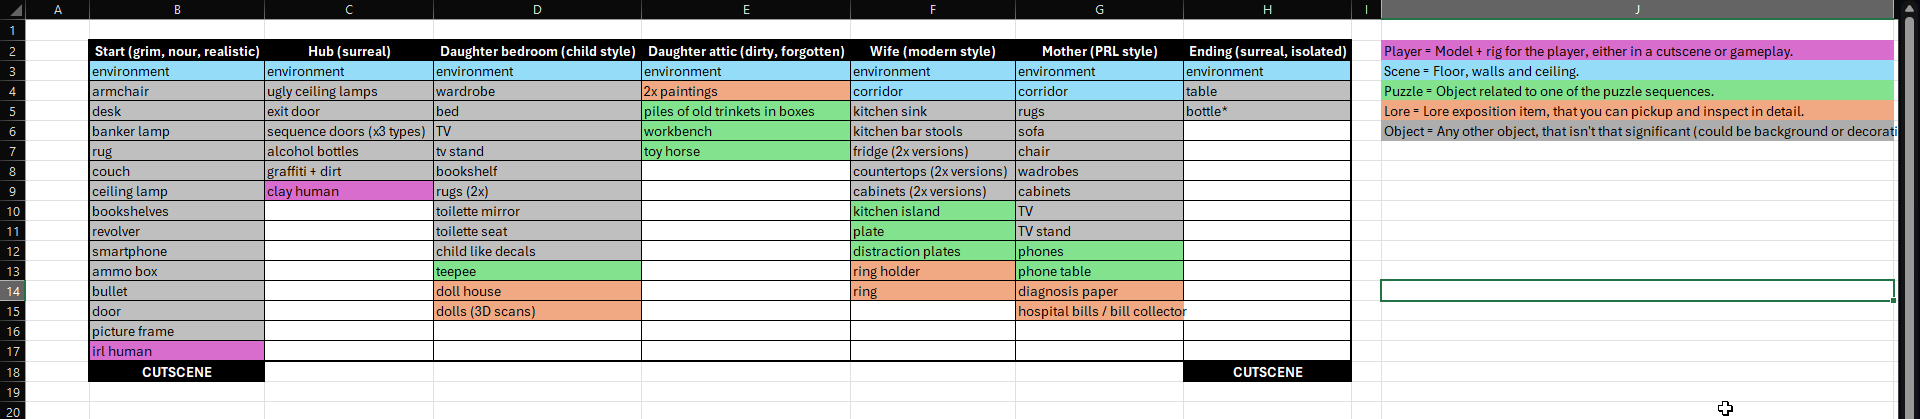
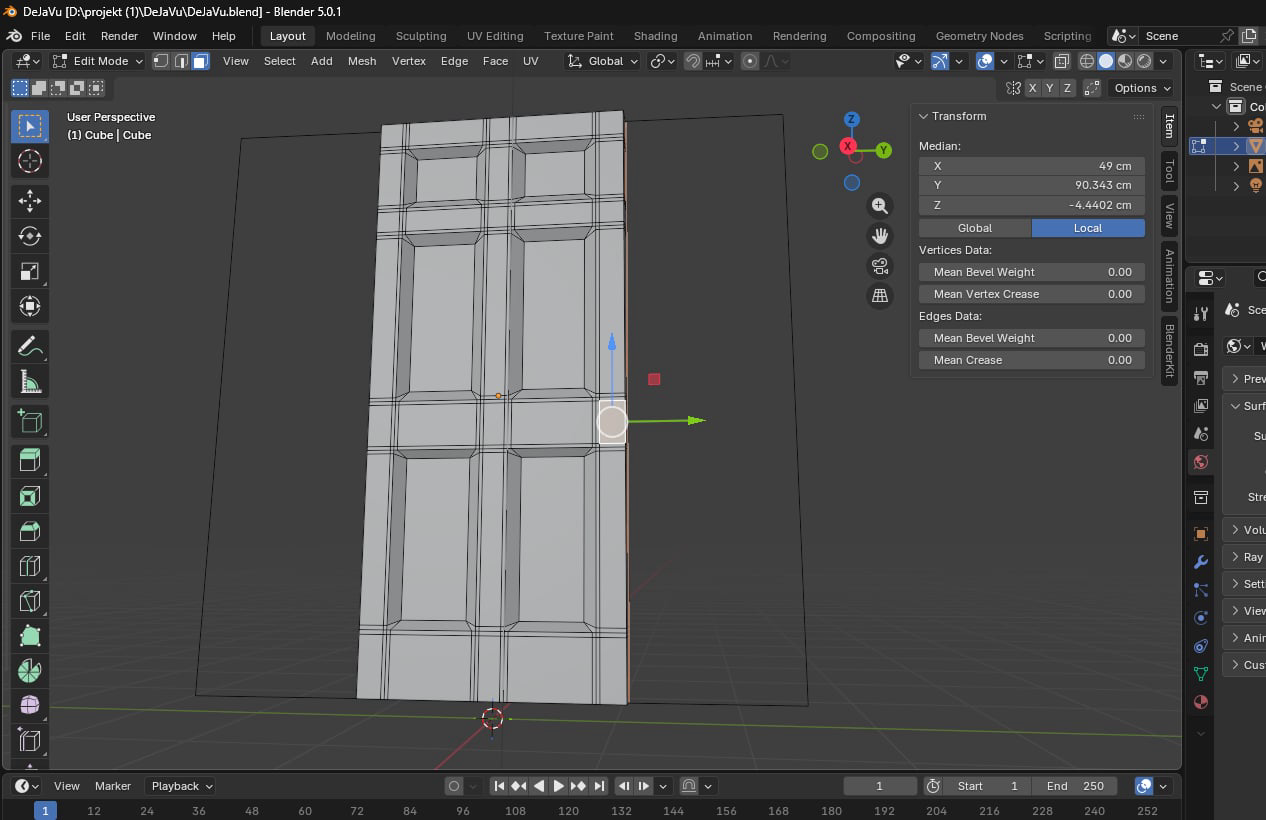
The both of us recently sat down to finally write down a complete asset list, as both a sort of overview and TODO list of the asset situation. This is what we ended up with:
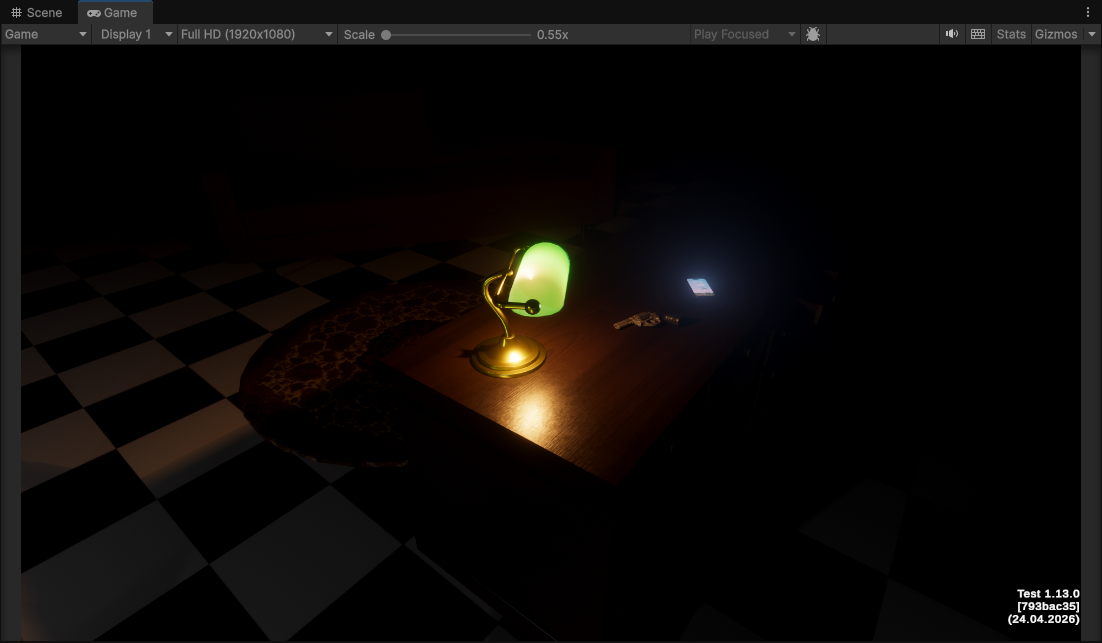
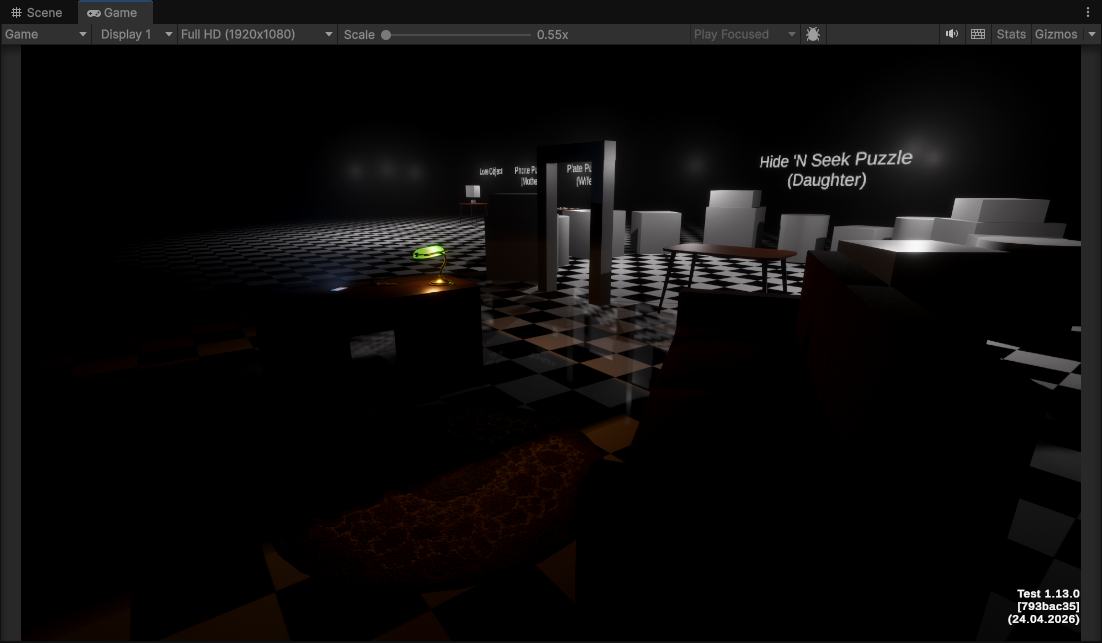
Here is a little sneak peek of what’s coming ;)
Clean up and Final Milestones
Something I also took care of recently, was some cleanup of our massive Figma jam document, and a final refresh of our milestones. Unfortunately (as often is the case with development of any kind) certain things had taken more time than we expected, we had some personal stuff to deal with, and so on. All of that leaves us with this to work with:
- Asset creation + MVP (3 weeks = 16.05.2026)
- Week 1
- Mocap pipeline
- Mocap Fusion docs
- Mocap Fusion index / opti finger track
- Mocap Fusion import / export (scenes ; objects)
- Human model (Meta Human ; Clay + Mixamo)
- Character prep + import (rig / retargetting / weight etc.)
- Clean up + Unity pipeline
- Working in Timeline
- Devlog 18
- Final level designs
- IRL assets
- Clay assets
- Mocap pipeline
- Week 2
- Mocap animations (cutscenes / interactions)
- Mocap animations (player anims)
- Proper transitions between levels and just joining everything
- Hub clean up changes
- Week 3
- Voice acting
- SFX
- Music
- Ambiance
- Week 1
- Polish (1 week = 23.05.2026)
- Saving
- Drop user back if they fall
- Forward Only / proper fix for Outline shader
- Post processing effects (motion blur ; floaters and such depend on res)
- Final UIs (w/ tips and such)
- Pause menu (mouse sensitivity, basic graphics, sound and such)
- Menu (live + site and ver and such)
- Debug menu
- HDRP profiles
- Check audio delays and such on a wired device
- Script reformat*
- Dialing stuff in on test setup
- Optimization (occlusion, baking, etc.)
- Final icons / logos
- Splash screens
- Versioning and such (player)
- Credits
- QA tests + turn off other inputs than keyboard and mouse
- Presentation (1 week = 30.05.2026)
- Taking care of things at the university
- Trailer
- Prepping setup (standee ; laptop and such)
- Itch.io / Gamejolt and other uploads
- Prepping presentation
As you can see, it’s quite tight. The first deadline is the 23.05.2026, which marks the start of game applications at Łódź Tech (so we don’t need a gameplay video or a trailer just yet). The admittedly quite generous amount of work we still have yet to do and, the fact that we actually need to submit the gameplay and trailer videos between 01.06.2026 and 12.06.2026 (second deadline) is what lead me to decide on moving the last phase after the first deadline.
But, this is it, there is no more space to extend anything, we either hit this or simply not make it to the contest at all.
What’s Next?
After finally catching up on the devlogs and documentation, I’m starting work on mocap tests, human models and documenting a Mocap Fusion based mocap pipeline. In the meantime, my bud keeps toiling away on making great assets and ticking things off the asset list!
In other news, the HyperBackup fail that I tried to fix was actually caused by a dying drive, so that was a waste of time, money and effort. Ohh, and, my Valve Index Controller RMA finally came in: