Demersus Devlog #11 - Crafting the Phone Puzzle & What it Taught Me
The process of designing and creating a prototype of the phone puzzle and what I learned during it.
- reading time
- 15 minutes
- published
- last updated
- authors
- Eryk Darnowski
- series
- Demersus Devlogs
- categories
- Game Development
- tags
- #Ztgk #Unity
Crafting The Phone Puzzle
I decided to tackle this one first as I freshly had a concept in mind and I just sort of felt like doing it more then the others.
Drafting a Rough Plan
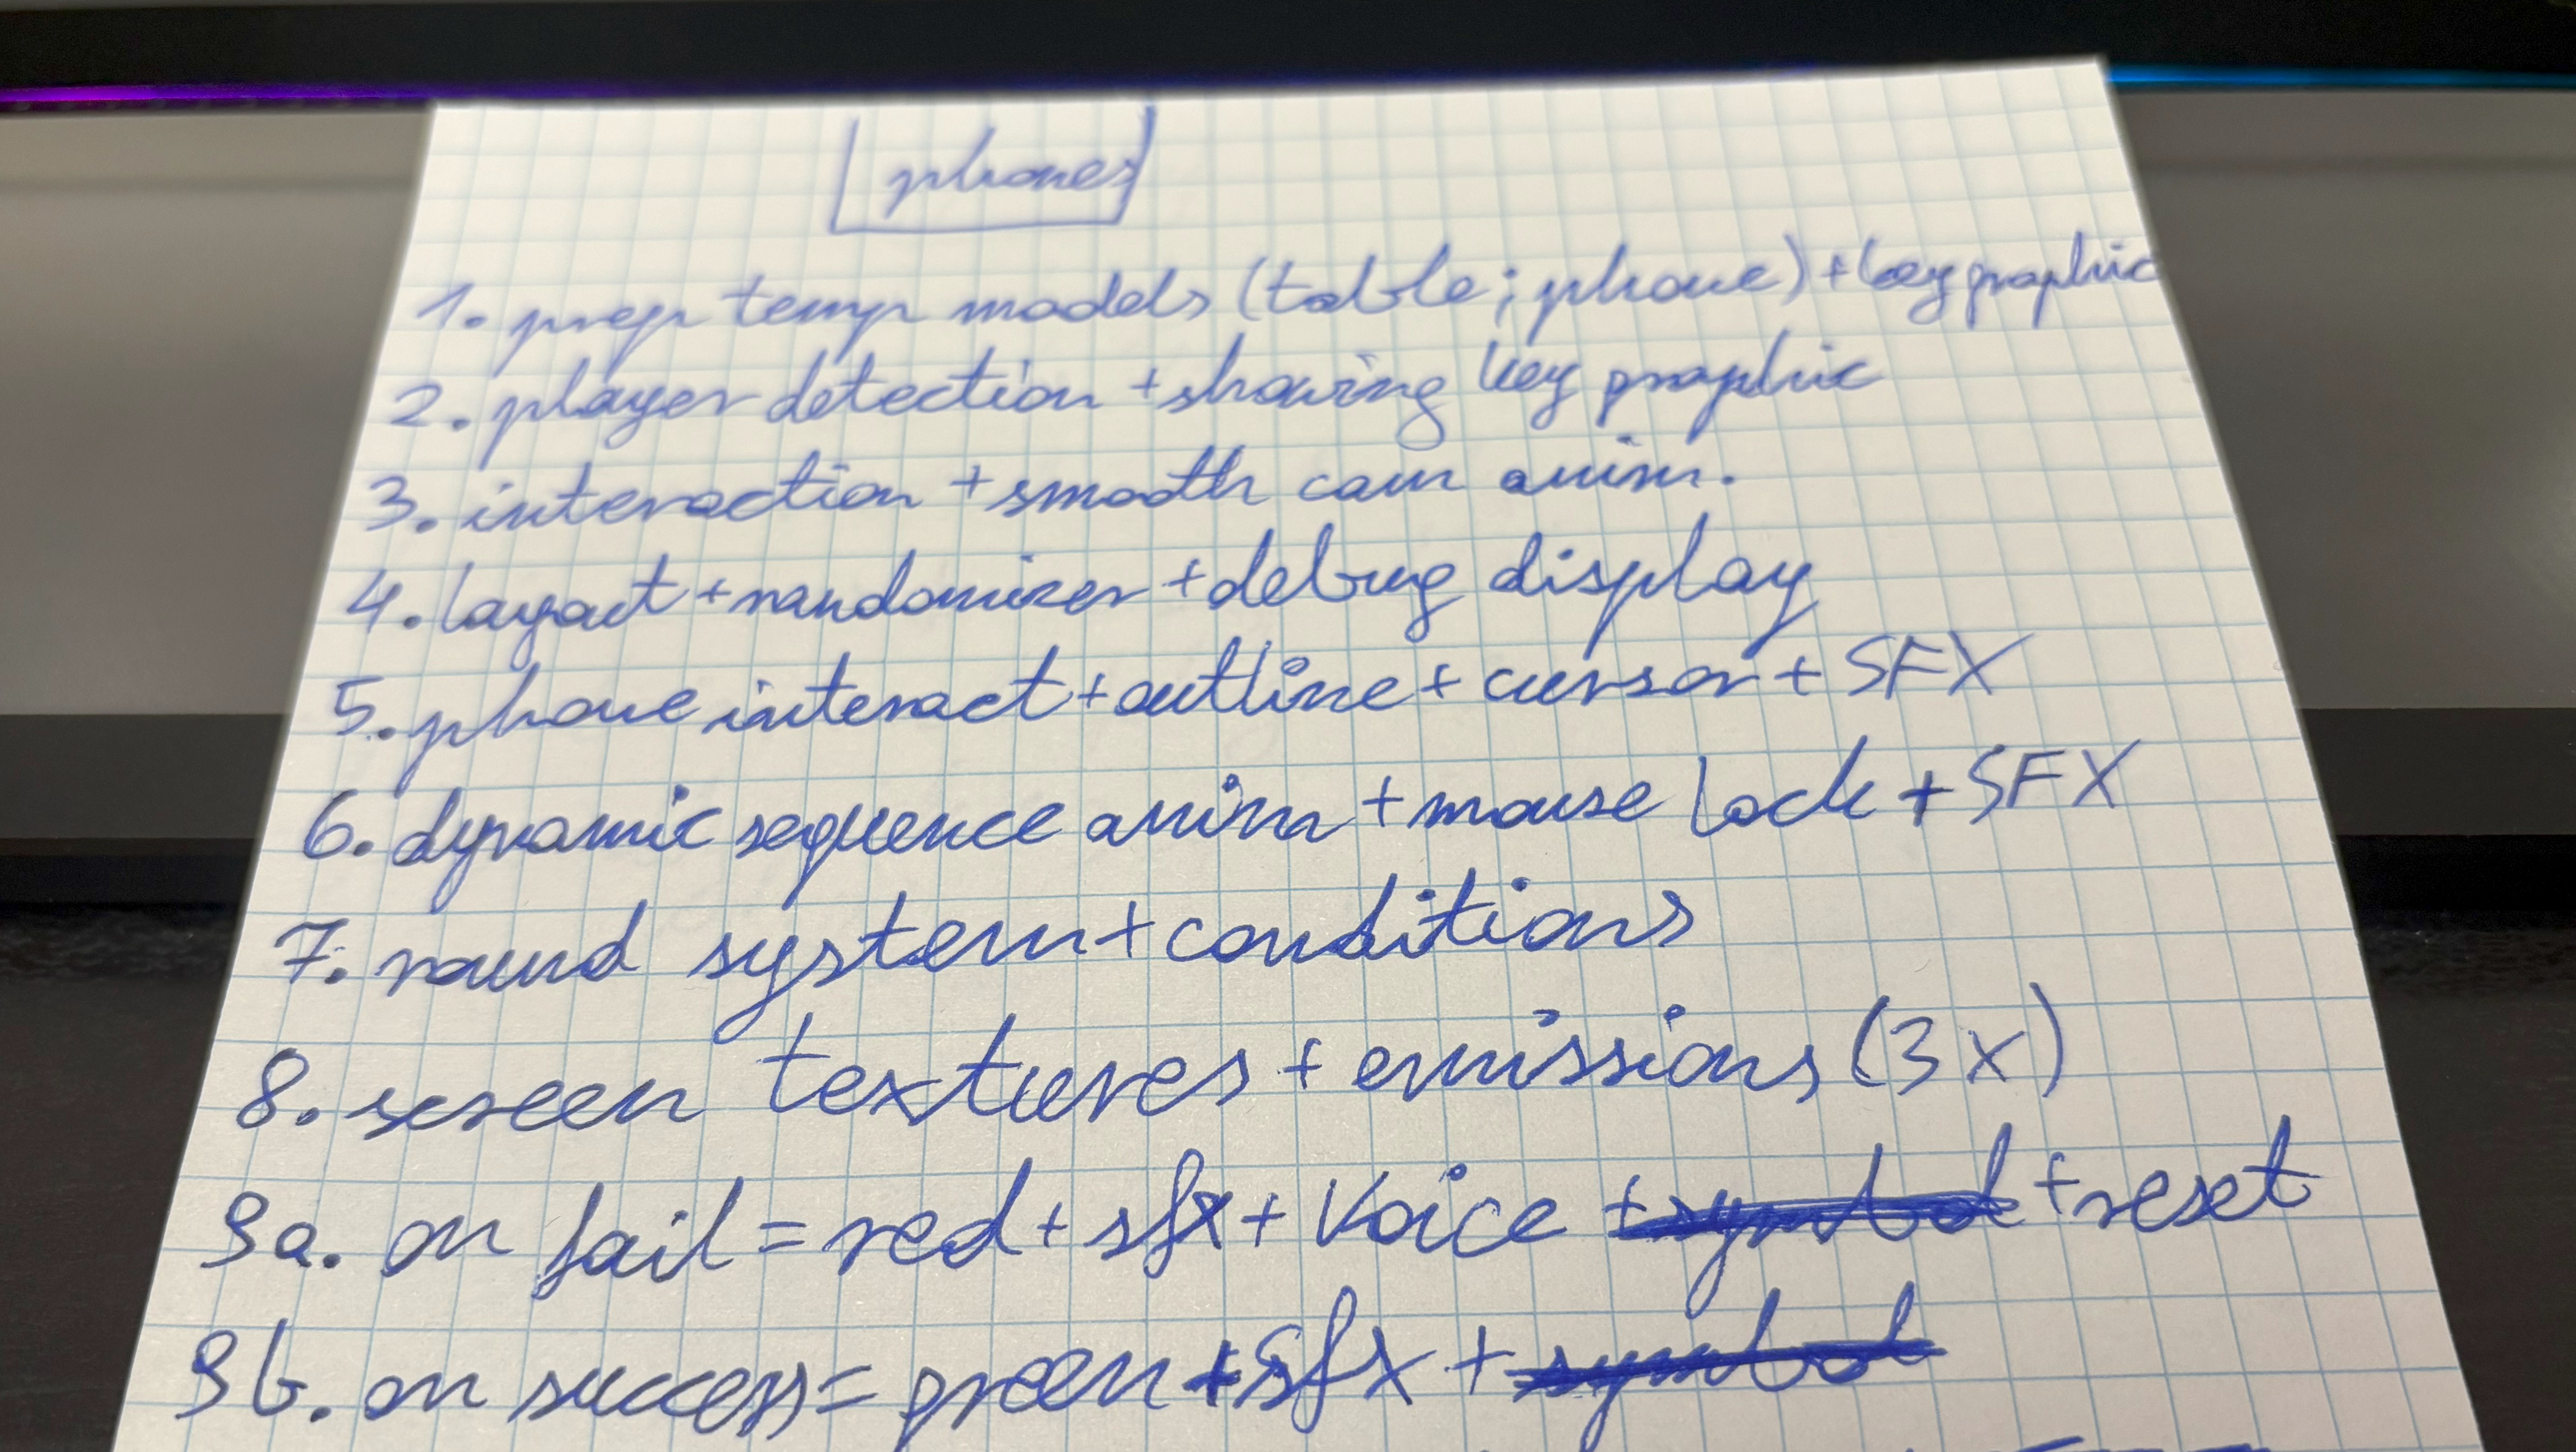
I started out by brainstorming the concept and wrote down a rough TODO list that I can have something general to follow (excuse my horrific hand writing):
Creating Temporary Assets
I started out with something a bit more fun - creating the temporary:
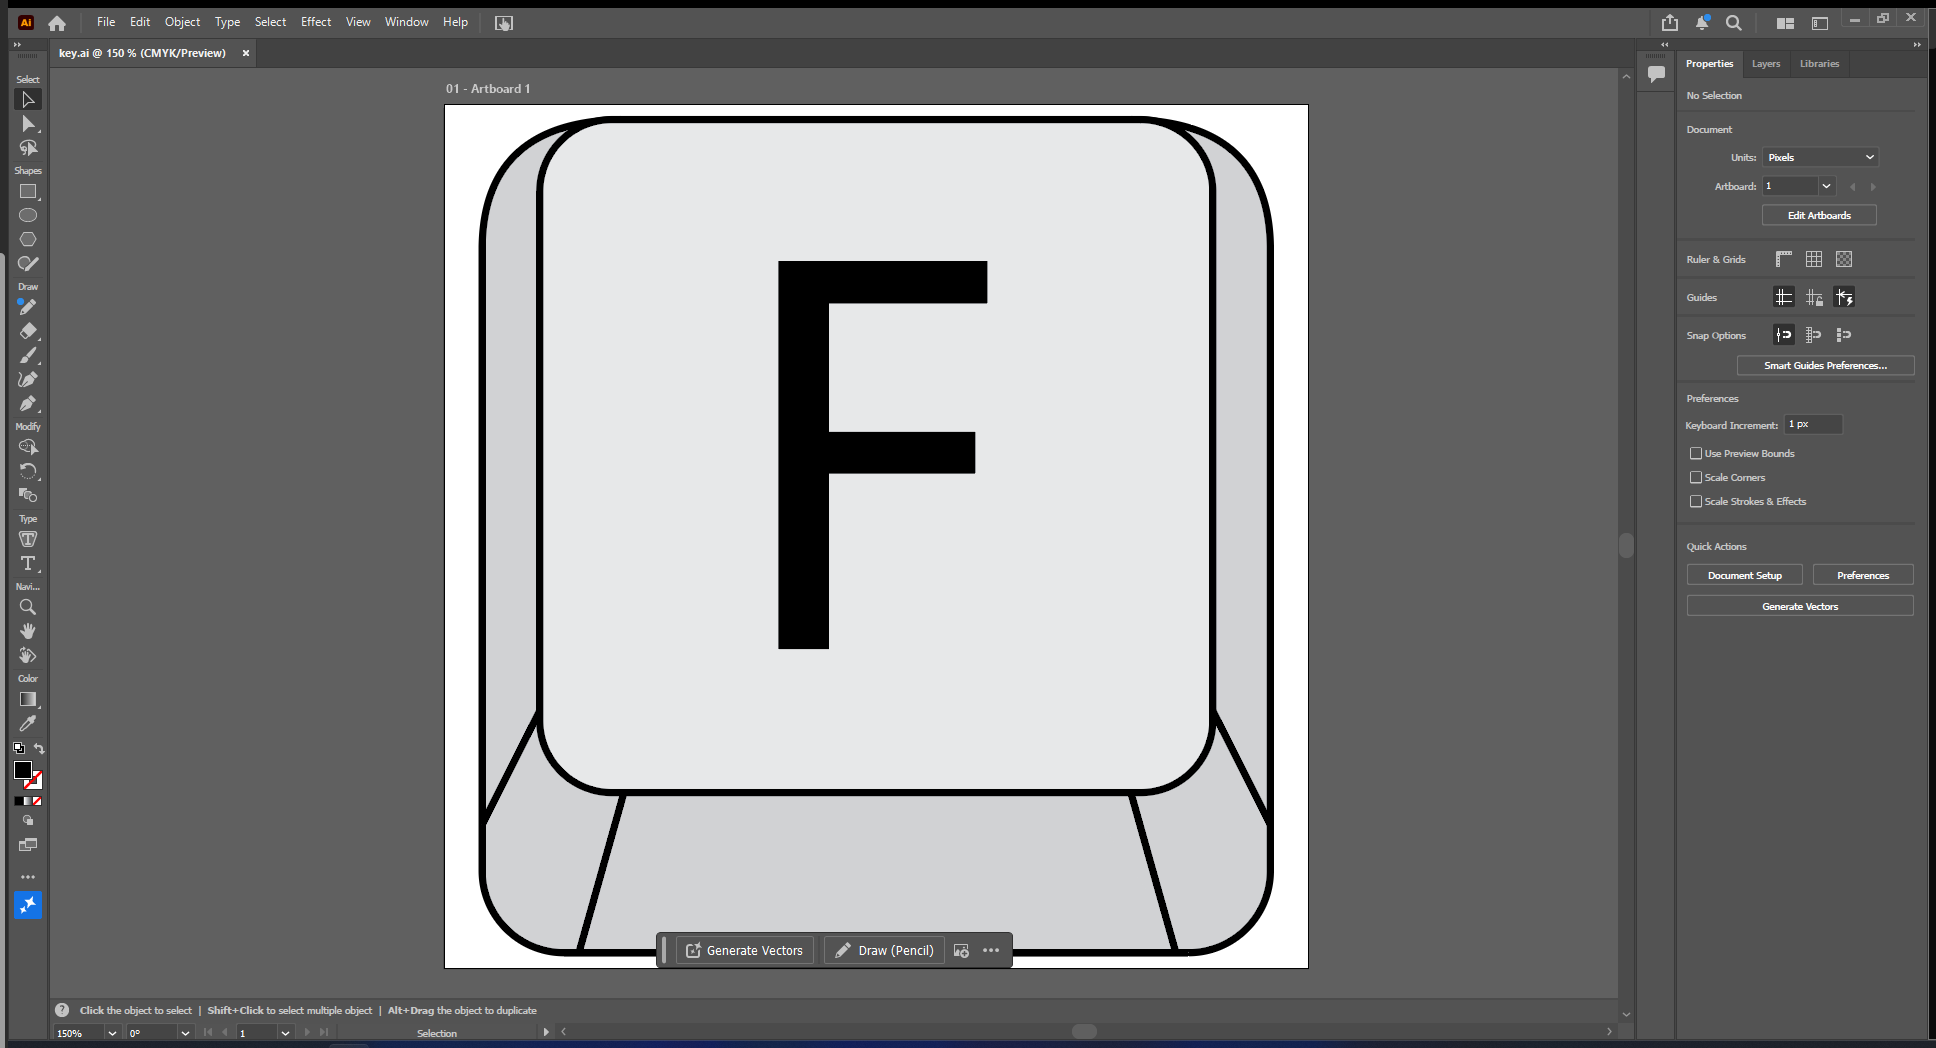
- Key Prompt graphic
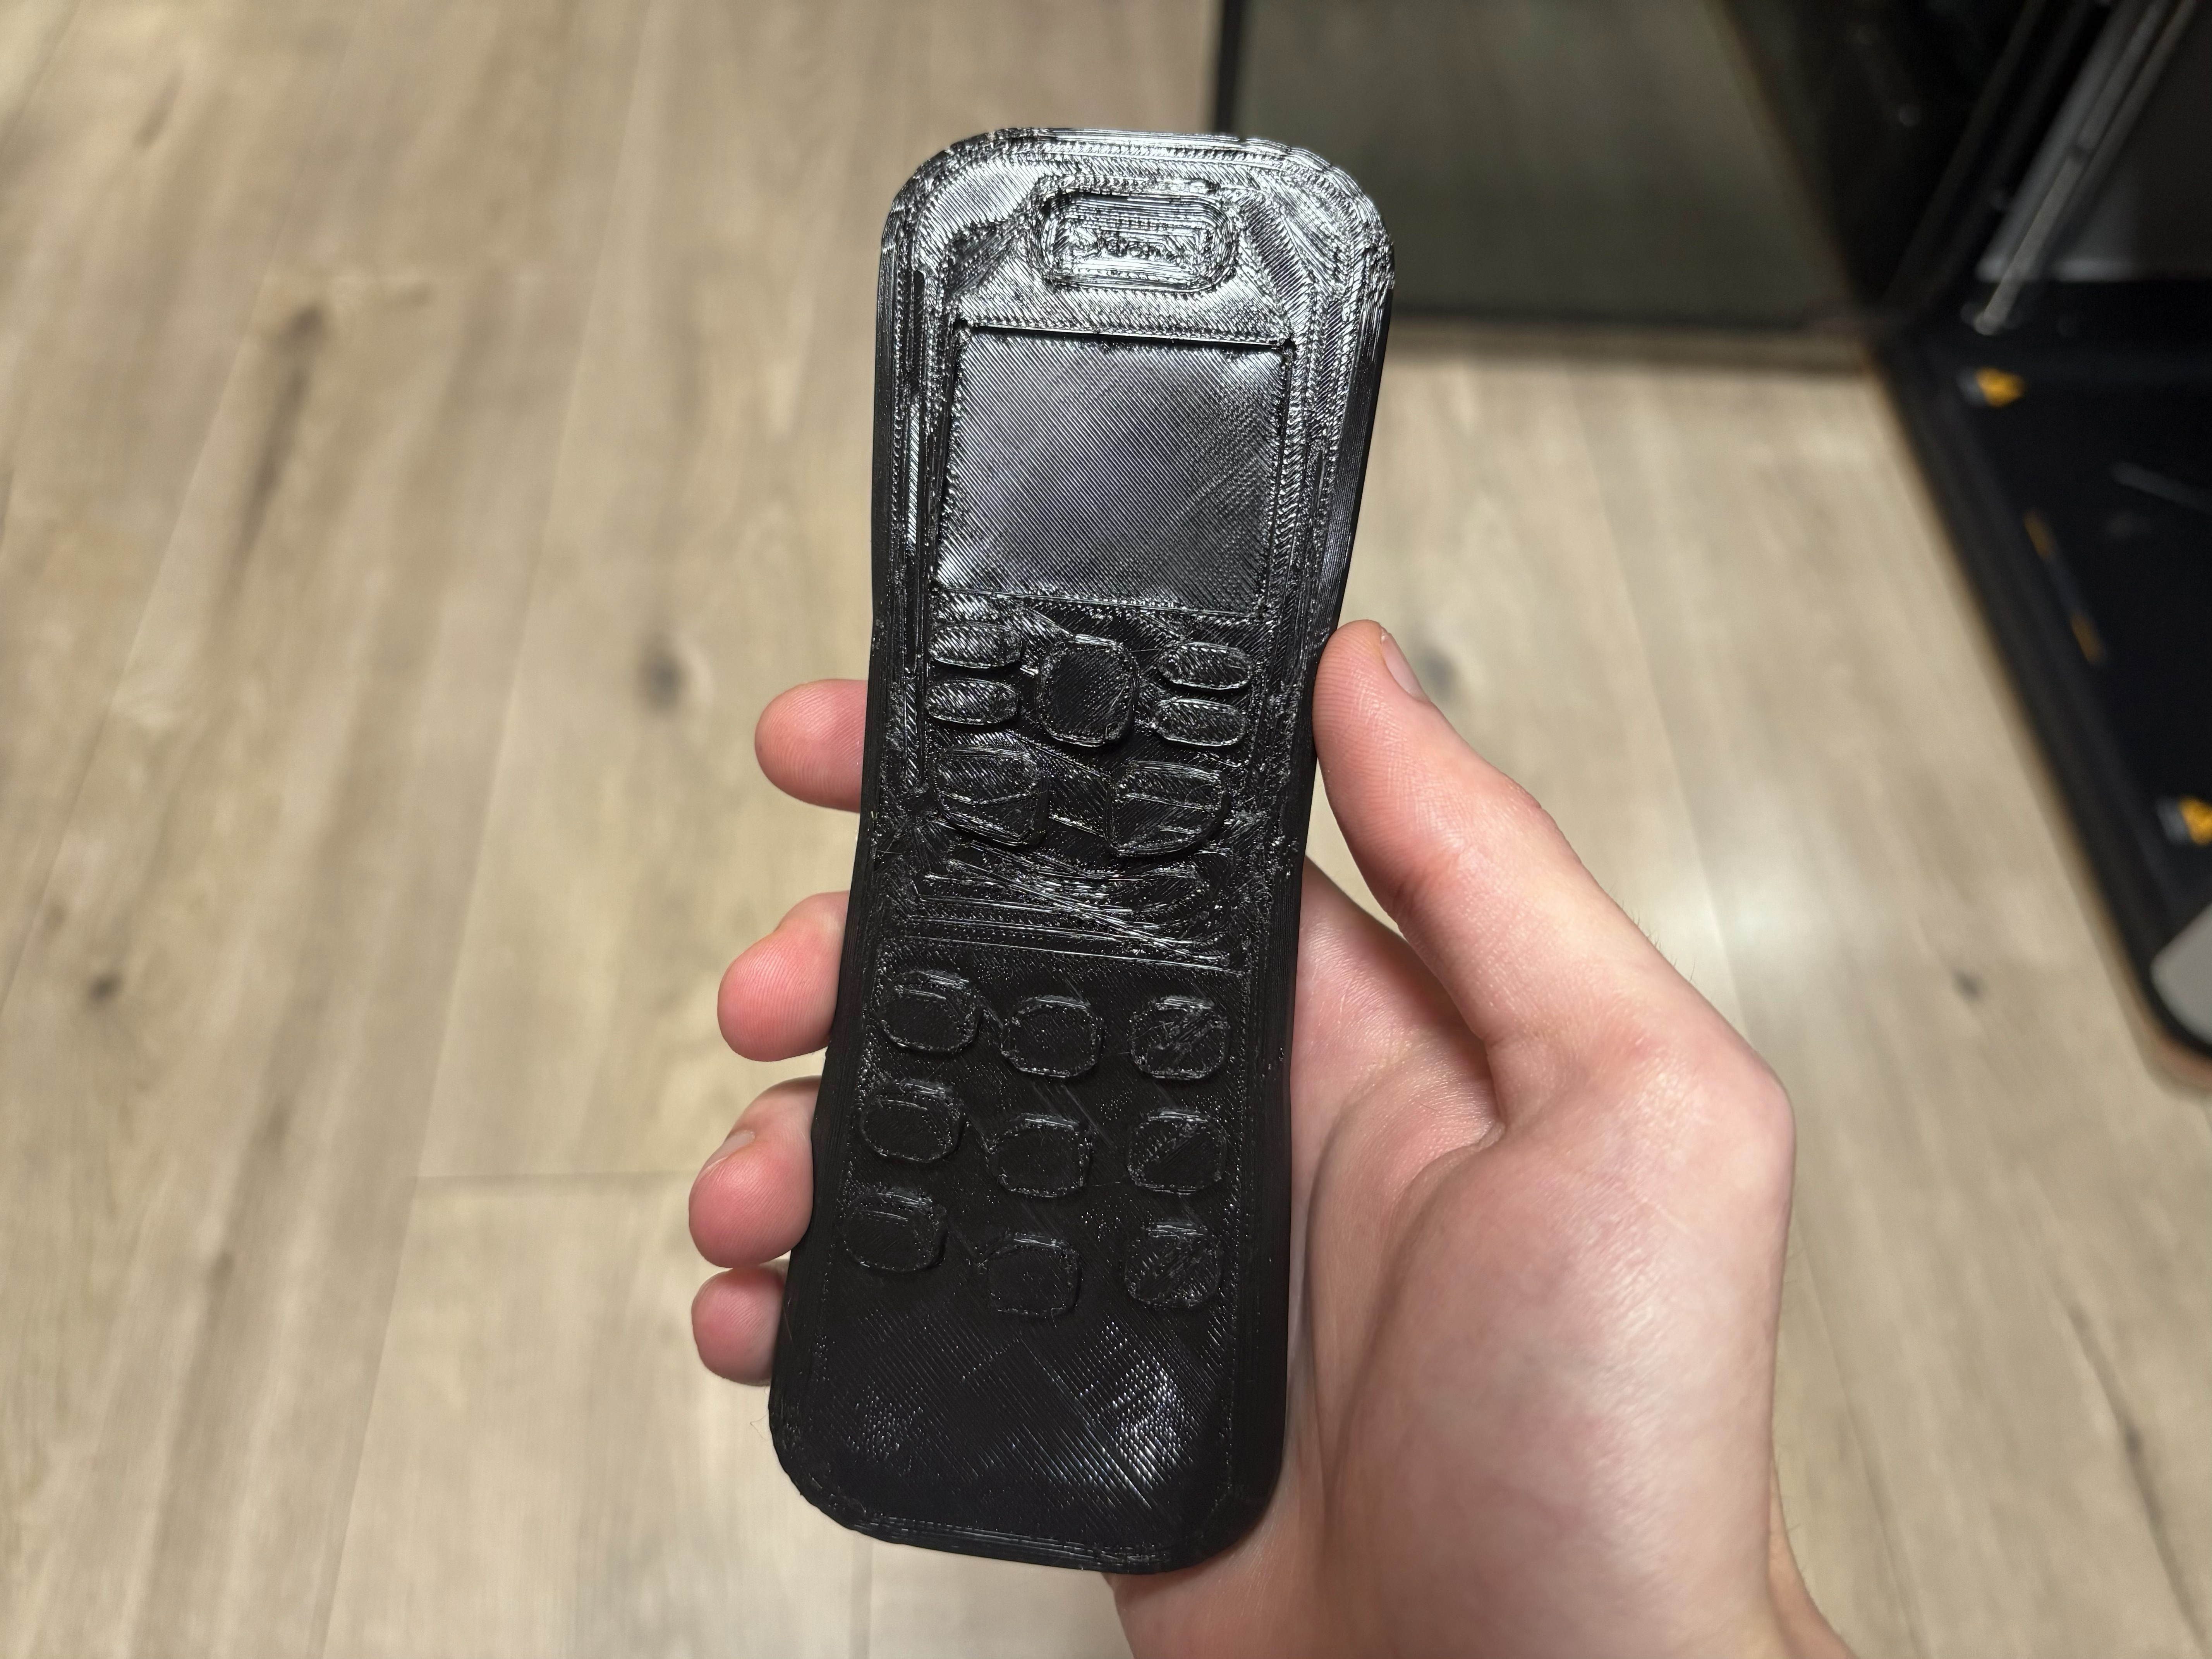
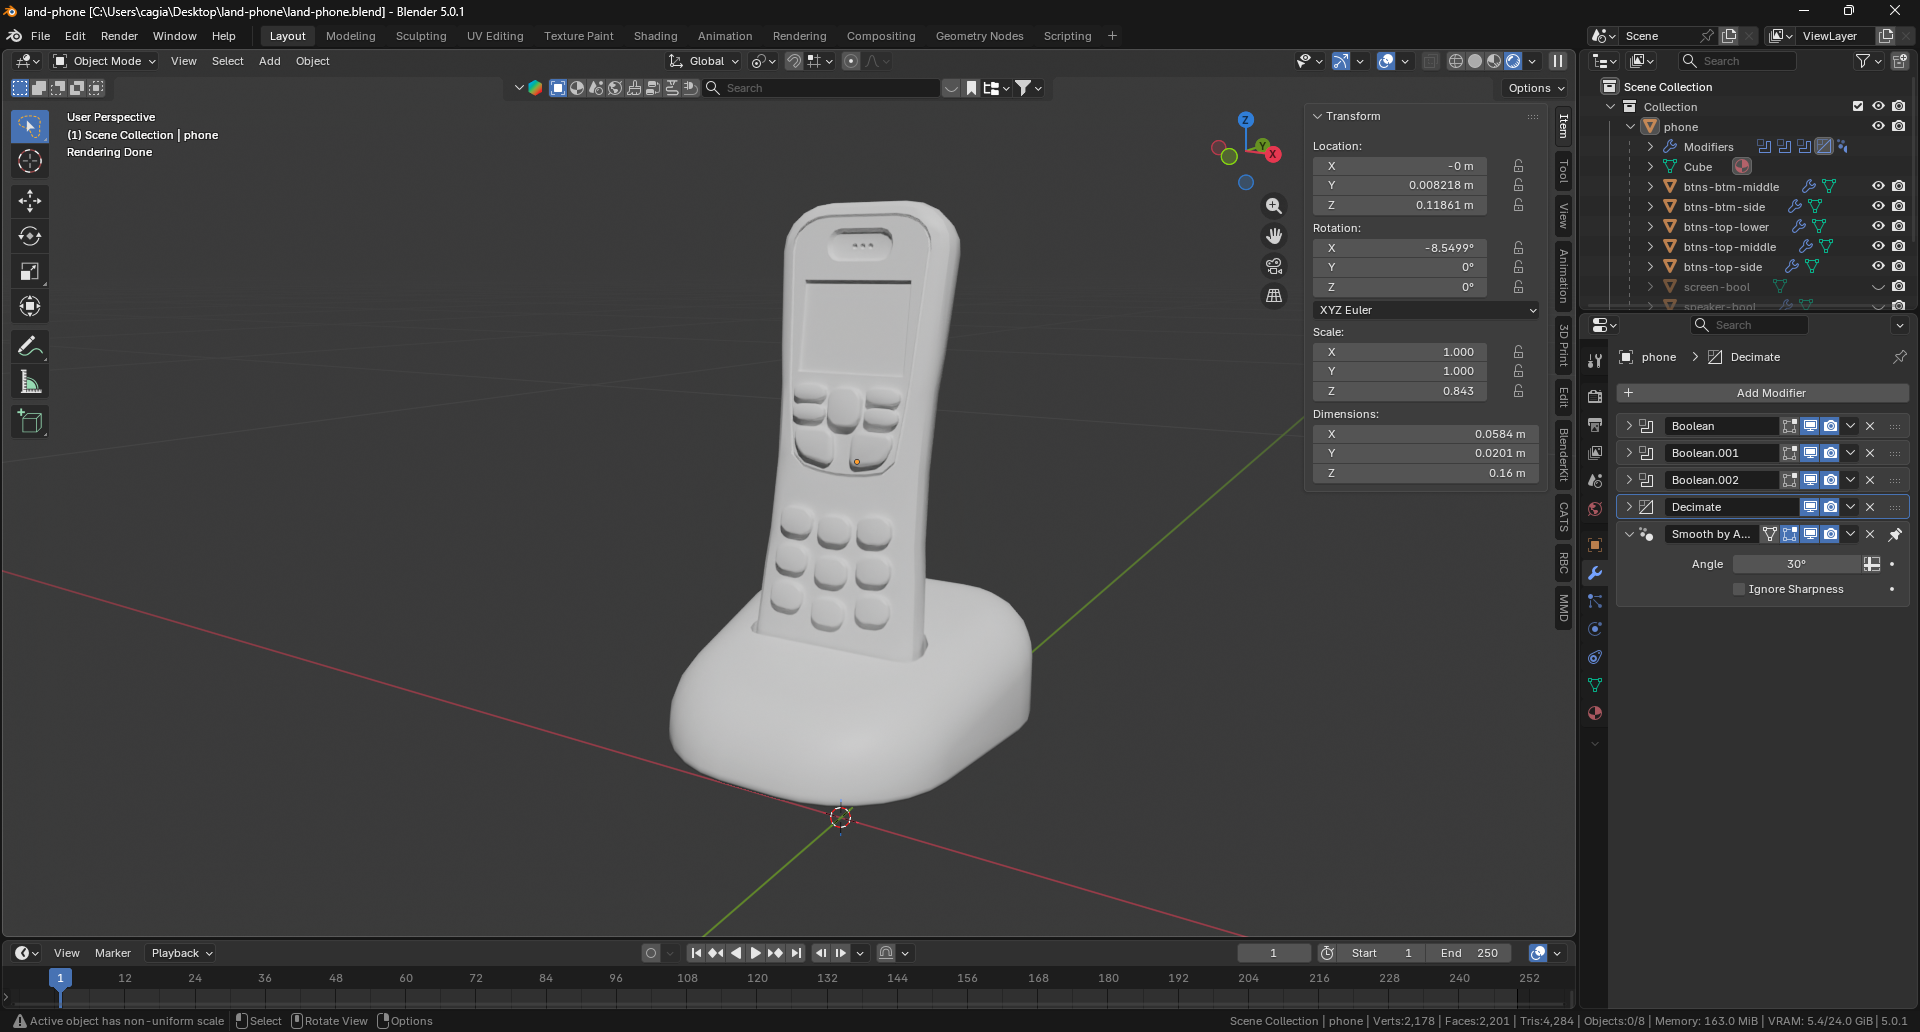
- Land Phone model
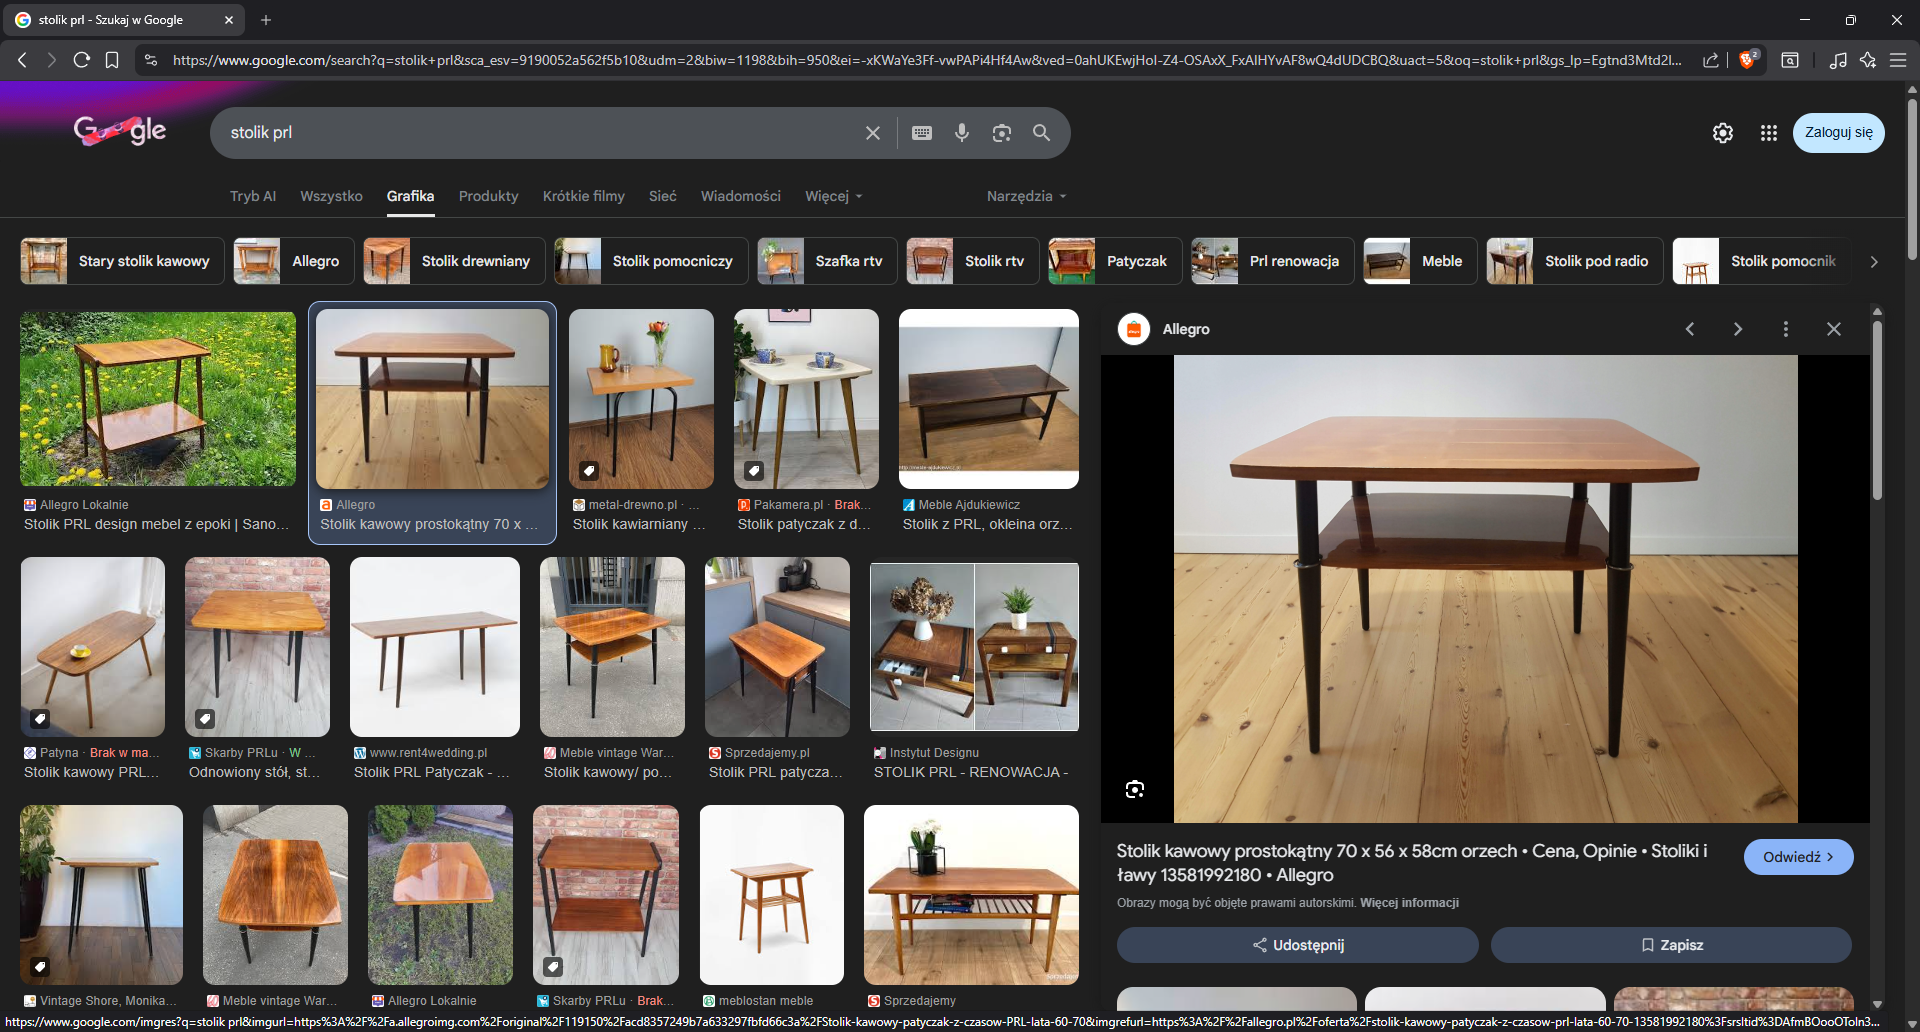
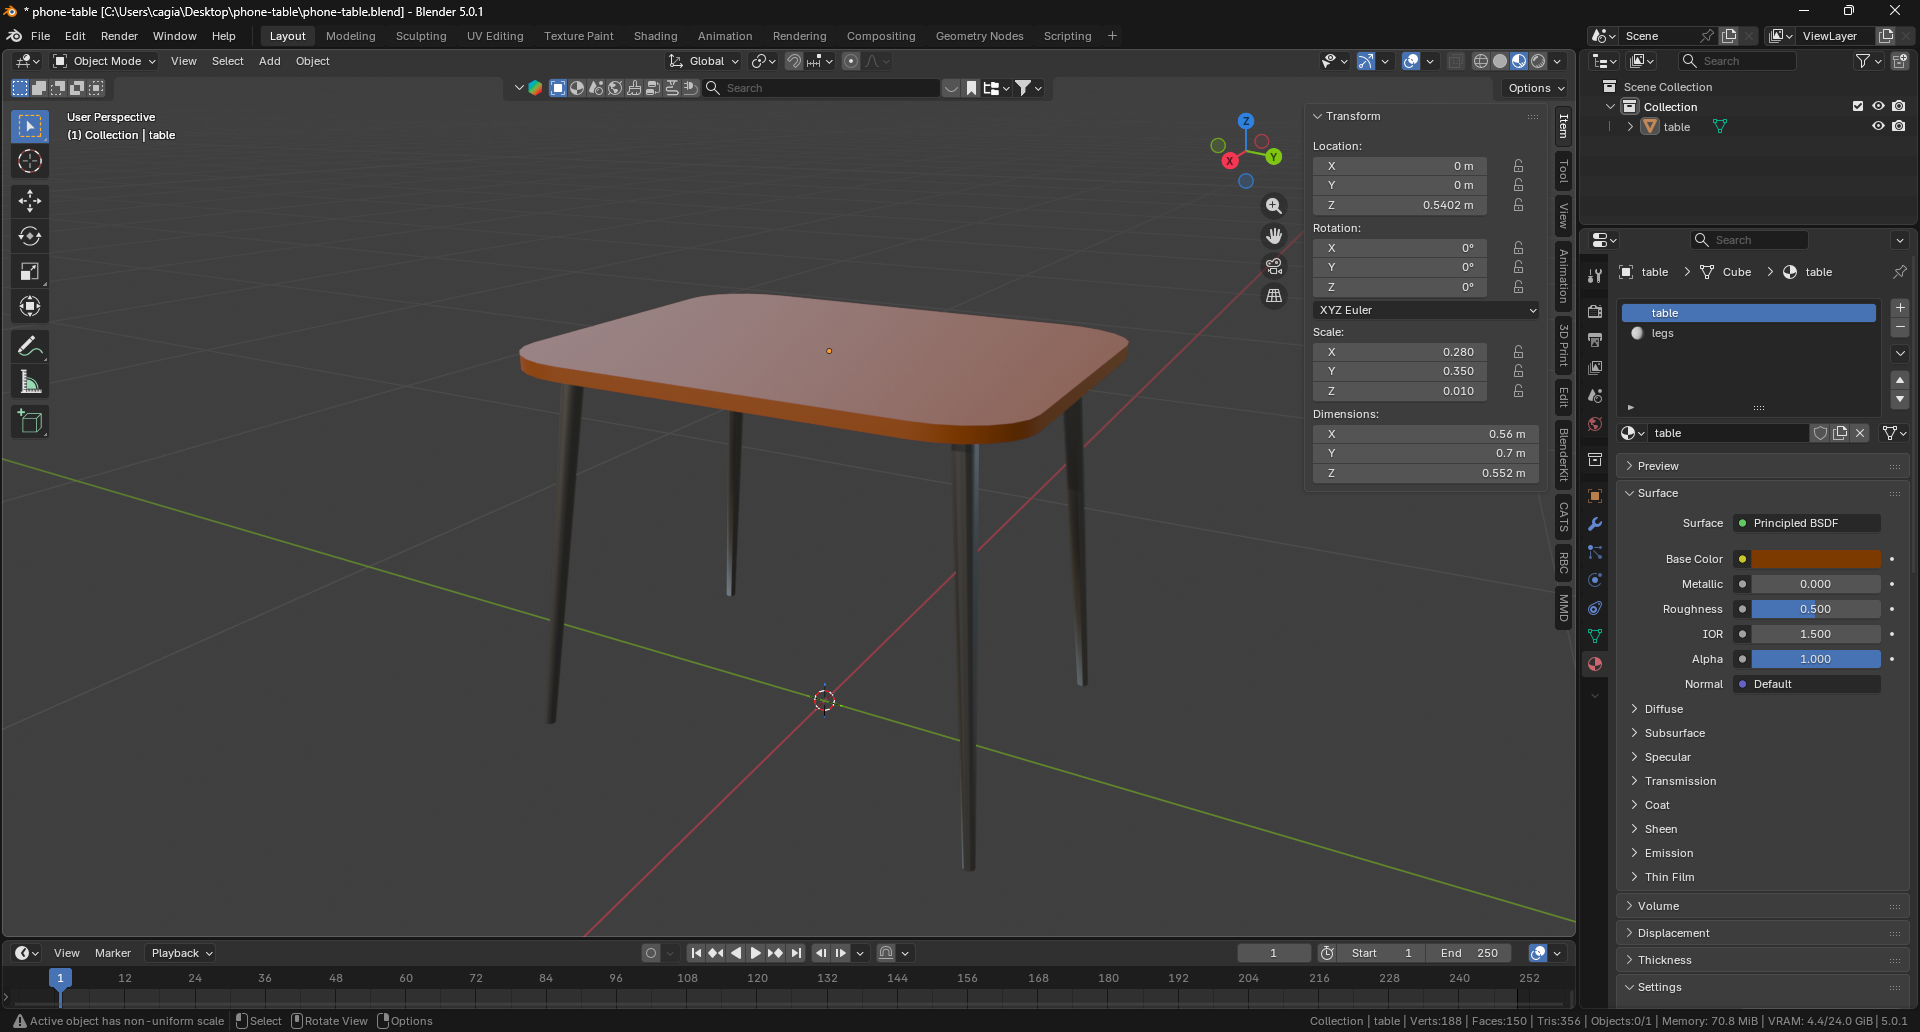
- Phone Table model
I quickly did the prompt graphic:
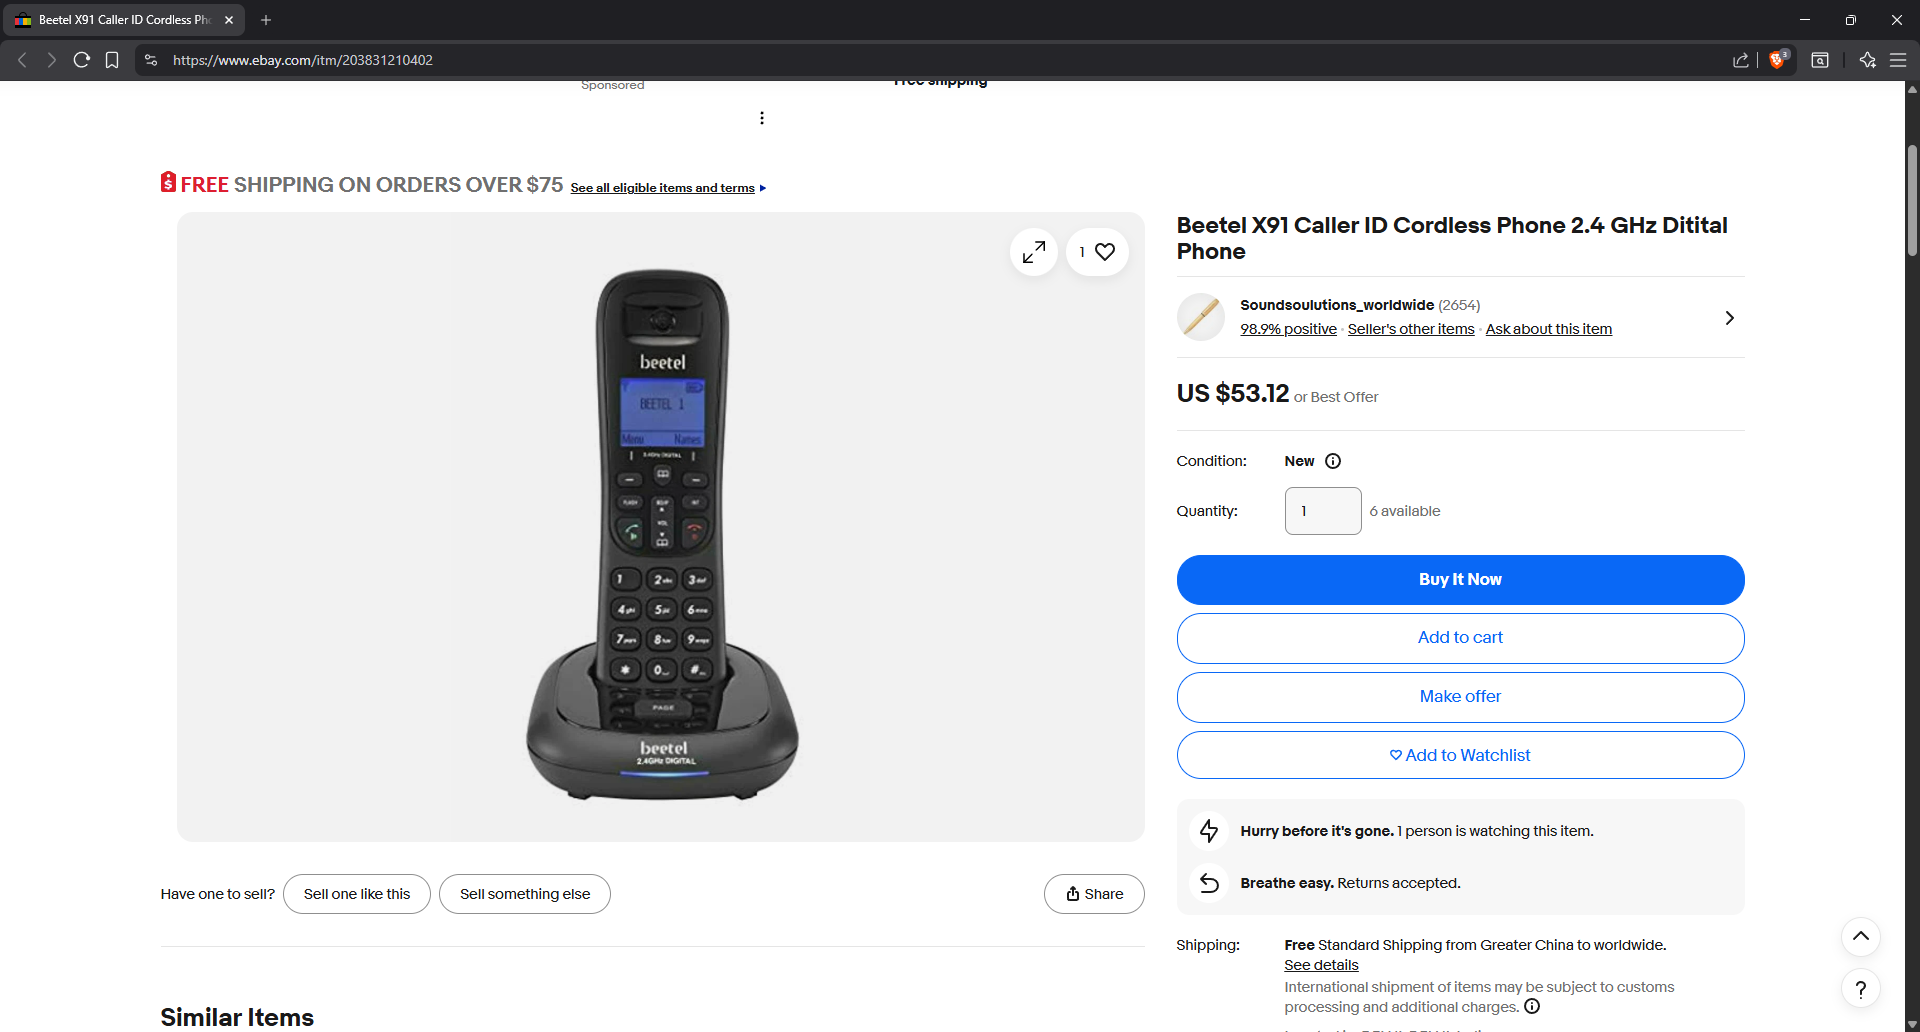
After that I moved on to gathering some inspiration for the phone model, I really wanted something old-school but still ‘fresh’ enough. I also had a particular cutscene in mind after finishing the puzzle therefore the form factor also mattered for me, in the end I chose this as the main inspiration for the phone model:
I modeled it in Blender and optimized it a bit more via decimation and smooth by angle modifiers before exporting:
Then it was time for the table the phones will sit on. The overall aesthetic I have for the mom sequence (and therefore also her puzzle) is a typical post-soviet block elderly person’s home, that why I searched for furniture in that style for inspiration:
Then again, I modeled something similar in Blender , add some initial materials and optimized it a bit before export:
Adding Submodules to the Mono-repo
Because Blender is a direct modeling tool, unlike for example Fusion 360 (which is parametric) it doesn’t have a changes timeline. This means that rolling back mistakes and such is quite restrictive as you can pretty much only rely on the old Ctrl + Z combo (which admittedly isn’t ideal).
Therefore I went with a quite peculiar approach of using git repos to hastily keep track of everything (later on this proved a bit problematic because of the non-linearity of it all but still, was quite useful).
With that out of the way, what I wanted to achieve in the end is having these inside the mono-repo that is hosting the whole game (we’re also using git for that task). Clearly the proper approach of going about this was using git’s submodules (so that’s what I did).
Embarrassingly it didn’t work out at first as I run in to some goofy issues. This was mostly caused by me wanting to use local repos (meaning they’re just a local directory and don’t have an external host and therefore also no URL). You can add a local repo but you need to be very careful with the paths.
First issue I run in to was running the command on the root of the game’s repo (I figured
it should point to where the master repo’s .git dir is sitting - that was not the case
and resulted in adding the sub-repo in the root).
Second issue was running the command and using an absolute path pointing to the sub-repo
which was sitting on my Desktop (C:\Users\<USER>\Desktop\land-phone\.git) this made
it so when I tried to commit changes to the sub-repo it later on it would throw out some
error about the external repository.
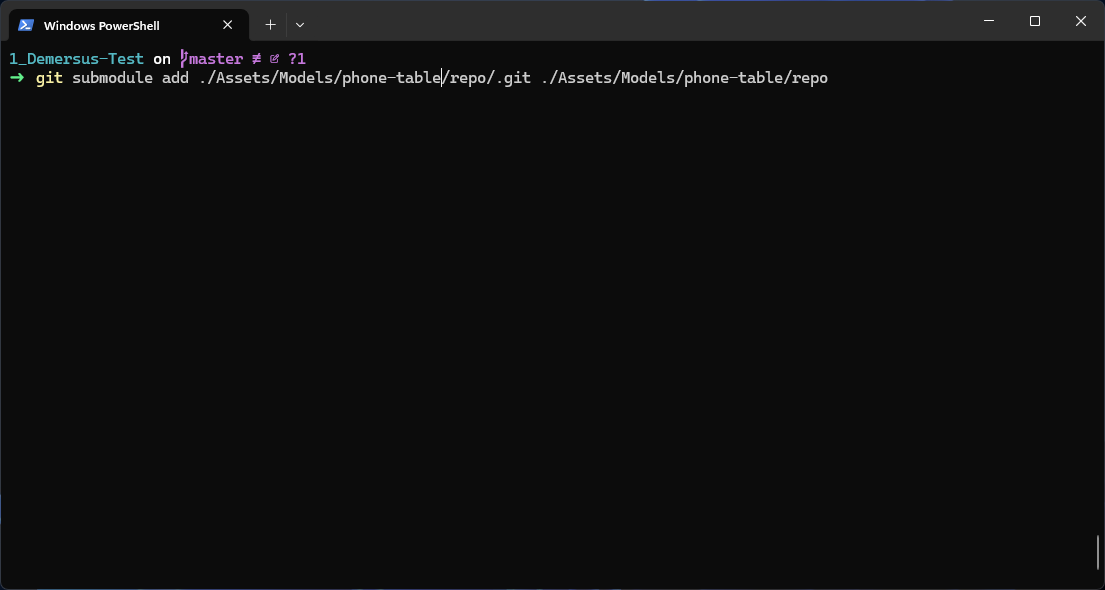
Finally I did it correctly by:
- Placing the directory with the sub-repo in the desired path in the master repo.
- Running this command at the root of the master repo (using a relative path and repeating it with a slight change):
Creating a Billboard Key Prompt
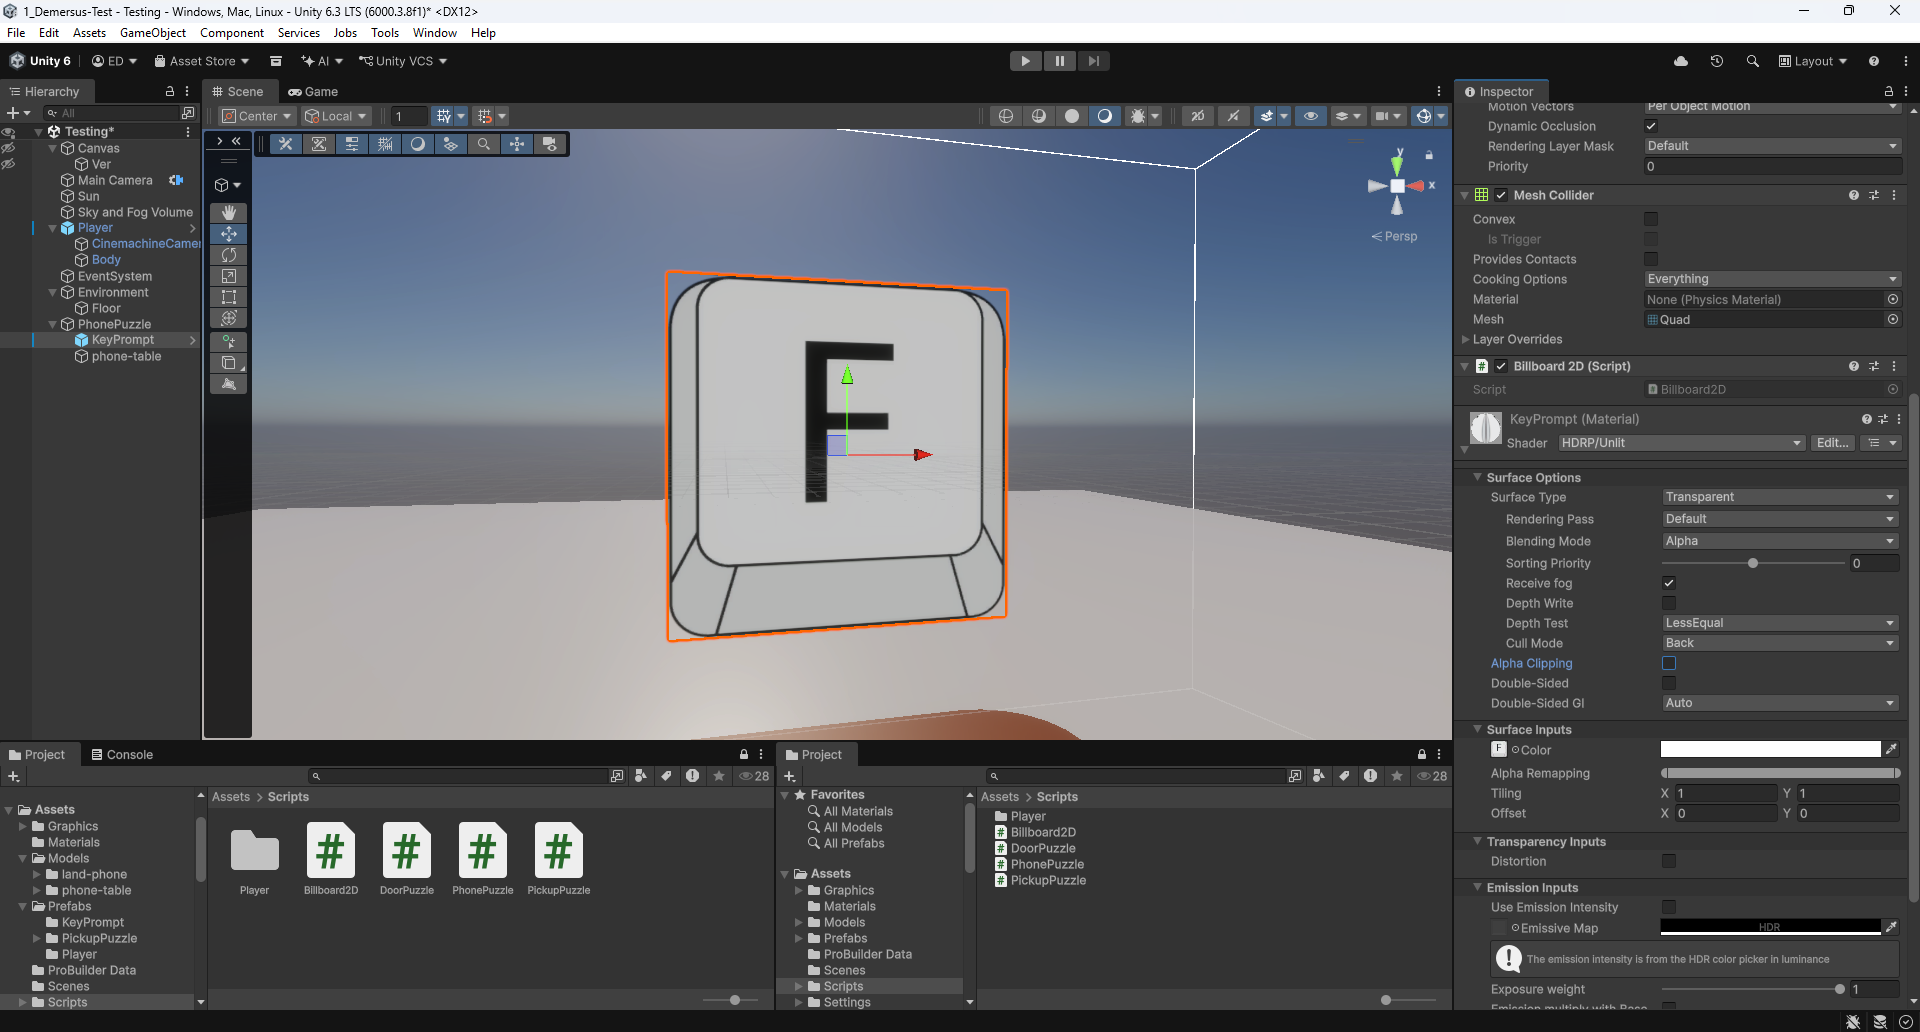
I started out by importing the Key Prompt graphic in to Unity and then placed a Quad in to the scene, I made sure it doesn’t cast shadows and create an HDRP Unlit material so it’s unaffected by lighting and such.
The next thing I tackled was making it display like a Doom enemy using the ‘billboard’
method. I initially got deceived by the built in
Billboard Renderer
which is part of optimization tools and not meant for this use case.
So I did my own implementation of a 2D billboard by using transform.LookAt():
However that wasn’t all, later on I wanted to
lerp
it’s opacity using alpha, but wasn’t able to do so cleanly because I checked
Alpha Clipping
when first trying to set up it’s transparency.
This caused issues where the transition would only work to about half of the alpha value and it looked very jerky / unpleasant. Turns out this behaviour is 100% to be expected as according to Unity’s docs:
a Threshold of 0.1 means that HDRP doesn’t render alpha values below 0.1
I figured the default value was 0.5 and that was causing the alpha cut-off at around half.
Basically I picked the wrong option / approach, in this case. Alpha Clipping is apparently
more well suited for things such as leaves, fences, hair and vegetation in general as it
renders like opaque geometry.
In order for my Key Prompt to display and animate properly I just need to do set these parameters on the material like so:
Surface TypetoTransparentAlpha Clippingto OFF
Implementing Player Detection
Right from the start I had the idea of making it so when the user interacts with a puzzle, the camera does smooth transition to the right position for viewing and interacting with the puzzle. One important thing in order to be able to do that is proper player detection consisting of the player’s position and gaze.
This is done to ensure no possibility of weird situations such as the camera going through the player, being able to see the player’s body while doing the puzzle other such things.
So the first thing I tackled was checking the player’s position, which was pretty simple and done using a box collider, here I used it to show and hide the Key Prompt:
Then I moved on to the more complex part, being gaze detection which I implemented using dot product (<- this is an awesome creator btw):
After that was working together nicely I finally tackled the camera lerp which at first was
quite challenging as initially I tried rigging something DIY together, but as always turns
out there is a better way to go about doing that and Cinemachine has a feature for this
specific need so you just setup a new Cinemahine camera and transition to it extremely
easily, by simply changing the camera’s priority value (puzzleCam.Priority = 20;):
Here are both the Scene and Game views showing everything working together:
Out of curiosity I also did a little experiment with occlusion culling :
Randomizing the Phones
I wasn’t really sure how to approach this issue, one thing that I cared about was making the solutions random enough, I didn’t want it them to be too linear (like straight paths and such). I experimented a little with using Chebyshev’s distance at first but later on settled on Manhattan distance as I felt it was giving me more consistent / better results as it works slightly differently.
Basically if you think about these approaches using Chess and a King for example Chebyshev
blocks out the whole surrounding square, while Manhattan only blocks the four cardinal
directions at distance 1, meaning to block diagonals too you only need distance 2,
and that zone is more manageable than Chebyshev’s distance 2 (which would be a huge
5x5 square of exclusion). In short this basically means that Manhattan’s approach
works a bit better with smaller grids like the one we have here:
Chebyshev   Manhattan

 X X X       * X *
 X P X       X P X
 X X X       * X *
This is obviously not perfect but is good enough, we’ll see if I’ll revisit this later on.
Drawing a Debug Display
Something I really wanted to step up with this project is my approach to debugging and debug displays specifically, which is evident by me trying out different Unity ImGui wrappers for this exact purpose in the previous devlog .
In this case I wanted to create a more advanced (3D) debug display for showing the chosen combination of phones that is the solution for the puzzle. This was useful for debugging the randomiser as well as testing the puzzle overall.
Funnily enough the biggest issue I was running in to was the numbers or labels signifying the order of the phones, next to their wireframes were being occluded somehow, by something.
It took me a while to figure it out as initially I though the issue was coming from the Camera / Cinemachine side, but after messing around with the clipping planes and frustrum settings I came to the conclusion that, this wasn’t the case.
In the end it turned to be a coding issue as Handles.Label and Gizmos.DrawWireCube are
designed for the Scene View so they use their own internal camera for culling,
positioning and such, which doesn’t match the Game View camera. This means that
when I was using the Game View (with gizmos turned on), the settings of the ‘internal’
camera didn’t allow for showing the labels so near as they fell outside of it’s frustrum
or some setting simply didn’t allow for displaying them in this case.
The fix was using Camera.current (the actual camera rendering the scene in game) and doing
projection myself with
WorldToScreenPoint
.
This (besides fixing the issue) had an additional effect where you don’t need to have gizmos
turned on to see the phone order debug overlay.
This is how that turned out:
Creating the Phone Puzzle’s Sounds
When creating the audio identity of the phone puzzle I really wanted to stay in this old-school phone ‘realm’, that’s why I went with ancient but still skeuomorphed in to today’s smartphone UIs DTMF (Dual-Tone Multi-Frequency) sounds we all are familiar with.
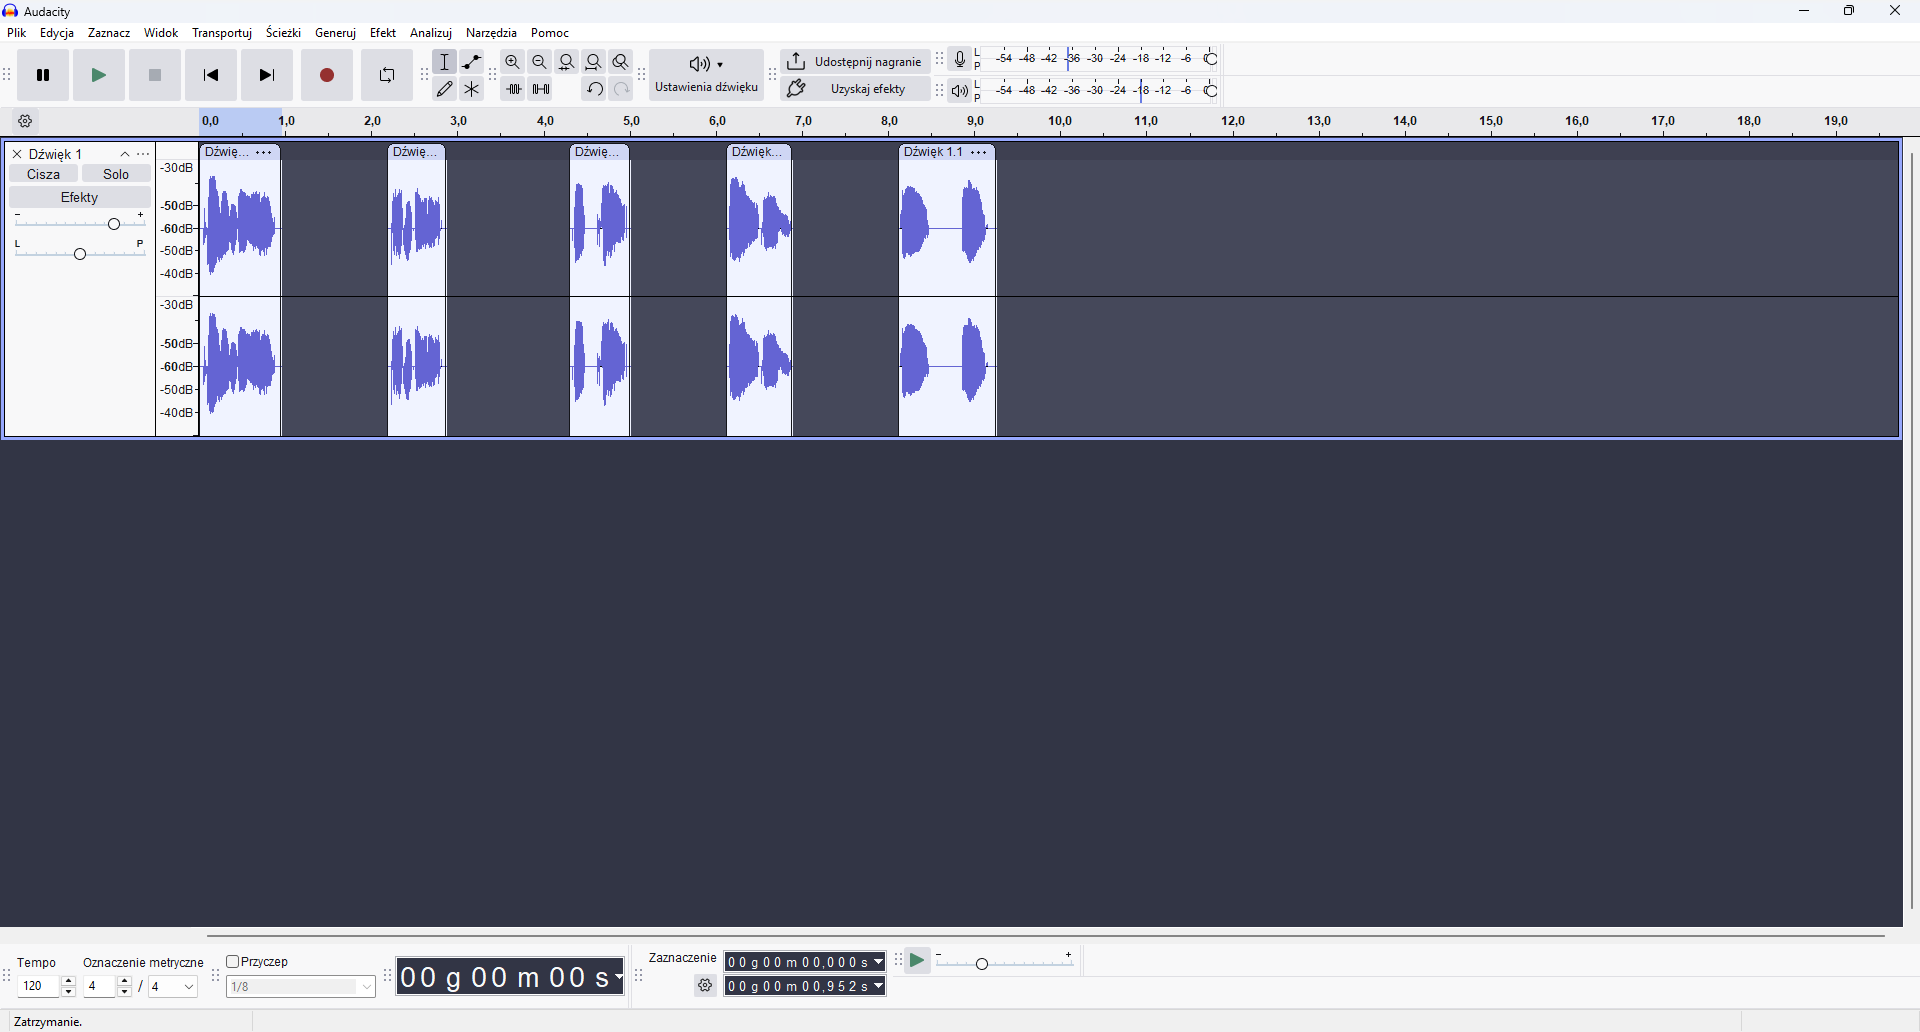
So I looked in to what tones are used to make each sound, recorded and processed them in Audacity and finally I decided to map them to the phones the same way a number pad is mapped!
Something cool I’ve learned while doing this is adding labels to each clip and easily exporting them with one action :
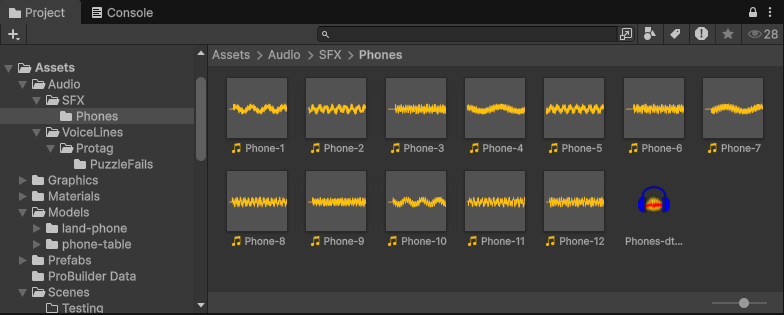
As a final touch I also recorded a few generalized ‘failed’ voice lines from the protagonist (of course they’ll all be replaced later on by proper voice acting). These get randomly selected and played upon failing the puzzle to give the player a more clear piece of information than just the puzzle’s ‘reaction’.
The Struggle of Implementing Outlines
Foolishly when I initially though of implementing an on hover feedback for the user in the shape of an outline I thought “this can’t be too hard to do… I mean it’s just an outline, I bet you can do that with a simple shader, right?” (subtle foreshadowing). Turns out, it was actually surprisingly difficult.
At first I tried to figure something out with the aforementioned shader approach (which yielded no results).
Then I moved on to searching for a package that takes care of that for me after consulting with reddit. I tried using ‘Quick Outline’ by Chris Nolet on the Unity AssetStore and while I’m sure it’s great, it just doesn’t seem to work in the HDRP pipeline .
After that I again tried with something DIY, at first by myself and then via some YouTube tutorials which (yet again) yielded absolutely nothing.
I figured the HDRP pipeline must be causing the issue so I googled around some more and found someone recommending a certain GitHub repo that’s meant to work with the HDRP:
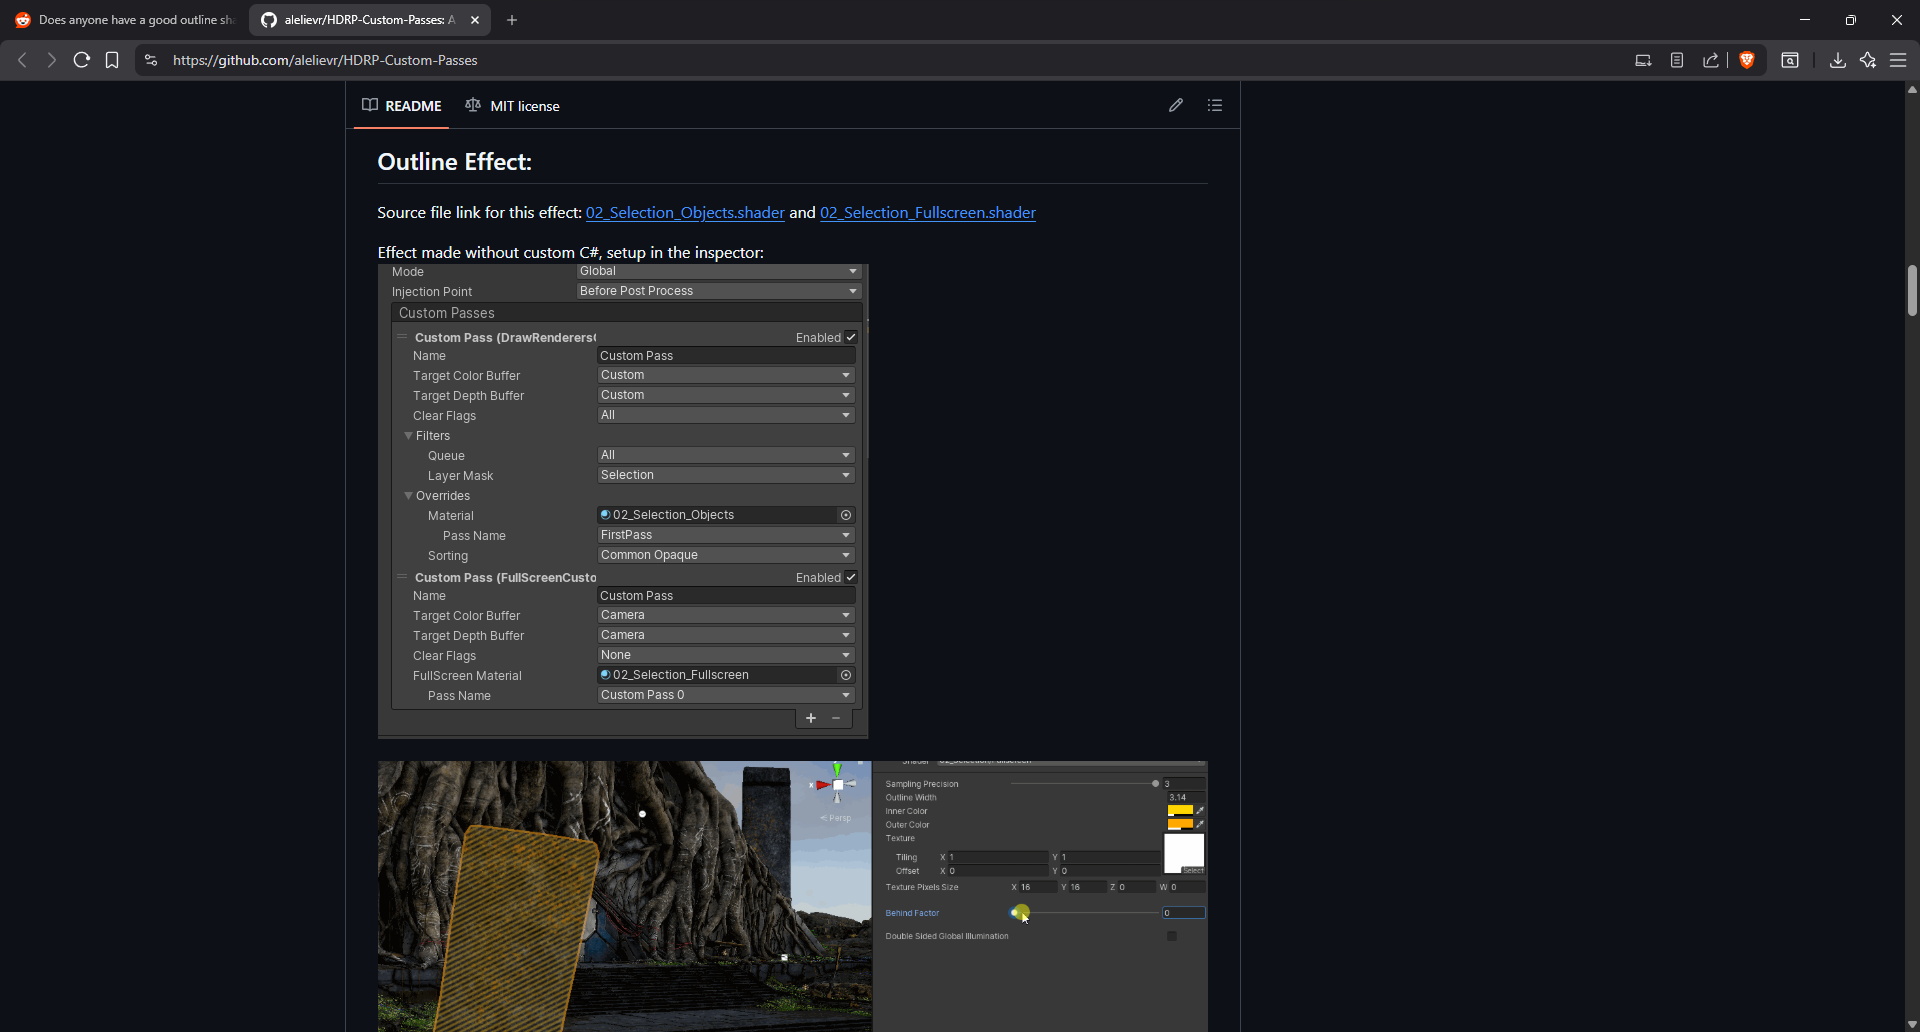
I had a look through the README and pretty much found what I was looking for (but I wasn’t out of the woods just yet).
As this is my first time doing a 3D game in Unity (also in HDRP), in some cases I run in to these issues which solutions to seem obvious in hindsight but really aren’t while you’re trying to figure them out. That’s why it took me a little bit to figure out how to actually implement the pre-written outline solution.
In the end I managed to do it (using the Shaders, some Materials and a Custom pass Volume) and even implemented a little coroutine which allows for a slight with transition upon the mouse entering and leaving each phone making the animation less sudden / jarring.
One issue I’ve run in to and couldn’t really figure out a proper fix to was that when the phone’s colliders were too close to each other (this mostly came up with ones that were above / below each other), with fast movement you were able to have two phones outlined at the same time. I did a temporary fix by simply moving them a bit more further apart.
In the end, all that resulted in this:
The Proper Way of Using Model Prefabs
Long story short - DON'T UNPACK THEM.I’m aware that this might seem quite obvious but (yet again), I’m not a seasoned developer
if you haven’t guessed already. Basically what I did is I unpacked the Model Prefabs of
the phones after placing them on the PuzzlePhone prefab, which made it so after updating
the FBX to add a separate screen material, none of them loaded correctly so they appeared
broken:
After that I learned that the proper way of working with Model Prefabs, basically what you need to do is this:
- Import your model (for example an FBX file) in to Unity.
- Drag it in to the scene hierarchy.
- Drag it in to your project panel (preferably some directory for your prefabs).
- You created a Prefab Variant which for our use case works just like a normal prefab.
Now you can make changes to that Prefab (Variant) like scripts, children etc. and when you re-import the model after changing it, those changes also be reflected in the prefab you created based on the initial Model Prefab!
Here is a useful Unity doc for more info on the matter.
Fixing Auto Exposure Issues
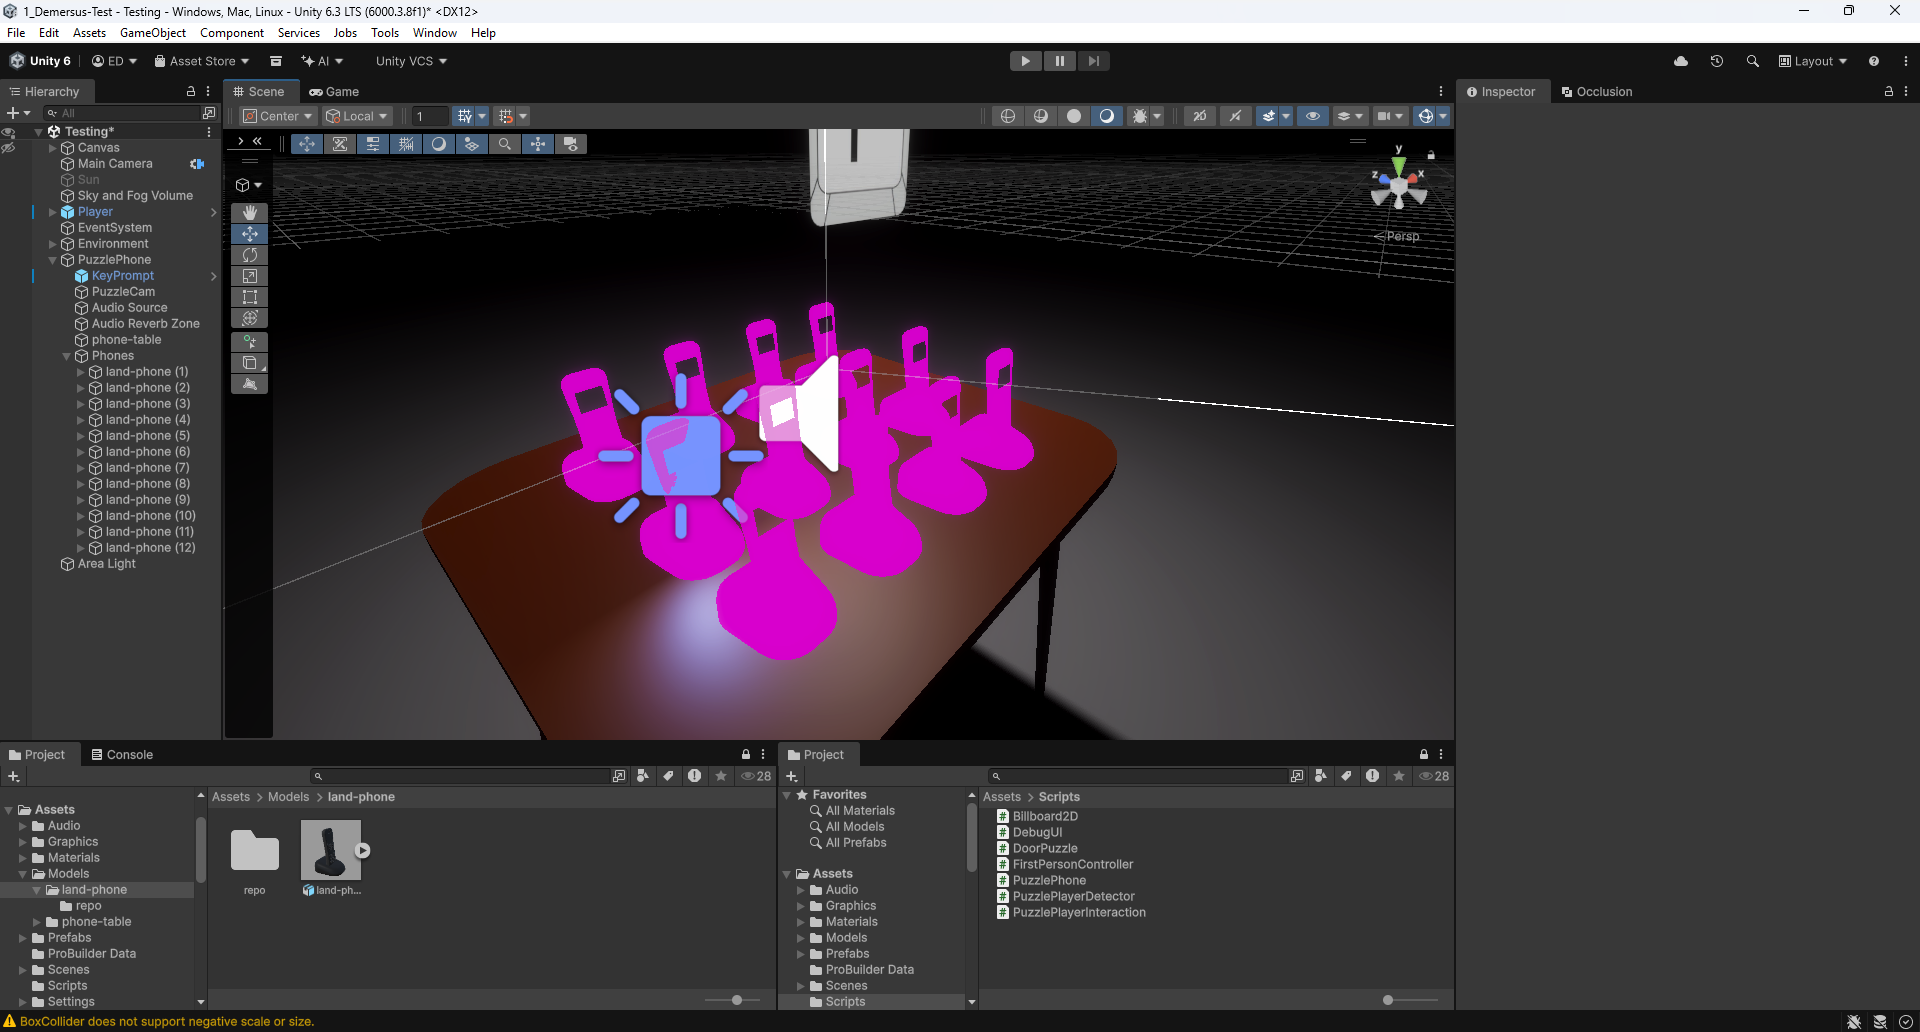
After rigging up all of the phones with lights to sell the screen effect better, I’ve noticed a weird visual bug, where the camera would dim when all of the lights where on during a fail or success condition withing the puzzle.
I searched around for what could be the cause of the issue, initially thinking it had something to do with the Camera or Cinemachine. After a bit of googling around I found out it was most likely caused by Auto Exposure :
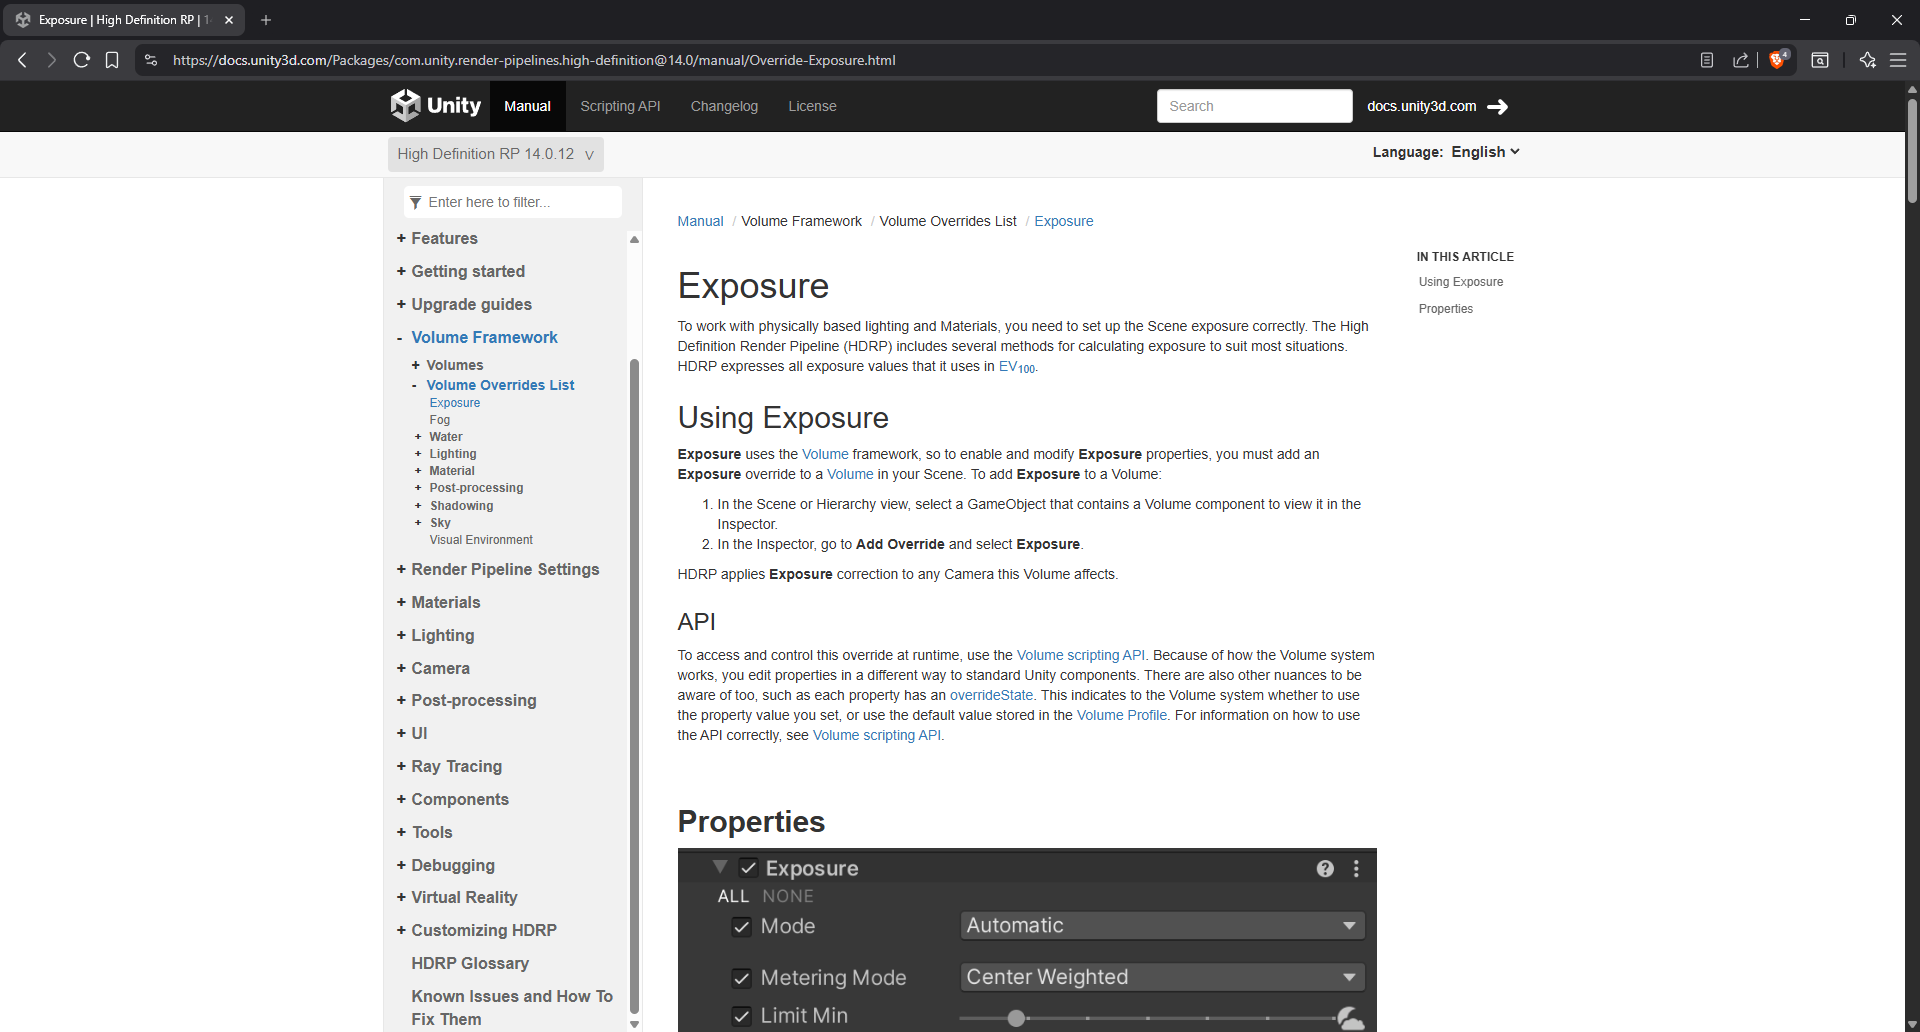
After skimming through the doc page I’ve tried setting up the minimal setup in order to turn off or at least reduced, however that didn’t work out. In hindsight I should’ve noticed that something must’ve already been setup there in order to actually cause it to behave in this way.
In the end I managed to find what I was looking for, it was hiding in plain sight. Turns out
the Sky and Fog Volume which was there by default after the project was created holds a
Volume which is where you set parameters of things such as exposure among other things:
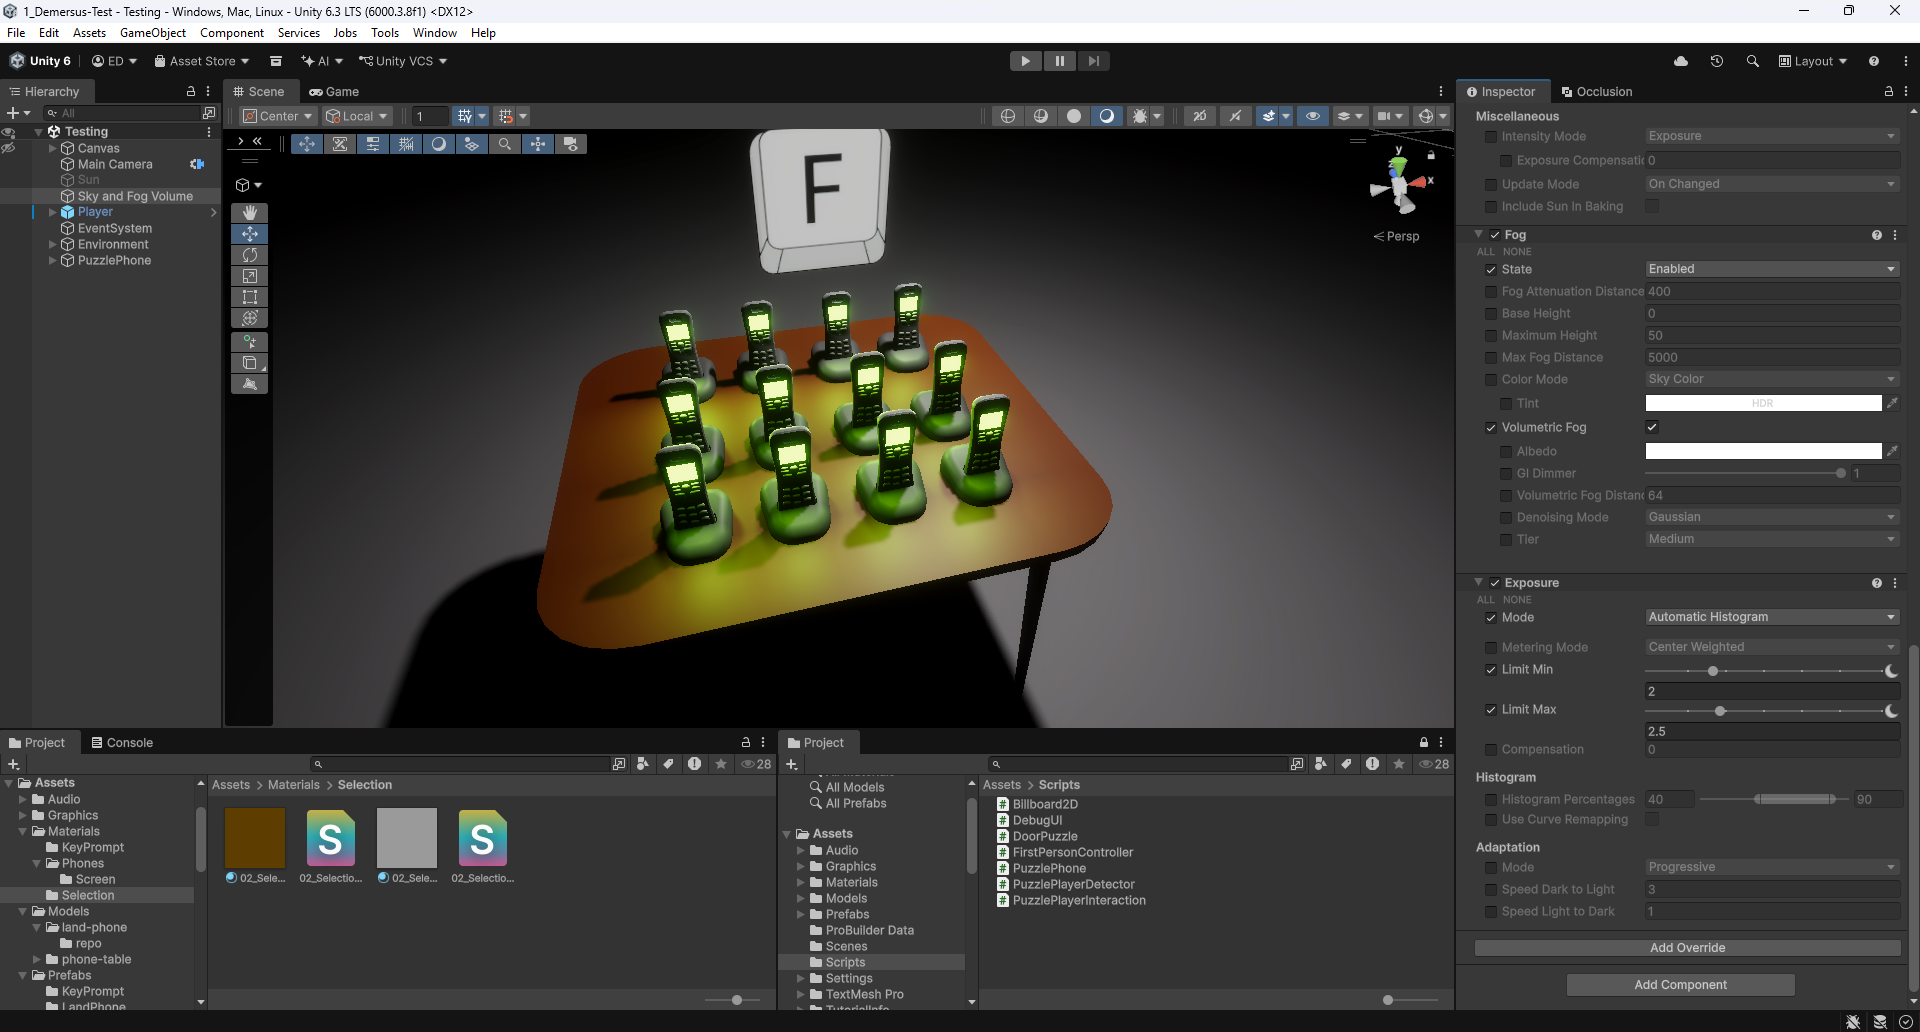
Surprisingly there is quite a lot of ways to go about configuring the Exposure. I reduced the
Limit Max setting from 15 to 2.5, which seemed quite unintuitive for me (at least at
first) as I naturally expected to be setting the Limit Min value instead. However, after
reading up on
Auto Exposure
in Unity’s docs it made way more sense. Basically with
all of the screens lighting up the average luminance value of the scene was rising, therefore
setting the Limit Max to a lower value meant it wasn’t able to go as high as before!
In the future I’ll most likely have to play around with those settings again when more environments with more lights get introduced to the game.
The ‘Final’ Result
Obviously not the final final result (if you know what I mean), but the final prototype turned out like so:
Things I Learned
- High poly geometry won’t be the biggest issue going forward, it’ll be shadows and most
importantly lights (or more likely I’m just doing something wrong and that’s why they’re
taking up so much performance - when all phones light up that is a
~70FPS decrease @.@). In fact, when I did a test by reducing the geometry of the phones by half or spawning in like64of them, I didn’t see any real performance difference. - The blocky ‘ugly’ shadows are not in fact caused by low triangle geometry but by the shadow quality setting on the Sun (at least in this default scene). Also, they’re are pretty expensive performance wise.
- Emissive materials don’t actually light up things around them, you need a light object to do that.
- Unity has a thing called Auto Exposure and it can cause unexpected lighting issues.
- There is a proper way of working with model-prefabs and it’s not unpacking them!
- You can have artifacts with debug overlays if you don’t set them up properly.
- Adding an outline effect in Unity is pretty hard (in HDRP even more so)
- You can easily export multiple files with a single click from Audacity.
- There is a proper way to go about material transparency / alpha.
- Adding local
submodulesto a git repo is a bit tricky at first.
What’s Next?
I have to admit we’re unfortunately a bit behind schedule. But that was honestly kind of to be expected, I mean this although ‘rough’ prototype still contains all of the core mechanics of the game, therefore it’s going to take a little bit of time. Sadly the level design is also a bit behind, but that’s not the bottleneck here. Up next I need to tackle the rest of the puzzles and an ‘inspect’ mechanic (for picking up and looking at lore objects like notes, pictures etc.), whereas my bud has to finish up the initial level design for the daughter, wife, mom and hub world.